Surface Preparation for Trim and Moldings in Interior House Painting
Welcome to the ultimate guide on Surface Preparation for Trim and Moldings in Interior House Painting. Are you a homeowner with a vision of transforming your living space? Do you want to achieve flawless, professional-looking results? Well, you’ve come to the right place.
In this comprehensive article, we’ll delve into the essential techniques, tips, and insider knowledge that will help you master the art of surface preparation for trim and moldings. Whether you’re a seasoned DIY enthusiast or embarking on your very first painting project, get ready to unlock the secrets to a stunning and long-lasting finish. So, let’s dive in and discover the transformative power of proper surface preparation!
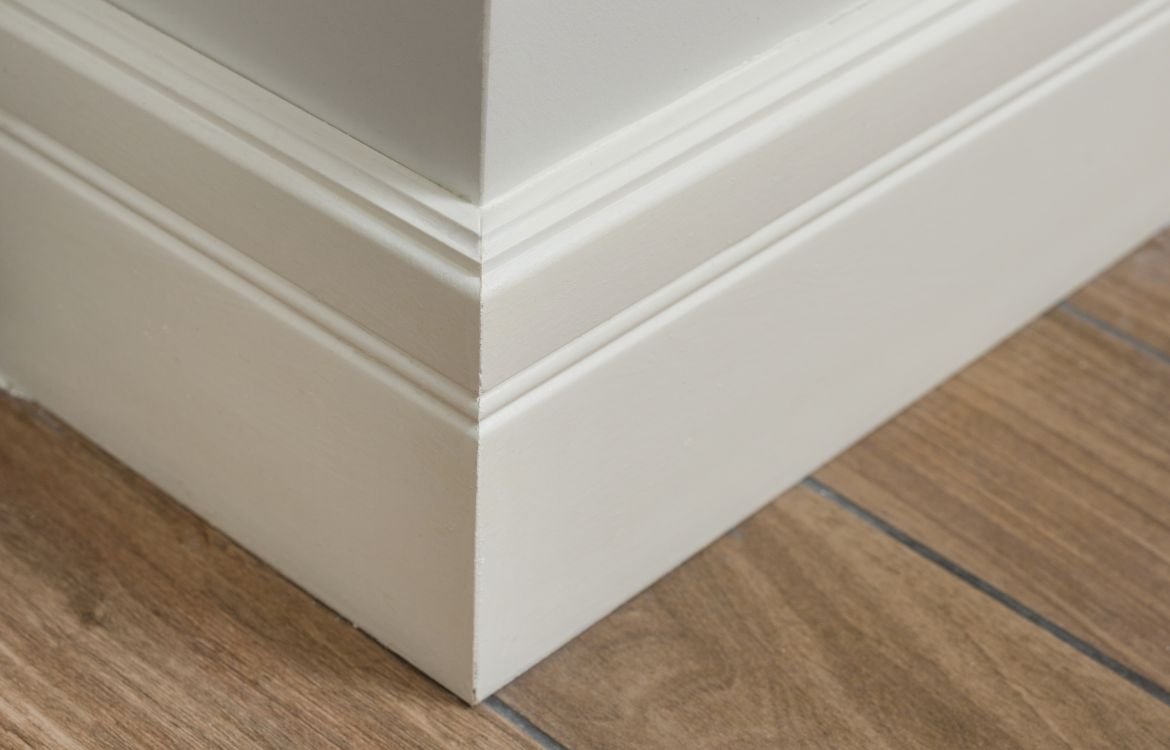
Understanding the Surface: Identifying the Type of Trim and Moldings
Before diving into the surface preparation process, it’s crucial to understand the type of trim and moldings you’ll be working with. Trim and moldings come in various materials, such as wood, MDF (Medium-Density Fiberboard), PVC (Polyvinyl Chloride), or even metal. Each material requires specific preparation techniques to ensure optimal paint adhesion and a smooth finish.
To identify the type of trim and moldings you have, closely examine their appearance, texture, and composition. Wood trim often has visible grain patterns, while MDF trim has a smooth, uniform surface. PVC and metal trim have distinct characteristics and may require additional preparation steps.

Checking for Any Existing Paint or Finishes
In addition to identifying the material, it’s essential to assess whether your trim and moldings have any existing paint or finishes. If the surfaces are already painted, you’ll need to determine the condition of the paint. Look for signs of peeling, cracking, or chipping. If the existing paint is in good condition, you may be able to proceed with surface cleaning and preparation. However, if the paint is damaged or flaking, you’ll need to remove it entirely before starting the surface preparation process.
Importance of Knowing the Material of the Trim for Effective Preparation
Knowing the material of your trim and moldings is crucial for effective surface preparation. Different materials require specific techniques and products to ensure optimal paint adhesion and durability. For example:
- Wood: Wood trim requires thorough cleaning to remove dirt and grime, sanding to smooth out imperfections, and possibly the use of wood fillers or putty to repair any cracks or holes.
- MDF: MDF trim is smooth and uniform, making it easier to prepare. However, it’s important to avoid excessive moisture during cleaning and priming, as MDF can absorb water and swell.
- PVC: PVC trim is durable and moisture-resistant but can be slippery, making it necessary to use a deglosser or a specialized primer to enhance paint adhesion.
- Metal: Metal trim often requires a thorough cleaning to remove rust or corrosion, followed by the application of a suitable primer to prevent future oxidation and ensure paint adhesion.
By understanding the material of your trim and moldings, you can tailor your surface preparation techniques and choose the appropriate cleaning agents, primers, and fillers for the best results. This knowledge will help you achieve a smooth, long-lasting paint finish that enhances the beauty of your interior spaces.
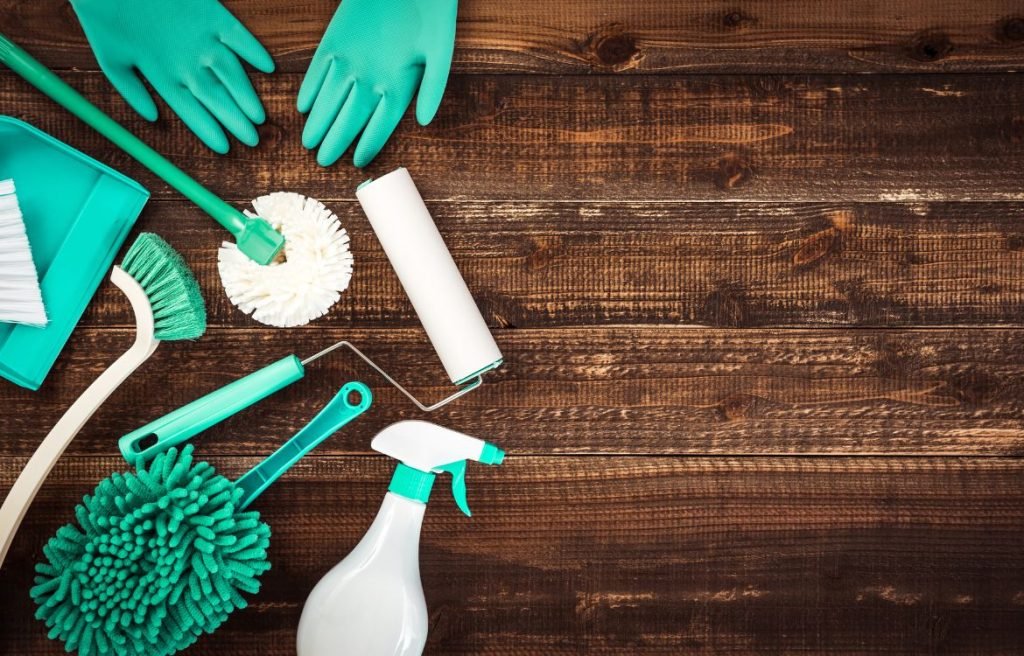
Cleaning the Surface: Preparing for a Flawless Paint Job
Before diving into the exciting world of painting your trim and moldings, it’s crucial to prioritize one essential step: cleaning the surface. Cleaning is often overlooked but plays a vital role in achieving a flawless and long-lasting paint finish. Let’s explore the importance of cleaning before painting and discover the specific cleaning techniques for different types of surfaces, including wood, plastic, and metal.
Importance of Cleaning Before Painting
Cleaning the surface before painting is crucial for several reasons:
- Removing Dirt and Grime: Over time, trim and moldings can accumulate dust, dirt, and grime, diminishing the quality of the paint application. Cleaning ensures a clean canvas for your paint, allowing it to adhere properly and achieve a smooth, professional finish.
- Enhancing Adhesion: Dust, oils, and other contaminants on the surface can create a barrier between the paint and the trim, leading to poor adhesion and potential paint failure. Thorough cleaning ensures optimal adhesion, improving the durability and longevity of your paint job.
- Smooth and Even Finish: By eliminating surface imperfections and debris, cleaning promotes a smooth and even paint finish. It helps to avoid unsightly bumps, rough textures, or trapped particles that can mar the final result.
Now that we understand the importance of cleaning, let’s explore how to clean different types of surfaces:
Cleaning Wood Surfaces:
- Start by dusting the trim and moldings using a soft, dry cloth or a brush. This removes loose debris and prevents scratching during the cleaning process.
- For mild dirt and grime, mix a mild detergent or dish soap with warm water in a bucket. Dip a clean sponge or cloth into the soapy solution and gently scrub the wood surfaces, paying attention to any crevices or intricate details.
- Rinse the surfaces thoroughly with clean water to remove any soap residue. Take care not to oversaturate the wood, as excessive moisture can cause swelling or damage.
- Allow the surfaces to dry completely before proceeding to the next steps of the surface preparation process.
Cleaning Plastic Surfaces:
- Plastic trim and moldings can typically be cleaned with a mild detergent or all-purpose cleaner. Dilute the cleaner according to the instructions on the product.
- Apply the cleaning solution to a clean cloth or sponge and gently scrub the plastic surfaces, ensuring you reach all areas and corners.
- Rinse the surfaces with clean water or wipe them down with a damp cloth to remove any cleaning residue.
- Allow the plastic surfaces to dry completely before continuing with the surface preparation.
Cleaning Metal Surfaces:
- Metal trim and moldings may require more attention to remove rust, oxidation, or other surface contaminants. Begin by dusting off loose debris using a soft brush or cloth.
- For heavily soiled or rusted areas, you may need to use a specialized metal cleaner or rust remover. Follow the product instructions carefully to avoid damaging the metal surface.
- Scrub the metal surfaces gently with a cloth or sponge soaked in the cleaning solution, paying attention to problem areas.
- Rinse the metal surfaces thoroughly with clean water and dry them completely to prevent any residual moisture from causing rust.
Tools and Materials Needed for Cleaning:
- Soft-bristle brush or cloth for dusting
- Bucket of warm water
- Mild detergent, dish soap, or all-purpose cleaner
- Sponges or clean cloths for scrubbing
- Plastic or metal cleaner (if applicable)
- Rust remover (if required for metal surfaces)
- Clean water for rinsing
- Dry, lint-free cloths for drying
Remember, always follow the manufacturer’s instructions when using cleaning products and wear appropriate protective gear, such as gloves and eye protection.
Repairing Damages: Restoring the Beauty of Your Trim and Moldings
As you prepare your trim and moldings for a fresh coat of paint, it’s essential to address any cracks, holes, or dents that may mar their appearance. Repairing these imperfections ensures a smooth and flawless finish, allowing your paint job to shine. Let’s explore how to identify and repair damages on your trim and moldings, from filling cracks and holes to achieving a perfectly smooth surface.
Identifying and Repairing Cracks, Holes, and Dents:
- Begin by closely inspecting your trim and moldings, paying attention to any visible cracks, holes, or dents. These damages can occur due to aging, settling, or accidental impacts.
- Use a small tool, such as a putty knife or a pointed object, to gently probe and test the damaged areas. This helps determine the extent of the damage and ensures there are no underlying structural issues.
- Once you’ve identified the damaged areas, it’s time to proceed with the repair process.
Filling Imperfections with Spackling Compound:
- Start by preparing your chosen spackling compound or wood filler according to the manufacturer’s instructions. Ensure the product matches the material of your trim and moldings.
- Using a putty knife or a similar tool, apply the spackling compound directly into the cracks, holes, or dents. Fill the damaged areas generously, slightly overfilling to compensate for any shrinkage during drying.
- Smooth the applied compound with the putty knife, ensuring it blends seamlessly with the surrounding surfaces. Feather the edges of the filled areas to create a smooth transition.
- Allow the spackling compound to dry completely, following the recommended drying time provided by the manufacturer.
Sanding the Repaired Areas for a Smooth Finish:
- Once the spackling compound is dry, it’s time to sand the repaired areas. Start by using a fine-grit sandpaper, such as 220-grit, to gently sand the filled areas. Sand in a circular or back-and-forth motion, being careful not to oversand or damage the surrounding surfaces.
- As you sand, periodically check the smoothness of the repaired areas by running your hand over them. The goal is to achieve a flush and smooth surface that seamlessly blends with the rest of the trim and moldings.
- After sanding, wipe away the dust residue with a clean cloth or a tack cloth. Ensure the surfaces are clean and free from any sanding debris before proceeding to the next steps of the surface preparation process.
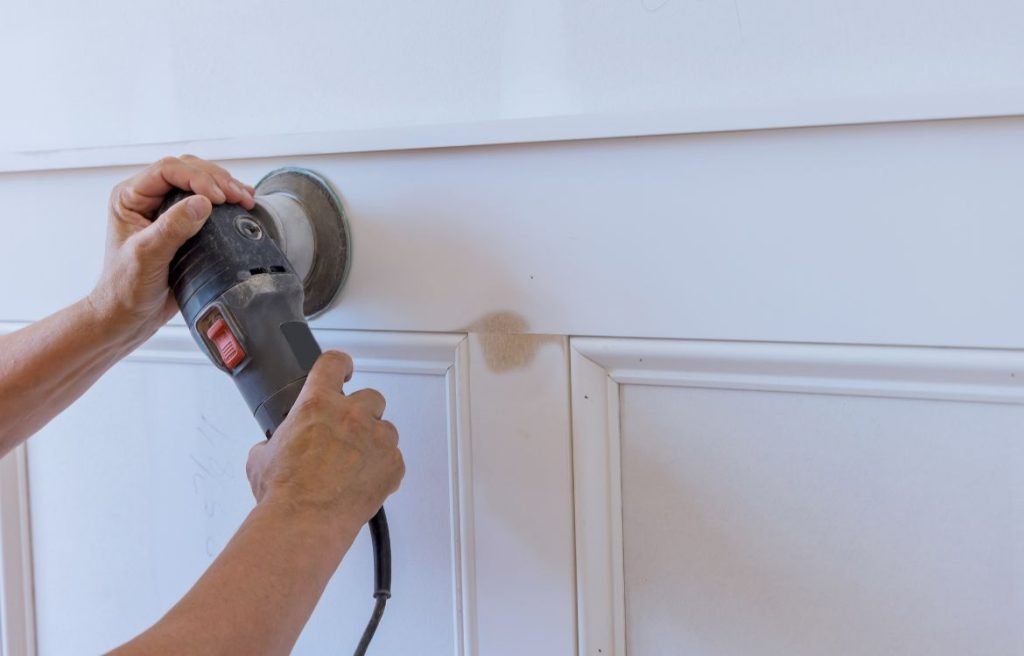
Sanding the Surface: Achieving a Smooth Canvas for Paint
As you continue the surface preparation process for your trim and moldings, sanding plays a crucial role in creating a smooth and flawless canvas for your paint application. Let’s explore the importance of sanding, selecting the right sandpaper grit, and the proper sanding techniques to achieve optimal results.
The Role of Sanding in Surface Preparation:
Sanding is a vital step in surface preparation as it serves multiple purposes:
- Smoothing Out Imperfections: Sanding helps to eliminate rough spots, uneven surfaces, and minor blemishes on your trim and moldings. It creates a smooth base for paint application, ensuring a professional and flawless finish.
- Enhancing Adhesion: By sanding the surfaces, you create a slightly rough texture that improves the adhesion of the paint. This helps the paint bond securely to the trim and moldings, reducing the risk of peeling or chipping over time.
- Improving Paint Appearance: Sanding minimizes the visibility of any previous brushstrokes, drips, or other texture inconsistencies, resulting in a more even and aesthetically pleasing paint finish.
Choosing the Right Sandpaper Grit:
When it comes to selecting sandpaper grit, consider the condition of your trim and moldings:
- Coarse Grit (80-100): Use coarse-grit sandpaper when dealing with significant imperfections, such as deep scratches, rough surfaces, or layers of old paint that need to be removed.
- Medium Grit (120-150): Medium-grit sandpaper is suitable for general smoothing and preparing surfaces with minor imperfections, providing a good balance between abrasion and refinement.
- Fine Grit (180-220): Fine-grit sandpaper is ideal for the final sanding before painting. It helps achieve a smooth finish and prepares the surface for optimal paint adhesion.
Proper Sanding Techniques for Trim and Moldings:
Follow these techniques to ensure effective and efficient sanding of your trim and moldings:
- Start by wrapping the sandpaper around a sanding block or using a sanding sponge. This provides a firm and even surface for sanding.
- Sand in the direction of the grain for wood trim to prevent damage or visible scratches. For other materials like plastic or metal, sanding in a consistent back-and-forth or circular motion is generally suitable.
- Apply light to moderate pressure while sanding. Let the sandpaper do the work and avoid excessive force that could damage the surfaces.
- Keep the sanding block or sanding sponge flat against the surface to ensure even sanding and prevent uneven areas.
- Regularly check your progress by running your hand over the sanded surfaces. This will help you identify any remaining rough spots or imperfections that need further attention.
- Wipe away sanding dust with a clean, damp cloth or use a vacuum with a brush attachment to remove debris.
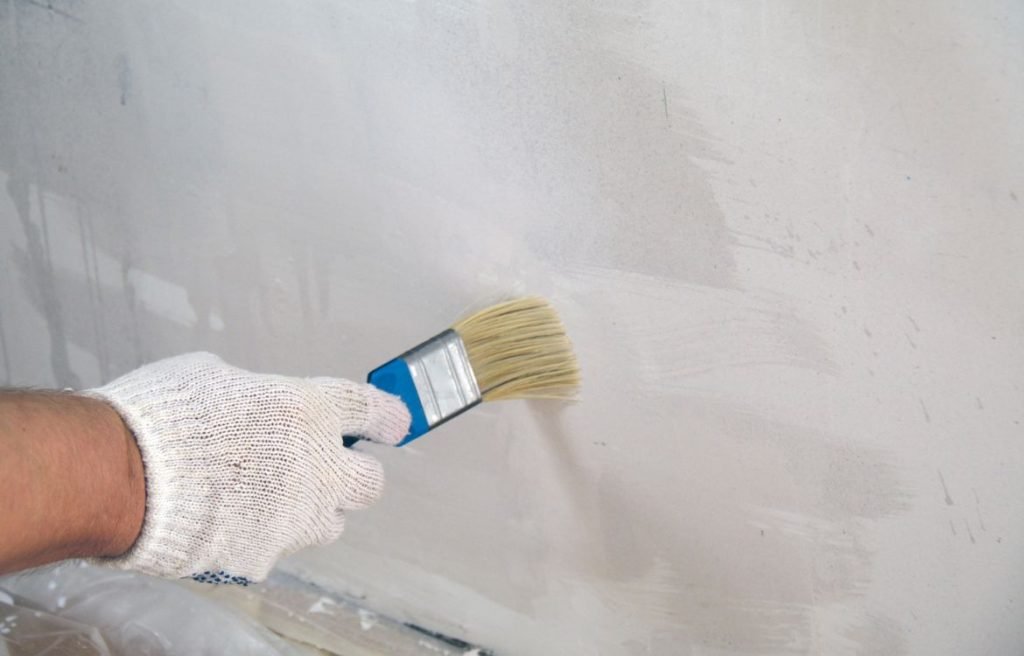
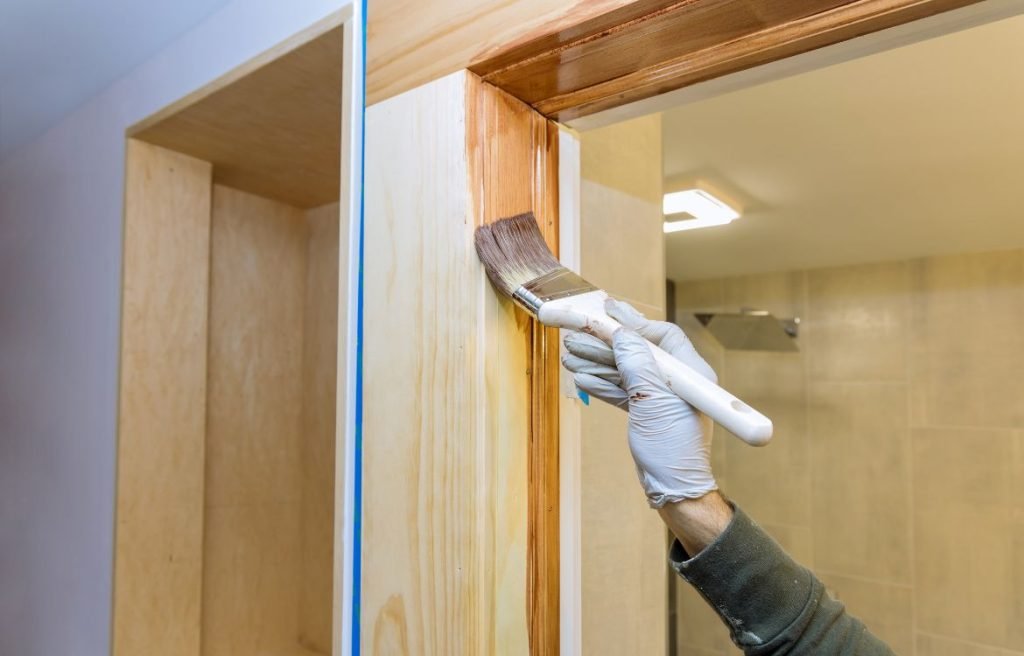
Priming the Surface: A Foundation for Long-lasting Paint
Now that you’ve achieved a smooth and properly sanded surface, it’s time to consider the role of primer in your painting process. Primer serves several essential functions in creating a durable and high-quality paint job.
The Role of Primer in Painting:
- Promoting Adhesion: Primer provides a strong bond between the surface and the paint, improving paint adhesion and reducing the chances of peeling or flaking.
- Sealing and Protecting: Primer seals the surface, preventing stains, moisture, or tannins from bleeding through the paint. It also helps to protect the material of your trim and moldings.
- Enhancing Color and Coverage: Using primer ensures that the true color of your paint shines through and provides consistent coverage, especially when transitioning from a dark to a lighter shade or when dealing with porous materials.
Choosing the Right Primer for the Material and Color:
Selecting the appropriate primer is essential to achieve the best results:
- Material Compatibility: Choose a primer that is compatible with the material of your trim and moldings. There are specific primers for wood, MDF, plastic, or metal surfaces. Consult with a paint specialist or refer to the manufacturer’s guidelines for the most suitable primer.
- Color Considerations: If you’re painting your trim and moldings with a lighter color, opt for a primer with a tint close to your desired paint color. This helps achieve better coverage and reduces the number of paint coats required.
Proper Application of Primer:
Follow these steps for a successful primer application:
- Ensure the sanded surfaces are clean, dry, and free from any dust or debris.
- Stir the primer thoroughly to ensure even consistency and color distribution.
- Apply the primer evenly using a high-quality brush or a roller. Use smooth, overlapping strokes, working in the same direction as the grain or pattern of the trim and moldings.
- Allow the primer to dry completely according to the manufacturer’s instructions before proceeding with the paint application.
Masking and Protecting the Surrounding Area: Preparing for a Mess-Free Paint Job
Before you embark on the exciting task of painting your trim and moldings, it’s crucial to take the necessary steps to protect and mask off areas that you don’t want to be painted. Properly applying painter’s tape and safeguarding your floors and furniture will help you achieve a clean and professional finish. Let’s explore the importance of masking, how to apply painter’s tape correctly, and the best practices for protecting your surrounding area.
Importance of Masking Off Areas Not to be Painted:
Masking off areas that you don’t want to be painted serves several purposes:
- Clean and Precise Edges: Proper masking creates clean and precise edges where your trim and moldings meet other surfaces, such as walls or ceilings. It prevents paint from bleeding or smudging onto areas that should remain unpainted.
- Time and Effort Savings: By taking the time to mask off the areas not to be painted, you minimize the need for touch-ups or the tedious task of removing paint splatters later on. It saves you valuable time and effort during the painting process.
- Professional-Looking Finish: Masking ensures a professional-looking finish, leaving your trim and moldings looking neat and well-defined. It adds that extra touch of attention to detail and enhances the overall aesthetics of your paint job.
How to Properly Apply Painter’s Tape:
- Ensure the surfaces you plan to tape are clean and free from dust or debris. Wipe them down with a clean, dry cloth if necessary.
- Begin by selecting high-quality painter’s tape specifically designed for delicate surfaces, such as trim and moldings. Ensure the tape is suitable for the type of paint you’ll be using.
- Start at one end of the surface you want to mask off and unroll a length of tape. Press the tape firmly against the surface, ensuring it adheres securely.
- Slowly and evenly run your finger or a putty knife along the edge of the tape to ensure a tight seal and prevent paint from seeping underneath.
- Continue unrolling and applying the tape along the surface, overlapping each strip slightly to create a continuous barrier.
- For corners and edges, carefully fold the tape to create crisp lines and prevent paint from bleeding into adjacent areas.
- Avoid stretching the tape excessively, as it may result in uneven lines or paint seepage.
Protecting Floors and Furniture:
When painting your trim and moldings, it’s important to protect your floors and furniture from accidental paint splatters or spills. Follow these tips:
- Cover your floors with drop cloths or plastic sheeting. Secure them in place to prevent shifting or tripping hazards.
- Remove or cover furniture with plastic sheeting or drop cloths to safeguard them from paint drips or splatters.
- For furniture or fixtures that cannot be moved, wrap them tightly in plastic sheeting, ensuring all surfaces are completely covered.
- Use additional protection, such as plastic or cardboard, to cover large surfaces or objects that are difficult to move, such as built-in shelves or appliances.
Final Preparations Before Painting:
Before you dive into the painting process, take a moment to complete the final preparations:
- Conduct a final check of the surfaces you’ll be painting. Ensure they are clean, dry, and free from dust or debris. Wipe them down if needed.
- Set up your painting area by organizing your paint cans, brushes, rollers, trays, and any other tools you’ll be using. Make sure you have adequate ventilation and access to fresh air during the painting process.
- Choose the right paint for your trim and moldings, considering factors such as the material, desired finish, and any specific requirements, such as durability or washability. Consult with a paint specialist if you need assistance.
- Select high-quality brushes, rollers, and other tools that are appropriate for the type of paint and the surface you’ll be painting. Ensure your brushes are clean and free from any previous paint residue.
FAQ
How do you prepare interior trim for painting?
To prepare interior trim for painting, start by cleaning the trim to remove any dust, dirt, or grease. Repair any damages or imperfections with wood filler or putty and sand the surface smooth. Apply a primer suitable for the trim material and follow up with the desired paint coats, ensuring proper drying between each coat.
Do you need to prep trim before painting?
Yes, it is important to prep trim before painting. Prepping includes cleaning the trim, repairing any damages, and sanding the surface to ensure a smooth and even finish. Additionally, applying a suitable primer helps with paint adhesion and enhances the durability of the painted trim.
Do I have to sand trim before repainting?
Sanding trim before repainting is typically necessary, especially if there are existing coatings or rough areas. Sanding helps to create a smooth surface and promotes better paint adhesion. Use fine-grit sandpaper and sand in the direction of the wood grain. Wipe off any sanding dust before priming and painting the trim.
How do you prepare walls and baseboards for painting?
To prepare walls and baseboards for painting, start by cleaning the surfaces to remove dirt, dust, and grease. Repair any wall imperfections and sand the surfaces to create a smooth finish. Apply painter’s tape to protect adjacent surfaces. Finally, apply a suitable primer and follow with the desired paint coats, allowing proper drying time between each coat.
Do I need to wash my walls and baseboards before painters come?
It is not necessary to wash the walls and baseboards before painters come unless they specifically request it. However, it is a good idea to remove any visible dust or dirt from the surfaces using a duster or a dry cloth. This can help ensure better paint adhesion and a cleaner finish.
What should I clean trim with before painting?
Before painting trim, clean it with a mild detergent or a household cleaner mixed with warm water. Use a sponge or cloth to gently scrub the trim, removing any dirt, dust, or grease. Rinse the trim with clean water and allow it to dry completely before applying primer and paint.
Conclusion
Thank you for taking the time to explore our in-depth guide on Surface Preparation for Trim and Moldings in Interior House Painting. We hope this resource has provided you with valuable insights, expert techniques, and the motivation to embark on your painting journey with confidence.
Remember, at Horizon Painting, we’re always here to support you every step of the way. If you have any questions, need further assistance, or would like to discuss your painting project in detail, don’t hesitate to contact us. Let us bring your vision to life and transform your home into a masterpiece.
Get in touch with our dedicated team at Horizon Painting today and experience the exceptional craftsmanship and impeccable service we’re renowned for. Your dream space awaits!