Tips for Preparing Textured Interior Surfaces for Painting
Are you ready to transform your living space into a captivating work of art? If you’ve been searching for the best tips on preparing textured interior surfaces for painting, look no further! At Horizon Painting, we understand that painting your home can be a daunting task, especially when it comes to textured surfaces.
But fear not! In this comprehensive guide, we’ll walk you through the essential steps and techniques to ensure a flawless paint job. Whether you’re a seasoned DIY enthusiast or a homeowner looking to refresh your space, our expert tips will empower you to achieve professional-looking results. So, let’s dive in and discover the secrets to preparing textured interior surfaces for painting like a pro!
Preparing to Paint
Preparing the Room for Painting:
- Covering the Floors and Furniture:
- Before you start painting, protect your floors and furniture by covering them with drop cloths or plastic sheets.
- This will prevent accidental spills or splatters from damaging your belongings.
- Filling Any Small Holes:
- Inspect the walls for any small holes or cracks and fill them with a spackling compound.
- Use a putty knife to smoothly apply the compound and let it dry completely.
- Sand the patched areas lightly for a seamless finish.
- Removing Outlet Covers:
- To ensure a neat and professional-looking paint job, remove outlet covers and switch plates.
- This will allow you to paint the wall surface evenly without any obstructions.
- Taping off the Trim:
- Use painter’s tape to carefully mask off the trim, baseboards, and any other areas you want to keep paint-free.
- Make sure the tape adheres tightly to the surface to create clean, crisp lines.
- Cutting in the Corners with a Brush:
- Use a high-quality brush to cut in the corners and edges of the room.
- This technique ensures precise and detailed paint application in areas where rollers cannot reach.
Choosing the Right Paint:
- Importance of Using a Semi-Gloss Alkyd Paint:
- When painting textured interior surfaces, it’s essential to choose a paint that can withstand the unique characteristics of texture.
- Opt for a semi-gloss alkyd paint, as it offers durability, easy maintenance, and excellent adhesion to textured surfaces.
- The semi-gloss finish also adds a subtle sheen, enhancing the appearance of your textured walls.
- Testing an Alkyd Primer on a Small Portion of the Wall:
- Before applying the paint, it’s advisable to test an alkyd primer on a small, inconspicuous area of the wall.
- This test will help you ensure proper adhesion and compatibility between the primer and your textured surface.
- Allow the primer to dry and assess the results to ensure satisfactory adhesion and coverage.
Cleaning the Surface:
- Importance of Thorough Cleaning:
- Cleaning the textured surface is a crucial step before painting, as it removes dust, dirt, and any contaminants that can affect paint adhesion.
- A clean surface ensures a smooth and long-lasting paint finish.
- Techniques for Cleaning Textured Surfaces:
- Begin by vacuuming the textured walls using a soft brush attachment to remove loose debris and cobwebs.
- Follow up with a damp cloth or sponge to wipe down the walls, paying extra attention to textured areas.
- For stubborn stains or grease, use a mild detergent solution and a soft brush to gently scrub the surface.
- Rinse the walls thoroughly with clean water and allow them to dry completely before proceeding with painting.
Painting with a Brush
Choosing the Right Brush:
Selecting the appropriate brush is crucial for achieving a smooth and even paint application on textured surfaces. Consider the following factors when choosing a brush:
- Bristle Type:
- Opt for a brush with synthetic bristles, such as nylon or polyester.
- Synthetic bristles are more resilient and can effectively navigate the uneven texture of the walls.
- Size and Shape:
- Choose a brush size that suits the scale of your textured surface.
- A medium-sized brush with a straight edge or angled bristles is ideal for reaching into crevices and covering larger areas efficiently.
- Handle Grip:
- Ensure the brush handle provides a comfortable grip for extended periods of painting.
- Look for ergonomic designs or handles with a rubberized grip for better control and reduced hand fatigue.
Painting Techniques for Textured Surfaces:
When painting textured interior surfaces, it’s important to employ techniques that ensure full coverage and a consistent finish. Here are two effective techniques to consider:
- Painting Diagonally in One Direction, Then the Other:
- Begin by painting diagonally across the textured surface in one direction, such as from the top left corner to the bottom right corner.
- Apply moderate pressure to the brush, allowing the bristles to penetrate into the texture and cover the surface evenly.
- Once the first diagonal pass is complete, repeat the process in the opposite direction, from the top right corner to the bottom left corner.
- This technique ensures that the paint reaches into the textured crevices from different angles, resulting in thorough coverage.
- Ensuring that Paint Covers Every Part of the Textured Wall:
- Pay close attention to the textured areas during the painting process to ensure complete coverage.
- Use crosshatch strokes to apply paint, crisscrossing the brush in different directions.
- Focus on working the paint into the texture, making sure no areas are left unpainted.
- Step back occasionally to assess the coverage and make any necessary touch-ups to achieve a seamless finish.
Remember to work in small sections at a time to maintain control and prevent the paint from drying too quickly. Regularly load your brush with paint and remove excess paint by tapping it gently on the side of the paint container. This will help distribute the paint evenly and prevent drips or clumps on the textured surface.
Painting with a Roller
Choosing the Right Roller:
Selecting the appropriate roller is essential for achieving a smooth and efficient paint application on textured surfaces. Consider the following factors when choosing a roller:
- Nap Thickness:
- Opt for a roller with a thicker nap to accommodate the texture of your walls.
- For textured surfaces, a 3/8 to 1/2-inch nap roller is typically recommended.
- Thicker naps allow the roller to reach into crevices and cover the surface more effectively.
- Roller Material:
- Look for a roller cover made of synthetic materials, such as polyester or nylon.
- Synthetic covers are durable and shed less lint, ensuring a cleaner finish on the textured surface.
- Roller Size:
- Choose a roller size that matches the scale of your project.
- A larger roller cover will cover more area, increasing efficiency, but may be less maneuverable in tight spaces.
Techniques for Painting with a Roller:
When using a roller to paint textured interior surfaces, specific techniques can help ensure even coverage and a professional-looking result. Follow these techniques for optimal results:
- Fully Loading the Roller with Paint:
- Pour an appropriate amount of paint into a paint tray or bucket.
- Dip the roller cover into the paint, ensuring it is fully loaded but not dripping excessively.
- Roll the loaded roller cover back and forth on the textured surface of the tray or bucket to evenly distribute the paint.
- Covering the Wall in Overlapping Vertical Strokes:
- Start at one side of the wall and roll the paint onto the textured surface using upward vertical strokes.
- Apply light to moderate pressure to ensure the paint reaches into the texture.
- Roll the roller in overlapping vertical strokes, working in small sections at a time.
- Continue this process until the entire wall is covered, maintaining a wet edge to avoid visible lines or marks.
- Using a “V” Pattern if Vertical Strokes Are Not Adequate:
- In some cases, vertical strokes alone may not adequately cover the textured surface.
- If necessary, switch to a “V” pattern, starting at the top corner of the wall and rolling diagonally downwards.
- Repeat the “V” pattern, gradually moving across the wall until the entire surface is covered.
- Checking for Areas that Have Too Much Paint and Removing the Excess:
- Periodically check for areas with excessive paint buildup on the textured surface.
- If you notice thick or heavy areas, use the roller without additional paint to lightly roll over those sections.
- This technique will help distribute the excess paint and create a more uniform appearance.
Throughout the painting process, it’s crucial to maintain a consistent and steady rolling motion. Avoid pressing too hard on the roller, as this can cause paint to splatter or push the texture down. Take breaks between sections to reload the roller with paint as needed, ensuring continuous coverage.
Painting with an Airless Sprayer
Techniques for Painting with an Airless Sprayer:
Painting textured interior surfaces with an airless sprayer can provide a fast and efficient way to achieve even coverage. Follow these techniques to ensure a smooth and professional result:
- Painting in 4-foot Horizontal Strokes:
- Start by positioning the sprayer nozzle approximately 12 to 18 inches away from the textured surface.
- Begin spraying with a steady motion, moving in horizontal strokes that cover an area of about 4 feet.
- Maintain a consistent speed to ensure even distribution of paint across the textured surface.
- Overlapping Each Previous Section by about 50 Percent:
- To achieve uniform coverage, overlap each subsequent section by about 50 percent of the previous stroke.
- This technique helps eliminate visible lines or gaps between sprayed areas and creates a seamless finish.
- Practicing on a Piece of Scrap Wood to Learn How Fast to Lay Down the Paint:
- Before starting the actual painting process on your textured surface, practice spraying on a piece of scrap wood or cardboard.
- This allows you to familiarize yourself with the sprayer’s flow and adjust the speed at which you lay down the paint.
- Experiment with different spraying distances and speeds to achieve the desired coverage and texture.
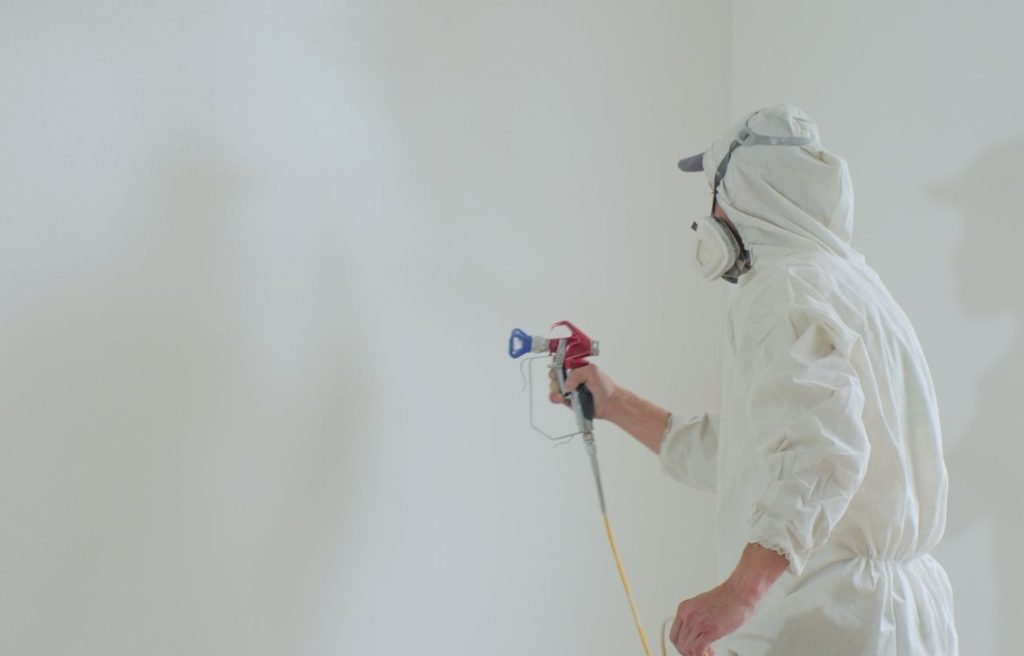
It’s important to note that when using an airless sprayer, proper preparation and protection are crucial. Ensure the surrounding areas are properly covered with drop cloths or plastic sheets to prevent overspray on adjacent surfaces. Take the necessary safety precautions by wearing protective gear such as goggles, a respirator, and gloves.
Post-Painting Steps
Checking for Missed Areas and Touching Up as Necessary:
After completing the initial paint application, it’s important to inspect the textured surface for any missed areas or uneven coverage. Follow these steps to ensure a flawless finish:
- Adequate Lighting: Use proper lighting to help identify any spots that may require touch-up. Natural daylight or bright artificial light can reveal imperfections more effectively.
- Methodical Inspection: Take your time to carefully examine the entire painted surface. Look for any areas where the texture may be visible through the paint or where the color appears inconsistent.
- Touch-Up Technique: Use a small brush or roller to touch up any missed spots or areas that require additional coverage. Match the texture and color of the existing paint to seamlessly blend the touch-up with the surrounding surface.
Applying a Second Coat if a Deeper Hue is Desired:
If you desire a deeper or more saturated color on your textured walls, applying a second coat of paint can enhance the overall appearance. Consider the following steps:
- Drying Time: Allow the first coat of paint to dry completely as per the manufacturer’s instructions before applying a second coat. This typically takes a few hours, but drying times may vary based on the paint type and environmental conditions.
- Light Sanding: Lightly sand the dried first coat with fine-grit sandpaper to create a smooth surface and ensure proper adhesion of the second coat.
- Application of Second Coat: Apply the second coat of paint using the same techniques employed in the initial painting process. Ensure even coverage and overlapping strokes to achieve consistent color and texture.
Letting the Paint Cure Completely before Reconnecting Light Fixtures and Restoring the Room:
Once the final coat of paint has been applied, it’s crucial to allow sufficient time for the paint to cure before reassembling the room. Follow these guidelines:
- Manufacturer’s Recommendations: Refer to the paint manufacturer’s instructions for the recommended curing time. This duration can range from a few days to several weeks, depending on the type of paint and environmental conditions.
- Patience and Ventilation: Ensure proper ventilation in the room by opening windows or using fans to facilitate the curing process. Avoid closing off the freshly painted area to allow air circulation.
- Reconnecting Fixtures and Furniture: Wait until the paint has fully cured before reconnecting light fixtures, reinstalling outlet covers, and moving furniture back into the room. This minimizes the risk of smudging or damaging the freshly painted surface.
Tips and Warnings
Remembering the Rule: Oil Over Water, but Never Water Over Oil:
When painting textured interior surfaces, it’s essential to understand the compatibility of different paint types. Follow this important rule to ensure a successful paint application:
- Oil Over Water: If you previously used an oil-based paint on your textured walls, it is generally safe to apply a water-based paint over it. Water-based paints have the ability to adhere well to oil-based surfaces.
- Never Water Over Oil: However, it is crucial to avoid applying an oil-based paint over a water-based paint. Oil-based paints may have difficulty adhering to the surface, resulting in poor adhesion, peeling, or other paint failures.
Planning to Buy More Paint as a Gallon of Paint Will Not Go as Far When Painting a Textured Wall:
Painting textured walls typically requires more paint than smooth surfaces due to the increased surface area created by the texture. Keep the following considerations in mind:
- Increased Paint Absorption: Textured surfaces tend to absorb more paint due to the indentations and crevices, which require additional paint to fully cover.
- Multiple Coats: Achieving even coverage on textured walls often necessitates multiple coats of paint. Each coat builds up the color and texture, further increasing the amount of paint needed.
- Purchase Sufficient Amount: When estimating the amount of paint required for your project, it’s prudent to buy more than the standard calculation for smooth surfaces. This ensures you have enough paint to achieve the desired finish without running out midway through the job.
FAQ
How do you paint textured surfaces?
When painting textured surfaces, start by cleaning the surface to remove any dirt or dust. Use a roller with a thick nap to apply the paint, working it into the textured areas. Apply the paint in multiple directions to ensure even coverage. Consider using a textured paint or adding a texture additive to regular paint for enhanced texture.
How do you clean textured walls before painting?
Cleaning textured walls before painting involves removing any dust, dirt, or grease. Start by using a vacuum cleaner with a brush attachment to remove loose debris. Then, use a mild detergent mixed with warm water and a sponge or cloth to gently scrub the walls. Rinse with clean water and allow the walls to dry completely before painting.
Do I need to prime textured walls before painting?
Priming textured walls before painting is generally recommended. Priming helps with better paint adhesion, evens out the surface, and can help with color consistency. It also helps to seal any repairs or stains. Use a primer suitable for your textured walls, such as a high-quality latex primer, and follow the manufacturer’s instructions for application.
What kind of primer do you use on textured walls?
For textured walls, it is recommended to use a high-quality latex primer. Look for a primer specifically designed for textured surfaces or labeled as a high-build primer. These primers are formulated to fill in the gaps and level out the texture, creating a smooth surface for paint. Follow the manufacturer’s instructions for the application of the primer.
Should I sand a textured wall before painting?
In most cases, sanding textured walls before painting is not necessary. The texture helps to conceal minor imperfections, and sanding can potentially flatten the texture. However, if there are specific rough spots or damages that need repair, you can lightly sand those areas to smooth them out. Be careful not to over-sand and compromise the texture.
Conclusion
We sincerely hope that our guide on preparing textured interior surfaces for painting has been both informative and inspiring. We’re passionate about helping homeowners like you transform their living spaces into personalized havens. If you’re ready to embark on your painting journey or have any questions along the way, don’t hesitate to reach out to us at Horizon Painting.
Our team of skilled professionals is here to provide expert guidance, top-notch service, and a seamless painting experience. Together, let’s bring your vision to life and create a home that reflects your unique style and personality. Contact us today and let’s make your painting dreams a reality!