Repairing Cracks and Holes in Interior Walls
Are you in search of expert guidance on Repairing Cracks and Holes in Interior Walls? Look no further! Welcome to a comprehensive resource tailored specifically for homeowners like you who are eager to paint their houses flawlessly. Here at Horizon Painting, we understand the importance of a smooth canvas, and we’re here to equip you with the knowledge and techniques needed to tackle those imperfections head-on. So, if you’re ready to prepare your walls for interior painting and achieve professional-looking results, join us on this journey of mastering the art of Repairing Cracks and Holes in Interior Walls.
Understanding the Causes of Cracks and Holes
Natural Settling of the House
One of the common causes of cracks and holes in interior walls is the natural settling of the house. Over time, buildings undergo slight shifts and adjustments, which can result in cracks forming. These cracks are often found around door frames, windows, and corners. While they may seem alarming, they are usually harmless and can be easily repaired.
Impact Damage
Accidents happen, and sometimes walls can sustain damage due to impact. Whether it’s a piece of furniture being moved around or a playful mishap, these incidents can lead to cracks and holes. Impact damage is more noticeable and tends to be localized to the area of impact. It’s important to address these issues promptly to prevent further damage and maintain the aesthetic appeal of your walls.
Moisture and Humidity
Moisture and humidity can wreak havoc on interior walls, leading to cracks and holes. Excessive moisture can seep into the walls, causing the material to expand and contract, weakening its structure over time. This is particularly common in areas prone to high humidity, such as bathrooms and kitchens. Addressing the underlying moisture issue is crucial to prevent recurring damage and maintain the integrity of your walls.
Poor Construction
In some cases, cracks and holes in interior walls can be attributed to poor construction practices. Insufficient reinforcement, inadequate materials, or improper installation techniques can all contribute to structural weaknesses. If you notice extensive cracking or recurring issues in multiple areas of your home, it’s advisable to consult a professional to assess the construction and recommend necessary repairs.
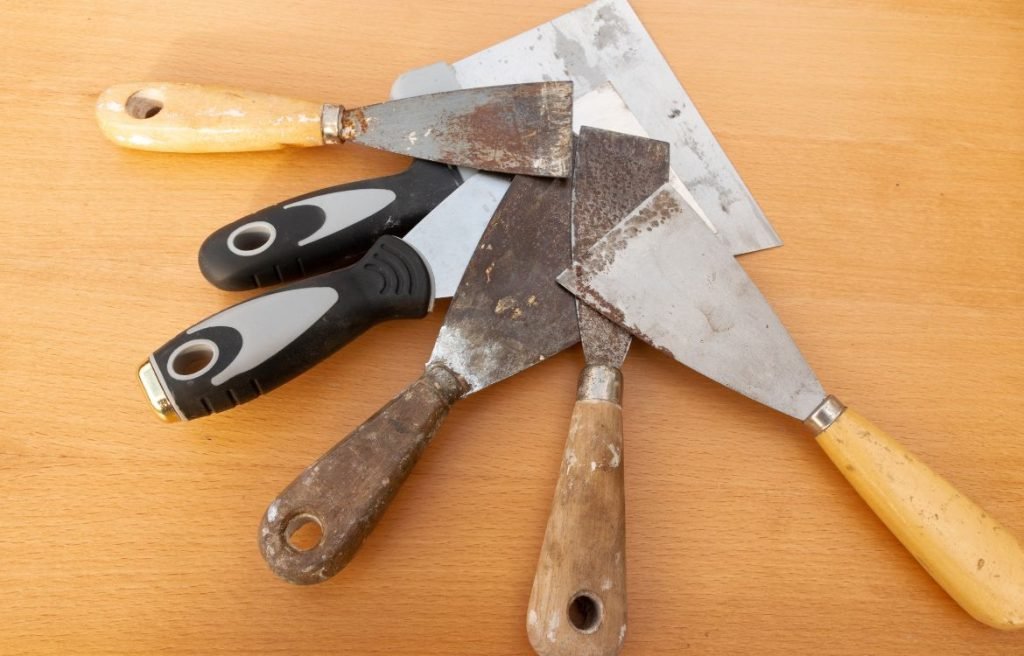
Tools and Materials Required
- Putty knife or scraper
- Sandpaper (various grits)
- Utility knife
- Dust mask
- Safety goggles
- Drywall saw or keyhole saw
- Hammer
- Nail set
- Joint compound
- Drywall tape
- Paintbrushes
- Paint roller and tray
- Screwdriver (if necessary for removing hardware)
- Spackling paste or patching compound
- Joint compound
- Drywall screws
- Drywall patches
- Sanding block
- Primer
- Paint (matching the existing wall color)
- Drop cloths or plastic sheets (for protecting the surrounding area)
Safety Precautions
Wearing Protective Gear
When undertaking any repair work on your interior walls, it’s important to prioritize your safety. Wear the appropriate protective gear to minimize the risk of injury. Here are some essential items to consider:
- Safety goggles: Protect your eyes from dust, debris, and potential splatters.
- Dust mask: Prevent inhalation of fine particles and dust during sanding and patching.
- Gloves: Shield your hands from sharp edges, chemicals, and potential skin irritants.
- Protective clothing: Wear long sleeves and pants to protect your skin from abrasions and potential contact with harmful materials.
Ensuring Good Ventilation
Maintaining good ventilation is crucial during the repair process. Open windows or use fans to ensure proper airflow and minimize the inhalation of dust, fumes, and any potential odors from materials like joint compound or paint. Adequate ventilation also helps in drying the patched areas effectively.
Repairing Small Holes and Cracks
Small holes and cracks are common occurrences and can be easily fixed. They are typically the result of nails, screws, or minor wear and tear. These holes and cracks are relatively straightforward to patch using spackling paste or patching compound. With proper techniques, you can achieve a smooth surface that’s ready for painting.
Preparing the Area
- Start by clearing the immediate area around the hole or crack. Remove any loose debris, paint chips, or dust using a brush or vacuum cleaner.
- Use a putty knife or scraper to gently widen the crack or hole, creating a V-shaped groove. This helps the filler or joint compound adhere better and provides a more stable foundation for the repair.
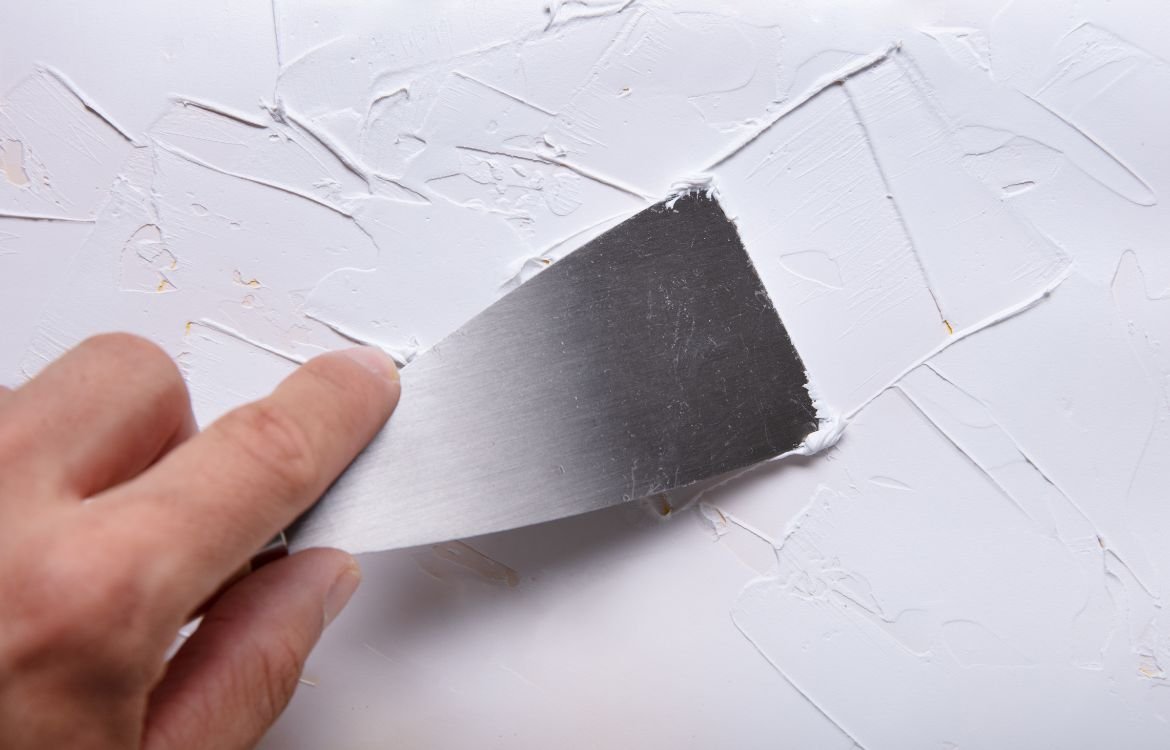
Applying Filler or Joint Compound
- Take a small amount of spackling paste or patching compound on your putty knife or scraper.
- Press the filler into the hole or crack, ensuring it fills the entire space. Smooth it out using the putty knife, removing any excess material.
- For larger cracks, you may need to apply multiple thin layers, allowing each layer to dry before applying the next. This ensures a strong and seamless repair.
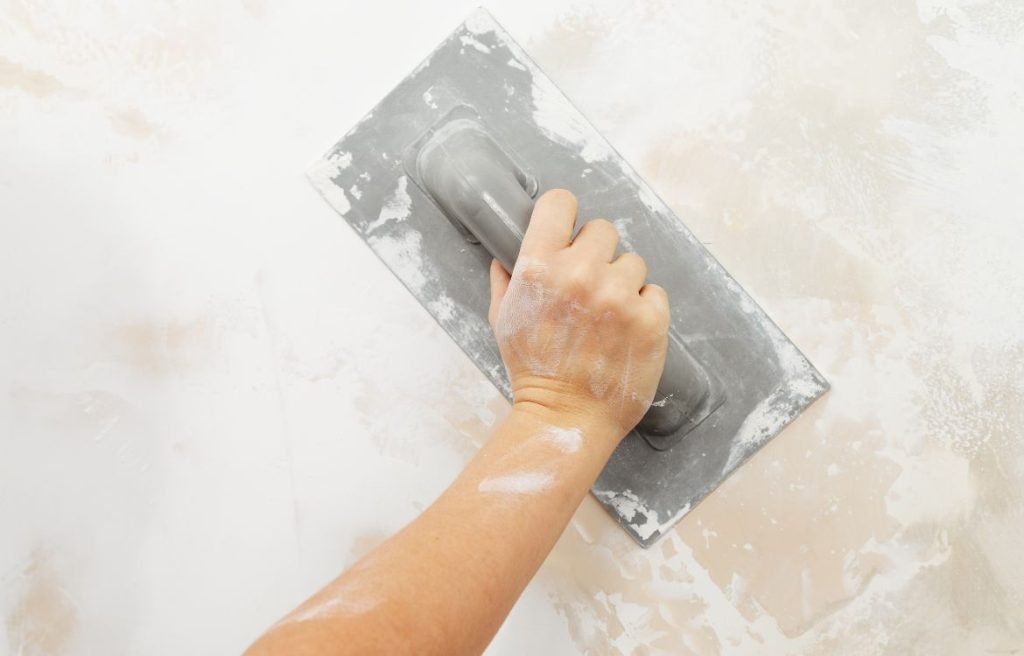
Sanding and Smoothing
- Once the filler or joint compound is completely dry, use sandpaper or a sanding block to gently sand the repaired area. Smooth out any unevenness or excess material until it blends seamlessly with the surrounding wall.
- Wipe away any dust with a clean cloth or sponge.
Painting over the Repaired Area
- Before painting, apply a coat of primer to the repaired area. This helps the paint adhere better and provides an even surface.
- Once the primer is dry, paint over the repaired area using a brush or roller, ensuring it matches the existing wall color. Apply multiple thin coats if necessary, allowing each coat to dry before applying the next.
Repairing Medium-Sized Holes
Medium-sized holes require a bit more attention and effort to repair. These holes are typically larger than nail or screw holes, often caused by accidental impacts or removal of fixtures. To fix medium-sized holes, you’ll need to apply a patch made of drywall or a mesh patch. This provides structural support and allows for a seamless repair that blends with the surrounding wall.
Preparing the Area
- Clear the immediate area around the hole, removing any loose debris or dust.
- Use a utility knife or drywall saw to create a clean, rectangular or square outline around the hole. This will provide a clear area for patching.
Applying Adhesive-Backed Fiberglass Mesh
- Cut a piece of adhesive-backed fiberglass mesh slightly larger than the hole.
- Place the mesh over the hole, ensuring it covers the entire area. Press it firmly against the wall to ensure proper adhesion.
Applying Joint Compound
- Take a small amount of joint compound on your putty knife or scraper.
- Apply a thin layer of joint compound over the mesh, extending it beyond the edges of the hole. Smooth it out using the putty knife, feathering the edges to blend with the surrounding wall.
Sanding and Smoothing
- Once the joint compound is dry, use sandpaper or a sanding block to gently sand the repaired area. Smooth out any rough edges or excess compound until it blends seamlessly with the surrounding wall.
- Wipe away any dust with a clean cloth or sponge.
Painting over the Repaired Area
- Apply a coat of primer to the repaired area, ensuring it covers the patch and blends with the surrounding wall.
- Once the primer is dry, paint over the repaired area using a brush or roller, matching the existing wall color. Apply multiple thin coats if needed, allowing each coat to dry before applying the next.

Repairing Large Holes
Large holes are more challenging to repair but can still be successfully addressed with the right approach. These holes may result from extensive impact damage, plumbing or electrical work, or removal of large fixtures. Repairing large holes often involves cutting out damaged sections of drywall, installing a new piece, securing it in place, and finishing with joint compound and tape. Proper technique and multiple layers of compound ensure a durable and visually appealing repair.
Cutting Out the Damaged Area
- Use a drywall saw or keyhole saw to carefully cut out the damaged area, creating a clean and even-edged rectangular or square shape.
- Ensure that the cutout extends to the nearest wall studs or backing supports for stability.
Installing Backing Supports
- Measure and cut a piece of wood or drywall slightly larger than the hole.
- Insert the backing support into the hole, securing it to the existing wall studs using drywall screws. This provides a sturdy base for the patch.
Applying a Drywall Patch
- Cut a piece of drywall to fit the hole, ensuring it matches the thickness of the existing wall.
- Place the drywall patch over the backing support, aligning it with the surrounding wall. Secure the patch to the support using drywall screws.
Applying Joint Compound
- Apply a thin layer of joint compound over the seams between the patch and the existing wall, using a putty knife or scraper.
- Embed drywall tape into the joint compound, smoothing it out with the putty knife. Ensure the tape is firmly pressed into the compound to create a strong bond.
- Apply another layer of joint compound over the tape, feathering the edges to blend with the surrounding wall.
Sanding and Smoothing
- Once the joint compound is dry, use sandpaper or a sanding block to gently sand the repaired area. Smooth out any unevenness or excess compound until it blends seamlessly with the surrounding wall.
- Wipe away any dust with a clean cloth or sponge.
Painting over the Repaired Area
- Apply a coat of primer to the repaired area, ensuring it covers the patch and blends with the surrounding wall.
- Once the primer is dry, paint over the repaired area using a brush or roller, matching the existing wall color. Apply multiple thin coats if needed, allowing each coat to dry before applying the next.
Creative Fixes for Holes in Walls
Using Toothpaste or Soap
In a pinch, you can temporarily fill small nail holes or cracks using toothpaste or soap. Simply squeeze a small amount onto your finger or putty knife and press it into the hole or crack. Smooth it out and allow it to dry. While not a permanent solution, this quick fix can help camouflage minor imperfections until you’re ready to make more extensive repairs.
Using Homemade Sealant with Baking Soda and Super Glue
For small to medium-sized holes, you can create a DIY sealant using baking soda and super glue. Mix the two ingredients in a disposable container until you achieve a paste-like consistency. Apply the mixture to the hole or crack, smoothing it out with a putty knife or scraper. Allow it to dry thoroughly before sanding and painting over the repaired area.
Using Flour for Larger Holes
If you’re faced with larger holes in your walls, flour can come to the rescue. Create a paste by combining flour with water until it forms a thick consistency. Fill the hole with the flour paste, ensuring it completely fills the void. Smooth it out with a putty knife or scraper and allow it to dry. Sand the area to achieve a smooth surface before painting.

Tips for a Perfect Finish
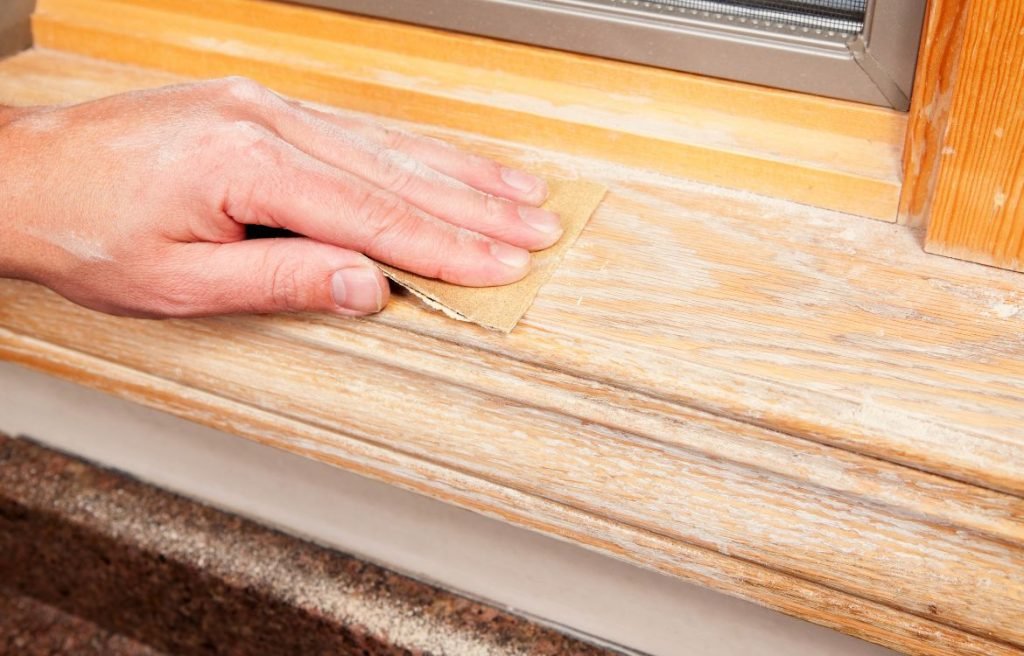
Achieving a Smooth Surface
To ensure a flawless finish, take the time to properly sand and smooth the repaired area. Use fine-grit sandpaper or a sanding block to gently feather the edges and blend the joint compound with the surrounding wall. Smooth out any ridges or imperfections until the surface feels seamless to the touch.
Matching Paint Colors
When painting over repaired areas, it’s important to match the paint color to the existing wall. To achieve a seamless blend, take a small sample of the existing paint to your local home improvement store and ask for a color match. Apply a small amount of the matched paint to the repaired area and assess the color under different lighting conditions to ensure a perfect match.
Maintaining the Repaired Area
After completing the repairs, it’s essential to maintain the integrity of the repaired area. Avoid placing excessive pressure or weight on the patched sections to prevent future damage. Regularly inspect the repaired area and address any signs of cracking or deterioration promptly to prevent further issues. Additionally, practice good wall maintenance by keeping the walls clean and free from excessive moisture or humidity.
FAQ
How do you fix cracks and holes in walls?
To fix cracks and holes in walls, follow these steps: – Clean the area around the crack or hole. – Use a scraper or putty knife to remove loose debris. – Apply a suitable filler or patching compound to fill the crack or hole. – Smooth the surface with a putty knife or sandpaper. – Allow the filler to dry completely. – Sand the area again if needed for a smooth finish. – Prime the repaired area before painting if necessary.
What filler for cracks in internal walls?
For cracks in internal walls, you can use various fillers, including: – Spackling compound: Suitable for small cracks and holes. – Joint compound: Works well for larger cracks and can be layered for better results. – Setting-type compound: Ideal for wider or deeper cracks as it dries harder and is more durable. – Plaster or gypsum-based fillers: Good for repairing cracks in plaster walls.
How do you fill holes in internal walls?
To fill holes in internal walls, follow these steps: – Clean the area around the hole and remove any loose debris. – Apply a suitable filler, such as spackling compound or joint compound, to the hole. – Use a putty knife to smooth the filler and level it with the surrounding wall surface. – Allow the filler to dry completely. – Sand the filled area lightly for a smooth finish. – Prime the repaired area before painting if necessary.
How do you fix large cracks in interior walls?
Fixing large cracks in interior walls may require additional steps: – Use a scraper or putty knife to widen the crack slightly and remove loose material. – Clean the crack and the surrounding area. – Apply a suitable filler, such as a setting-type compound or plaster-based filler, to the crack. – Press the filler into the crack and smooth it with a putty knife. – Allow the filler to dry completely. – Sand the filled area to achieve a smooth finish. – Prime the repaired area before painting if necessary.
What is the best filler for deep cracks?
For deep cracks, a suitable filler would be a setting-type compound or epoxy-based filler. These fillers have a thicker consistency and can be applied in layers to fill deep cracks effectively. They also dry harder and are more durable, providing long-lasting repairs. It’s important to follow the manufacturer’s instructions when using these fillers and ensure proper drying and sanding between layers for a smooth and seamless finish.
What size crack in wall should I worry about?
The size of the crack in a wall can indicate the severity of the issue. As a general guideline, cracks that are larger than 1/8 inch (3mm) in width or show signs of movement, such as widening or lengthening, may require further evaluation and repair. Additionally, cracks that are accompanied by other symptoms like structural instability, water damage, or foundation issues should be addressed by a professional. It’s best to consult a qualified contractor or structural engineer to assess and determine the cause of the crack and recommend appropriate repair measures.
Conclusion
Thank you for joining us on this journey of uncovering the secrets to Repairing Cracks and Holes in Interior Walls. We hope that this comprehensive guide has provided you with the knowledge and confidence to take on your painting project with ease.
Remember, at Horizon Painting, we’re always here to support you along the way. If you have any questions or require professional assistance, don’t hesitate to contact us. Let’s work together to bring beauty and vibrancy to your home. Reach out to us at Horizon Painting today and let’s make your painting dreams a reality!