Priming and Sealing Interior Surfaces with Stains or Odors
Are you searching for expert guidance on Priming and Sealing Interior Surfaces with Stains or Odors? Look no further! You’ve landed on the right page. This comprehensive guide is tailored to homeowners like you who are eager to transform their living spaces with a fresh coat of paint. So, let’s dive in and discover how priming, sealing and preparing your surface for painting can make your painting project a resounding success.
What is a Primer?
When it comes to painting interior surfaces, primers play a crucial role in achieving a flawless finish. So, what exactly is a primer? Think of it as the foundation of your paint job, a preparatory layer that ensures the surface is ready to receive the paint. Primers are specially formulated coatings designed to promote adhesion, provide a uniform surface, and enhance the longevity of the paint.
Primers serve multiple purposes, including sealing porous surfaces, blocking stains, and promoting better paint coverage. They create a smooth, consistent surface that allows the paint to adhere effectively, resulting in a more durable and visually appealing finish. By applying a primer before painting, you set the stage for a professional-looking outcome.
What is a Sealer?
While primers lay the groundwork, sealers take it a step further by providing an additional layer of protection. Sealing interior surfaces is essential, especially when dealing with stains or odors. Sealers act as a barrier, preventing stains from bleeding through the paint and protecting against moisture, odors, and other contaminants.
Sealers come in various formulations, each catering to specific needs. They can be clear or tinted, and their purpose is to lock in the underlying surface, ensuring that any existing stains or odors are effectively concealed. By applying a sealer, you safeguard your freshly painted surfaces, extending their lifespan and maintaining their pristine appearance.
Differences between Primers and Sealers
While primers and sealers share similarities, it’s important to understand their differences. Primers focus on preparing the surface for painting, promoting adhesion and covering imperfections. They are typically applied before the paint, providing a smooth and consistent base.
On the other hand, sealers primarily aim to protect the painted surface and block stains or odors. They are often applied after the paint, acting as a safeguard against potential issues. While some products may combine primer and sealer properties, it’s essential to choose the right product based on your specific requirements.
Types of Primers and Sealers
Oil-Based Primers
Oil-based primers have long been a popular choice for their exceptional adhesion and stain-blocking properties. These primers are effective at covering water-based stains, smoke damage, and stubborn odors. They create a strong bond with the surface, ensuring excellent paint adhesion and durability.
Oil-based primers are commonly used on surfaces such as wood, metal, and previously painted areas. However, keep in mind that they can take longer to dry and may have a strong odor. Proper ventilation is crucial when working with oil-based primers.
Shellac-Based Primers
Shellac-based primers are known for their fast-drying capabilities and excellent stain-blocking properties. Derived from natural shellac resin, these primers are particularly effective at sealing water stains, smoke damage, and tannin bleed from wood.
Shellac-based primers are versatile and can be used on a variety of surfaces, including wood, plaster, metal, and even painted surfaces. They provide a smooth and consistent base for paint application and are often used in restoration projects due to their exceptional sealing properties.
Water-Based Primers
Water-based primers offer several advantages, including ease of use, quick drying times, and low VOC (volatile organic compound) levels. They are environmentally friendly and emit minimal odor, making them a preferred choice for indoor projects.
Water-based primers are suitable for various surfaces, including drywall, wood, and previously painted surfaces. They provide good adhesion and are effective at blocking common stains and odors. These primers are ideal for homeowners seeking a convenient and user-friendly option without compromising on performance.

Dealing with Stains
Identifying Types of Stains
- Water Stains: Water stains are a common issue, often caused by leaks, condensation, or water damage. They appear as discolored patches on walls or ceilings, with a characteristic brownish or yellowish tint.
- Smoke and Soot Stains: Smoke and soot stains result from fires or excessive indoor smoking. These stains can be challenging to remove, as they tend to cling to surfaces, leaving behind a dark, smudgy residue.
- Grease Stains: Grease stains are typically found in kitchen areas, where cooking oils and splatters can adhere to walls or cabinets. These stains create unsightly, greasy marks that require special attention for effective removal.
- Ink Stains: Ink stains are a common occurrence, especially in home offices or areas where writing or printing takes place. They can be caused by accidental spills or smudges and often leave behind deep-colored marks.
Techniques for Covering Stains
- Surface Preparation: Before attempting to cover stains, it’s crucial to prepare the surface properly. Clean the affected area with a mild detergent to remove any dirt or grime. Rinse thoroughly and allow it to dry completely before proceeding.
- Stain-Sealing Primers: To effectively cover stains, consider using stain-sealing primers. These primers are specifically designed to prevent stains from bleeding through the paint. Apply the primer evenly over the stained area, ensuring full coverage.
- Multiple Coats: In some cases, a single coat of primer may not fully conceal stubborn stains. Applying multiple coats, allowing sufficient drying time between each coat, can help achieve better coverage and ensure the stain remains hidden.
Products for Blocking Stains
- Stain-Blocking Primer: Invest in a high-quality stain-blocking primer that is specifically formulated to block various types of stains. Look for products labeled as stain-sealing or stain-blocking, ensuring they are suitable for the specific stain you are dealing with.
- Specialty Stain-Blocking Paints: In certain situations, using specialty stain-blocking paints may be necessary. These paints are formulated to provide an extra layer of protection against stubborn stains, ensuring they do not resurface.
Addressing Odors
Common Sources of Odors
- Smoke and Fire Damage: Odors resulting from smoke and fire damage can linger long after the incident. These odors can be challenging to eliminate and require specific techniques to ensure they are effectively sealed.
- Pet Odors: Pets can bring joy to our lives, but they can also leave behind unpleasant odors. Urine, dander, and pet-related accidents can contribute to persistent and unwanted smells in our homes.
- Cooking and Food Odors: The aroma of delicious meals can be delightful, but certain cooking and food odors can be overpowering and linger in the house. Fish, spices, and strong-smelling ingredients can leave behind unwanted scents.
Techniques for Sealing Odors
- Proper Ventilation: Ensuring proper ventilation in your home is essential for reducing and eliminating odors. Open windows, use exhaust fans, or install air purifiers to promote fresh airflow and remove stale odors.
- Deep Cleaning: Thoroughly clean surfaces, carpets, curtains, and upholstery to remove any lingering odor-causing particles. Use appropriate cleaning products and techniques to target specific sources of odors effectively.
Products for Blocking Odors
- Odor-Sealing Primers: Utilize odor-sealing primers specifically designed to block and seal odors. These primers create a barrier that prevents odors from permeating through the painted surface, effectively neutralizing the smell.
- Odor-Neutralizing Sprays: Consider using odor-neutralizing sprays to tackle specific areas or localized odors. These sprays work by chemically neutralizing and eliminating the odor molecules, providing a fresh-smelling environment.
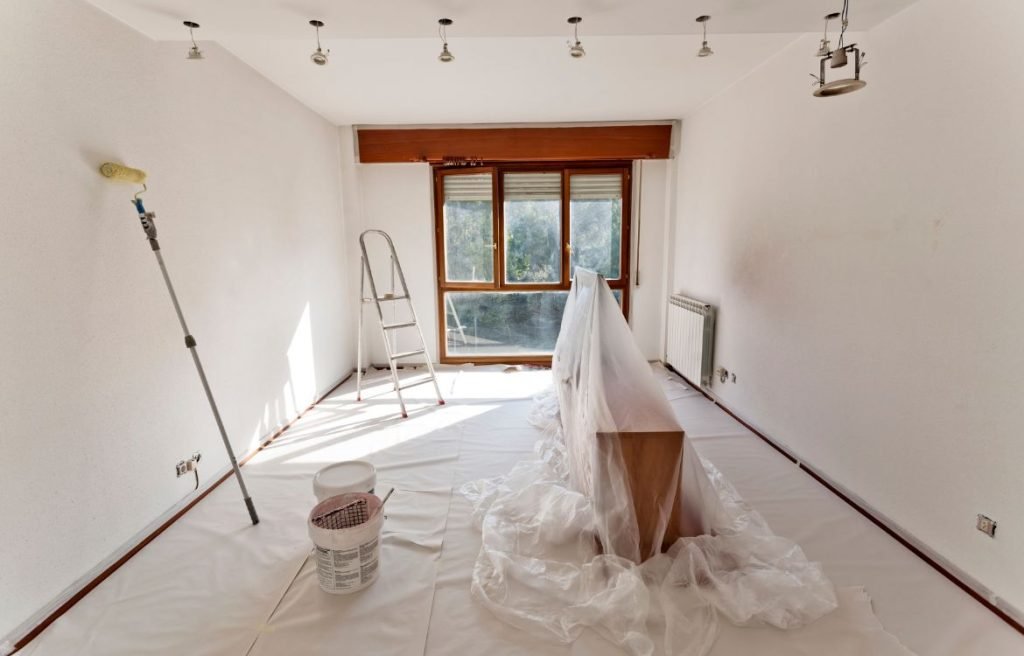
Step-by-Step Guide to Priming and Sealing
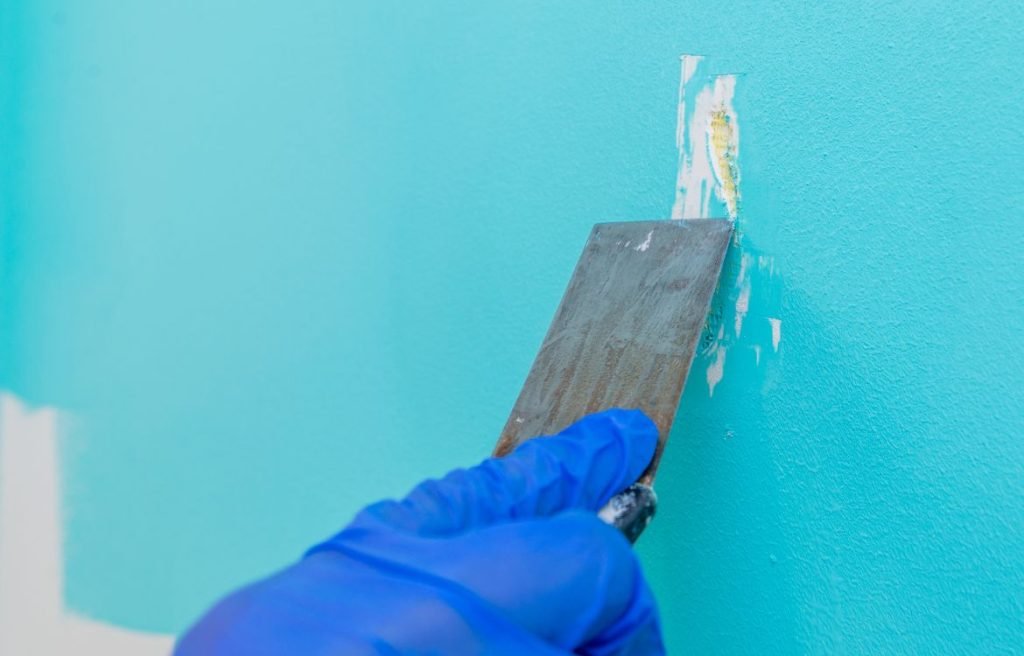
Preparing the Surface
- Clean and Dry: Begin by thoroughly cleaning the surface you plan to prime and seal. Remove any dirt, dust, grease, or loose paint using a mild detergent and water. Rinse the surface and allow it to dry completely before proceeding.
- Sanding: If the surface has any rough areas or imperfections, lightly sand them using fine-grit sandpaper. This step helps smooth out the surface and ensures better adhesion of the primer and sealer.
- Repairing Damaged Areas: Inspect the surface for any cracks, holes, or damaged areas. Fill these imperfections using an appropriate filler or spackling compound. Smooth out the repaired areas and let them dry as per the manufacturer’s instructions.
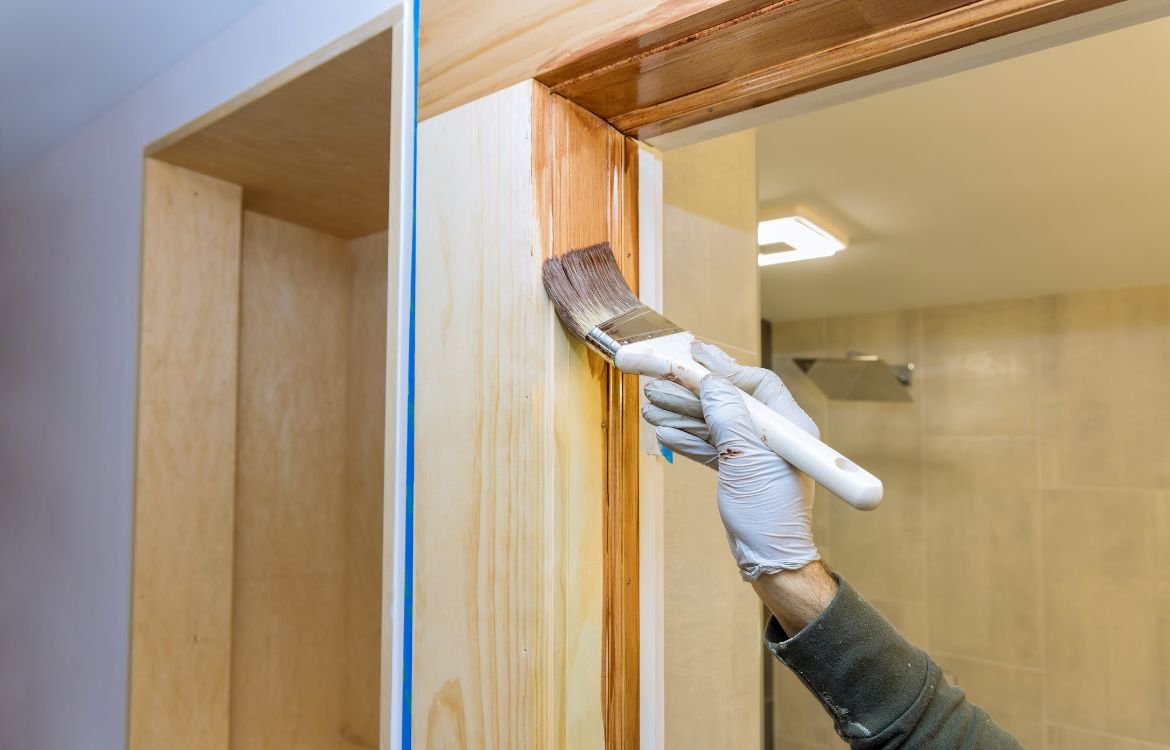
Applying the Primer
- Choose the Right Primer: Select a primer suitable for the surface you’re working on and the type of paint you plan to use. Refer to the manufacturer’s instructions for specific recommendations.
- Stir and Mix: Thoroughly stir the primer to ensure consistent color and proper mixing of any settling pigments or additives.
- Application Technique: Apply the primer using a brush, roller, or sprayer, depending on the size and nature of the surface. Begin with even and smooth strokes, working in small sections at a time.
- Follow Drying Times: Allow the primer to dry completely according to the manufacturer’s instructions. This ensures proper adhesion and prepares the surface for the next steps.
Applying the Sealer
- Select the Appropriate Sealer: Choose a sealer that is compatible with the surface and the specific purpose you’re addressing, such as stain-blocking or odor-sealing.
- Mix and Prepare: If required, thoroughly mix the sealer according to the manufacturer’s instructions. Some sealers may need stirring or shaking before use.
- Application Technique: Apply the sealer evenly and smoothly, using the appropriate tools such as brushes, rollers, or sprayers. Follow the recommended coverage and drying times specified by the manufacturer.
- Multiple Coats: Depending on the severity of the stains or odors, multiple coats of sealer may be necessary. Apply additional coats as needed, ensuring proper drying time between each application.
Post-Application Tips
- Inspection: After the primer and sealer have dried completely, inspect the surface for any missed spots, unevenness, or areas that may require touch-ups.
- Sanding (Optional): If desired, lightly sand the primed and sealed surface to achieve a smoother finish before proceeding with the final paint application.
- Follow Paint Instructions: Refer to the instructions provided by the paint manufacturer for the recommended application techniques, drying times, and any additional steps to achieve the desired finish.
Safety Measures and Best Practices
Ventilation and Protective Equipment
- Adequate Ventilation: Ensure proper ventilation in the area where you’re working. Open windows, use fans, or work in well-ventilated spaces to minimize the inhalation of fumes and promote fresh air circulation.
- Protective Equipment: Wear appropriate safety gear, including goggles, gloves, and a respirator, to protect yourself from potential harmful effects of the primer, sealer, and any associated chemicals.
Safe Disposal of Materials
- Follow Local Regulations: Dispose of any unused or leftover primer, sealer, or related materials in accordance with local regulations. Check with your municipality for specific guidelines on hazardous waste disposal.
- Proper Storage: Store any remaining primer, sealer, or associated chemicals in their original containers, tightly sealed, and in a safe place out of reach of children and pets.
FAQ
How do you reduce moisture and mold?
To reduce moisture and mold, ensure proper ventilation in the affected areas, use dehumidifiers to control humidity levels, fix any water leaks or sources of moisture, promote air circulation, and keep surfaces dry. Regularly clean and maintain areas prone to moisture, such as bathrooms and basements, and promptly address any mold growth by cleaning it thoroughly or seeking professional assistance.
What types of material are most likely to develop mold when exposed to moisture?
Materials that are porous, organic, or prone to retaining moisture are most likely to develop mold when exposed to moisture. This includes materials such as wood, drywall, carpet, insulation, fabrics, paper, and cardboard. These materials provide a suitable environment for mold growth if they remain damp or wet for extended periods.
How do you address mold exposure?
If you suspect mold exposure, it is important to take appropriate measures. First, identify and address the source of the mold, such as water leaks or excessive moisture. Then, consider hiring a professional mold remediation company to safely remove the mold and mitigate the damage. Additionally, consult with a healthcare professional if you experience health symptoms related to mold exposure.
How do professionals deal with mold?
Professionals dealing with mold follow a systematic approach. They begin by identifying the source of moisture and fixing it. Then, they establish containment measures to prevent mold spores from spreading. The affected areas are thoroughly cleaned and treated using specialized equipment and cleaning agents. Finally, professionals conduct clearance testing to ensure the mold issue has been successfully resolved.
How do you get rid of surface mold?
To get rid of surface mold, use a solution of water and detergent or a commercial mold cleaner. Scrub the affected area with a brush or sponge, making sure to remove all visible mold. Rinse the area with clean water and dry it thoroughly. It is important to identify and address the underlying cause of mold growth to prevent its recurrence.
What is the best humidity level to prevent mold?
To prevent mold growth, maintain indoor humidity levels below 60% ideally between 30% to 50%. Use a hygrometer to measure humidity and utilize dehumidifiers or air conditioners in humid areas. Proper ventilation and air circulation also help in reducing moisture and maintaining a healthy humidity level.
What material is mold proof?
There is no material that is entirely mold-proof, as mold can grow on any organic material when conditions are suitable. However, certain materials like glass, metal, and plastic are less prone to mold growth as they are non-porous and do not provide a suitable food source for mold. Proper maintenance and moisture control are still necessary to prevent mold growth on these materials.
What kills mold spores in the air?
To kill mold spores in the air, use air purifiers or high-efficiency particulate air (HEPA) filters. These devices can capture and filter out airborne mold spores, reducing their concentration in the air. It is important to address the underlying cause of mold growth and maintain proper moisture control to prevent the recurrence of mold spores in the indoor environment.
Conclusion
Thank you for taking the time to explore our in-depth content on Priming and Sealing Interior Surfaces with Stains or Odors. We hope you found this guide informative and inspiring as you embark on your painting journey.
Remember, at Horizon Painting, we’re always here to assist you every step of the way. Whether you have questions, need further guidance, or seek professional painting services, don’t hesitate to reach out to our team of experts.