Removing Old Paint and Preparing Interior Surfaces for Repainting
Are you ready to transform your home into a vibrant haven? If you’ve been searching for expert guidance on Removing Old Paint and Preparing Interior Surfaces for Repainting, you’ve come to the right place. At Horizon Painting, we understand the importance of a fresh and flawless finish that can breathe new life into your living spaces. In this comprehensive guide, we’ll take you through the step-by-step process of preparing surface for interior painting, providing valuable insights, tips, and techniques to ensure a successful repainting project. Get ready to unleash your inner DIY enthusiast and create a home that truly reflects your style and personality.
Removing Old Paint by Sanding
- Sanding is a popular method for removing old paint from interior surfaces. It involves using sandpaper or a power sander to gradually eliminate the layers of paint. Begin by ensuring the surface is clean and free from any loose debris. Use coarse-grit sandpaper to remove the majority of the paint, gradually transitioning to finer-grit sandpaper for a smoother finish. Sand in a circular or back-and-forth motion, being careful not to apply excessive pressure that could damage the surface. Once the old paint has been removed, thoroughly clean the area to remove any dust generated during the sanding process.
- When to Use Sanding: Sanding is most effective when dealing with relatively small areas or surfaces with intricate details, such as moldings or trim. It is also suitable for surfaces where the old paint is in good condition, without extensive peeling or flaking. Sanding allows for precise control and is an excellent option for achieving a smooth and even surface before repainting.
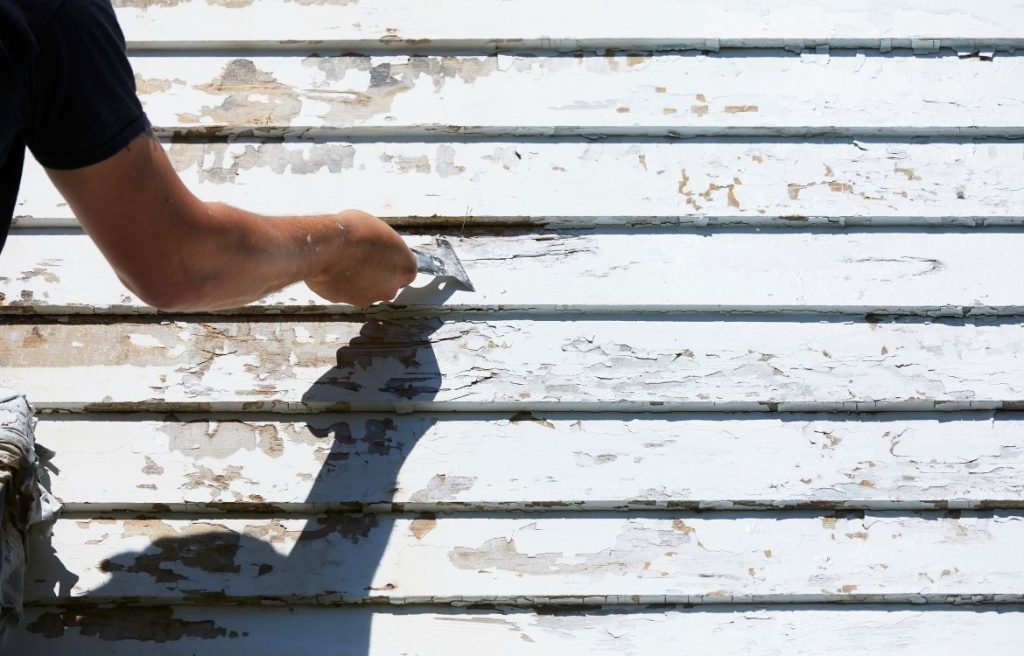
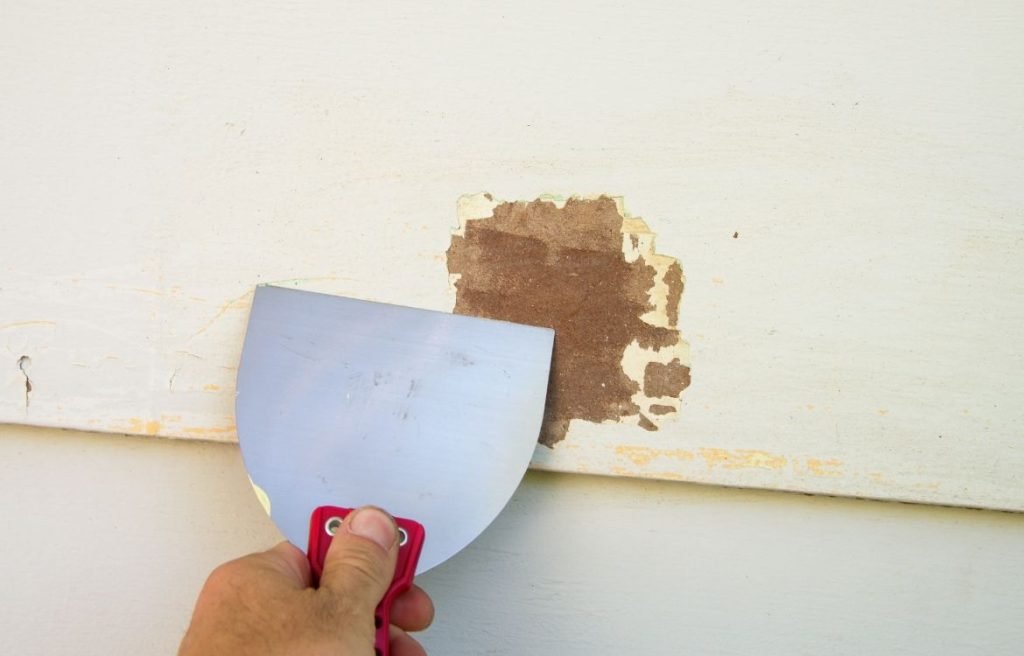
Removing Old Paint by Scraping
- Scraping is another commonly used method for removing old paint. It involves using a paint scraper or putty knife to physically scrape away the paint layers from the surface. Begin by holding the scraper at a slight angle and applying firm but controlled pressure to lift and remove the paint. Work in small sections, and be cautious not to gouge or damage the underlying surface. Once the majority of the paint has been scraped off, use sandpaper or a sanding block to smooth the surface further.
- When to Use Scraping: Scraping is particularly effective for areas where the old paint is peeling, cracking, or flaking. It allows for targeted removal of loose or damaged paint, revealing a stable base for repainting. Scraping is a suitable method for larger areas such as walls or ceilings, as it enables more efficient paint removal compared to sanding.
Removing Old Paint by Chemical Stripping
- Chemical stripping involves using paint-removing chemicals to dissolve and loosen the old paint layers. Begin by applying the stripping agent to the surface, following the manufacturer’s instructions carefully. Allow the chemical to penetrate the paint layers, typically for a specified amount of time. Once the paint has softened, use a scraper or wire brush to gently remove the dissolved paint. Afterward, clean the surface thoroughly to remove any residue from the stripping agent.
- When to Use Chemical Stripping: Chemical stripping is beneficial for surfaces with multiple layers of paint or surfaces where scraping or sanding may not be suitable or efficient. It is a useful method for intricate or delicate surfaces, such as furniture or detailed woodwork. Chemical stripping allows for the removal of paint from hard-to-reach areas and can be an effective solution for stubborn or stubbornly adhered paint.
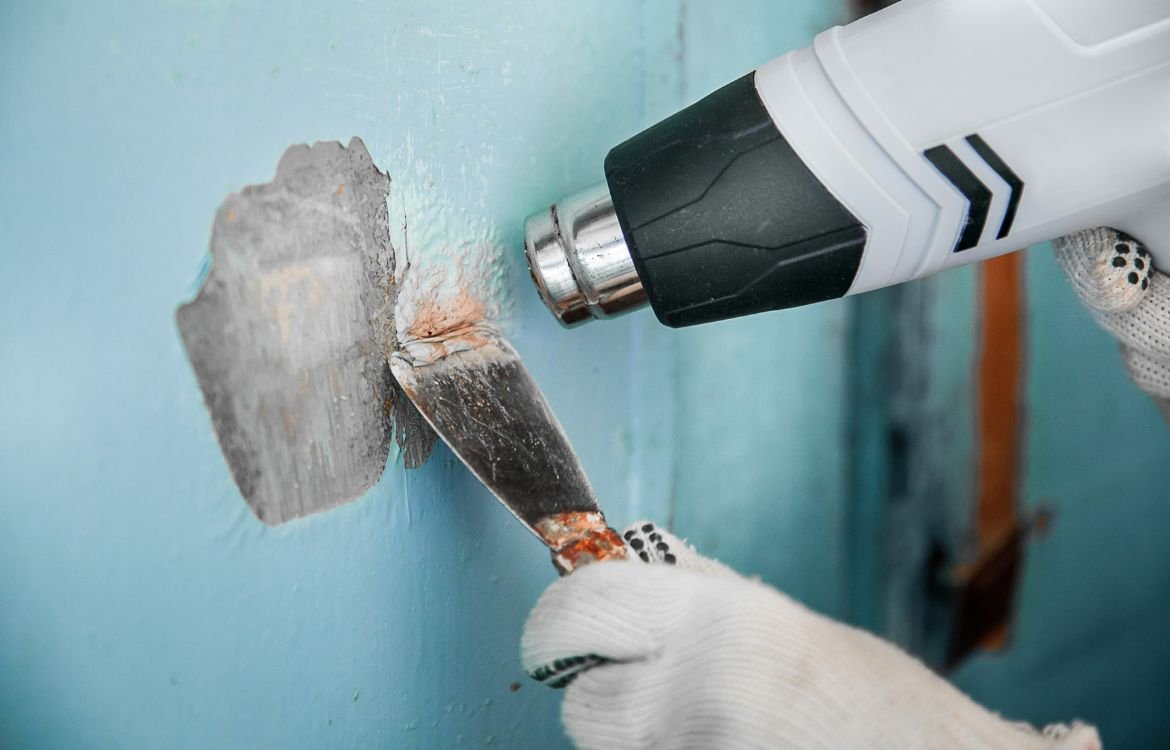
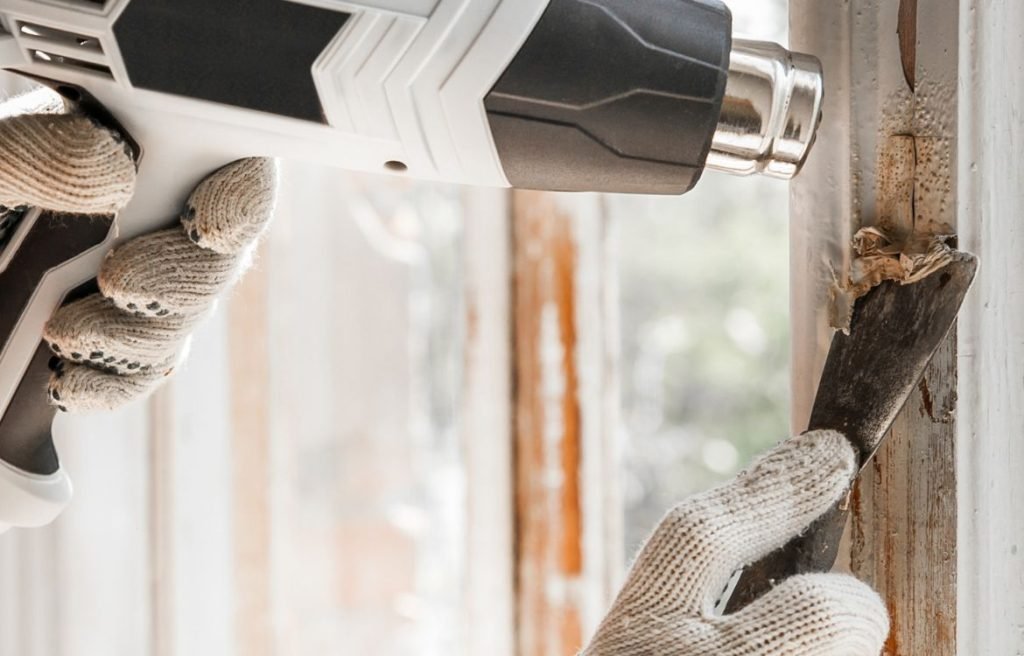
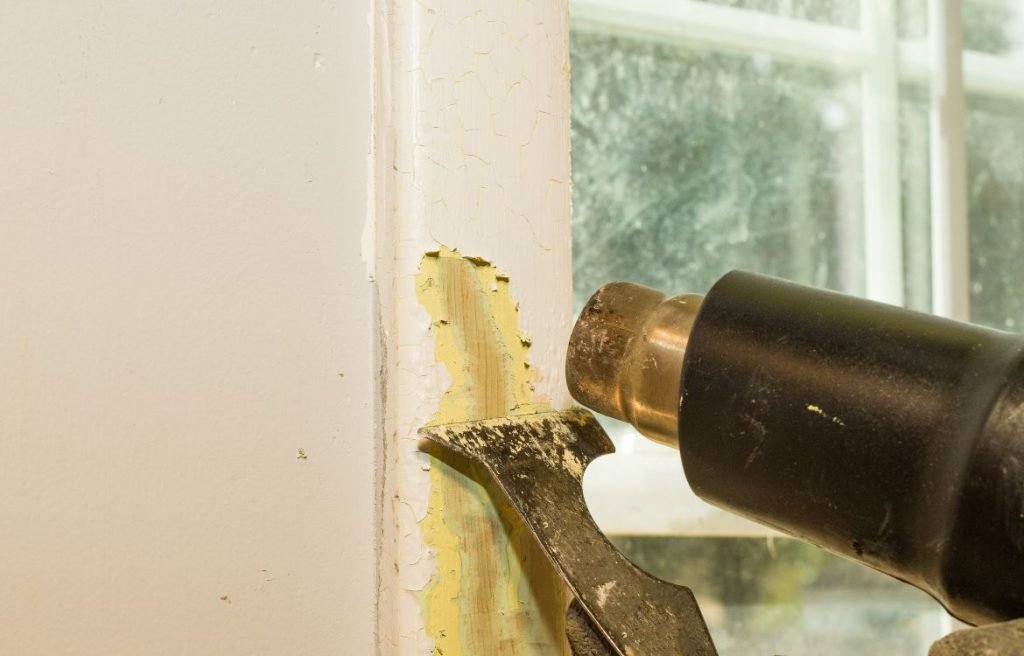
Removing Old Paint by Heat Gun
- Using a heat gun involves applying controlled heat to the old paint layers, causing them to soften and blister. Begin by holding the heat gun a few inches away from the painted surface and moving it slowly across the area. As the paint begins to bubble, use a scraper or putty knife to gently scrape away the softened paint. Be cautious not to overheat the surface or create smoke, as excessive heat can damage certain materials. Once the paint has been removed, clean the surface to remove any residue.
- When to Use a Heat Gun: A heat gun is effective for removing old paint from surfaces with intricate details, such as ornate woodwork or metal objects. It is also useful for removing multiple layers of paint or paint that is stubbornly adhered. However, it requires caution and precision to avoid scorching the surface or causing damage. Proper ventilation and protective gear are essential when using a heat gun.
Glue Paint/Wet Wall Paint Removal
- Process of Glue Paint/Wet Wall Paint Removal: Glue paint or wet wall paint can present a unique challenge when it comes to removal. Begin by moistening the painted surface with warm water or a mixture of water and mild detergent. Allow the water to penetrate the glue paint, softening it in the process. Use a scraper or putty knife to gently scrape away the softened paint. Be cautious not to damage the underlying surface. Once the glue paint has been removed, thoroughly clean the surface to remove any residue.
- When to Use Glue Paint/Wet Wall Paint Removal: Glue paint or wet wall paint is commonly found in older homes or areas where wallpaper has been removed. This type of paint can be particularly stubborn and resistant to traditional paint removal methods. The moistening technique helps to soften and loosen the glue paint, making it easier to scrape away. It is essential to take precautions and test the moisture on a small, inconspicuous area before applying it to the entire surface.
Water-Based Wall Paint Preparation
- Process of Water-Based Wall Paint Preparation: Preparing a surface previously painted with water-based wall paint requires specific steps to ensure proper adhesion and a smooth finish. Start by cleaning the surface using a mild detergent and water solution to remove any dirt, grease, or grime. Rinse thoroughly and allow the surface to dry completely. Next, lightly sand the walls to create a slightly roughened texture, promoting better paint adhesion. Finally, inspect the walls for any imperfections or damage and address them with suitable patching materials or filler. Sand again if necessary to achieve a smooth, even surface.
- When to Use Water-Based Wall Paint Preparation: Water-based wall paint is commonly used in interior applications due to its low odor and ease of cleanup. When repainting over water-based paint, proper preparation ensures optimal results. By cleaning the surface, sanding lightly, and addressing any imperfections, you create an ideal canvas for the new paint to adhere to. This preparation method applies to surfaces where the existing water-based paint is in good condition and requires minimal repairs.
Preparing the Surface for Repainting
Cleaning the Surface:
Before applying a fresh coat of paint, it’s crucial to clean the surface thoroughly. Use a mild detergent or surface cleaner diluted in water to remove dirt, dust, and grease. Scrub gently with a sponge or soft cloth, paying extra attention to areas prone to buildup, such as kitchen walls or bathroom surfaces. Rinse the cleaned area with clean water and allow it to dry completely before proceeding to the next step.
Repairing Damage or Cracks:
Inspect the surface for any damage, cracks, or imperfections. Use a suitable patching material or filler, such as spackling compound or joint compound, to repair these areas. Apply the filler with a putty knife, ensuring a smooth and even application. Once the filler has dried, sand the repaired areas lightly to create a seamless transition between the patched spots and the rest of the surface.
Priming the Surface:
Priming is an essential step in preparing the surface for repainting. It helps to create a uniform base, improves paint adhesion, and enhances the longevity of the new paint. Choose a primer that suits the surface material and the type of paint you will be using. Apply the primer evenly using a brush or roller, following the manufacturer’s instructions. Allow the primer to dry completely before proceeding with the paint application.
Tips and Tricks for Removing Old Paint
Safety Measures:
- Prioritize your safety throughout the paint removal process. Wear protective gear, including safety goggles, a dust mask or respirator, gloves, and protective clothing, to minimize exposure to potentially harmful particles.
- Follow the manufacturer’s instructions for any chemical strippers or paint removal products you use. Be aware of any hazards associated with the products and take necessary precautions.
- Avoid using open flames or excessive heat sources near flammable materials or when using a heat gun. Use heat guns with caution, keeping them at a safe distance from the surface and being mindful of overheating.
Working in a Well-Ventilated Area:
- Ensure proper ventilation when removing old paint, especially when using chemical strippers or solvents. Open windows and doors, or use fans or exhaust systems to improve airflow and minimize exposure to fumes.
- Consider setting up a temporary work area outdoors, if feasible, to further enhance ventilation and reduce the concentration of fumes indoors.

Testing for Lead Paint:
- If you live in an older home (typically built before 1978), there is a possibility of lead-based paint. Before undertaking any paint removal project, it’s important to test for the presence of lead.
- Use a lead test kit, available at hardware stores, to determine if lead is present. Follow the instructions carefully and test multiple areas, including layers of paint.
- If lead is detected, it’s advisable to seek professional assistance for safe lead paint removal or encapsulation.
Using a Paint Stripper for Difficult Surfaces:
- When dealing with intricate or difficult-to-reach surfaces, consider using a paint stripper. Paint strippers can effectively dissolve multiple layers of paint, making the removal process easier.
- Follow the instructions provided by the manufacturer for the specific paint stripper you choose. Apply the product evenly to the surface and allow it to penetrate the layers of paint as directed. Use a scraper or brush to remove the softened paint.
- Be cautious when working with paint strippers, as they often contain strong chemicals. Take appropriate safety measures, including wearing gloves and working in a well-ventilated area.
Sanding Between Coats:
- When applying multiple coats of paint, consider sanding between each coat. Sanding helps to create a smooth and even surface, ensuring better adhesion and a professional finish.
- Use fine-grit sandpaper or a sanding block to lightly sand the painted surface after each coat has dried. This will help remove any imperfections, such as brush strokes or drips, and create a smooth canvas for the next coat.
- After sanding, wipe the surface with a clean, damp cloth to remove any sanding dust before applying the next coat of paint.
FAQ
How do you reduce moisture and mold?
To reduce moisture and mold, ensure proper ventilation in the affected areas, use dehumidifiers to control humidity levels, fix any water leaks or sources of moisture, promote air circulation, and keep surfaces dry. Regularly clean and maintain areas prone to moisture, such as bathrooms and basements, and promptly address any mold growth by cleaning it thoroughly or seeking professional assistance.
What types of material are most likely to develop mold when exposed to moisture?
Materials that are porous, organic, or prone to retaining moisture are most likely to develop mold when exposed to moisture. This includes materials such as wood, drywall, carpet, insulation, fabrics, paper, and cardboard. These materials provide a suitable environment for mold growth if they remain damp or wet for extended periods.
How do you address mold exposure?
If you suspect mold exposure, it is important to take appropriate measures. First, identify and address the source of the mold, such as water leaks or excessive moisture. Then, consider hiring a professional mold remediation company to safely remove the mold and mitigate the damage. Additionally, consult with a healthcare professional if you experience health symptoms related to mold exposure.
How do professionals deal with mold?
Professionals dealing with mold follow a systematic approach. They begin by identifying the source of moisture and fixing it. Then, they establish containment measures to prevent mold spores from spreading. The affected areas are thoroughly cleaned and treated using specialized equipment and cleaning agents. Finally, professionals conduct clearance testing to ensure the mold issue has been successfully resolved.
How do you get rid of surface mold?
To get rid of surface mold, use a solution of water and detergent or a commercial mold cleaner. Scrub the affected area with a brush or sponge, making sure to remove all visible mold. Rinse the area with clean water and dry it thoroughly. It is important to identify and address the underlying cause of mold growth to prevent its recurrence.
What is the best humidity level to prevent mold?
To prevent mold growth, maintain indoor humidity levels below 60% ideally between 30% to 50%. Use a hygrometer to measure humidity and utilize dehumidifiers or air conditioners in humid areas. Proper ventilation and air circulation also help in reducing moisture and maintaining a healthy humidity level.
What material is mold proof?
There is no material that is entirely mold-proof, as mold can grow on any organic material when conditions are suitable. However, certain materials like glass, metal, and plastic are less prone to mold growth as they are non-porous and do not provide a suitable food source for mold. Proper maintenance and moisture control are still necessary to prevent mold growth on these materials.
What kills mold spores in the air?
To kill mold spores in the air, use air purifiers or high-efficiency particulate air (HEPA) filters. These devices can capture and filter out airborne mold spores, reducing their concentration in the air. It is important to address the underlying cause of mold growth and maintain proper moisture control to prevent the recurrence of mold spores in the indoor environment.
Conclusion
Thank you for joining us on this journey of Removing Old Paint and Preparing Interior Surfaces for Repainting. We hope this guide has equipped you with the knowledge and confidence to embark on your painting project with ease.
At Horizon Painting, we’re passionate about helping homeowners like you achieve their vision of a beautiful home. If you have any further questions or need professional assistance, don’t hesitate to reach out to us. Our experienced team is here to provide personalized advice and top-quality painting services. Contact us today and let’s make your dream home a reality.