Assessing the Condition of Interior Surfaces before Painting
Welcome! Are you looking for expert guidance on how to assess the condition of interior surfaces before painting? You’ve come to the right place.
In this comprehensive guide, we will equip you with the knowledge and insights you need to achieve a flawless paint job that transforms your home. Whether you’re a seasoned DIY enthusiast or a first-time painter, understanding the importance of assessing and preparing interior surfaces is crucial for a successful painting project.
So, let’s dive in and discover the key steps and considerations for assessing the condition of your interior surfaces before picking up that paintbrush.
Introduction
Assessing the condition of interior surfaces before painting is a crucial step in achieving a successful and long-lasting paint job. It goes beyond just applying a fresh coat of paint; it ensures that the surfaces are properly prepared and optimized for optimal adhesion and durability. In this article, we will delve into the importance of assessing interior surfaces, providing you with an understanding of why this step is vital for achieving the desired results.
Understanding Surface Preparation
Significance of Proper Surface Preparation
Proper surface preparation is the foundation of a successful paint job. It sets the stage for optimal paint adhesion, durability, and a flawless finish. Many homeowners may underestimate the importance of this step, but neglecting surface preparation can lead to paint failure, unsightly results, and the need for premature repainting.
When you take the time to prepare the surfaces adequately, you create a clean, smooth, and well-conditioned canvas for your paint. This allows the paint to adhere properly, preventing issues like peeling, cracking, or bubbling. Additionally, proper surface preparation ensures that any existing imperfections or damage are addressed, giving you a more polished and professional end result.
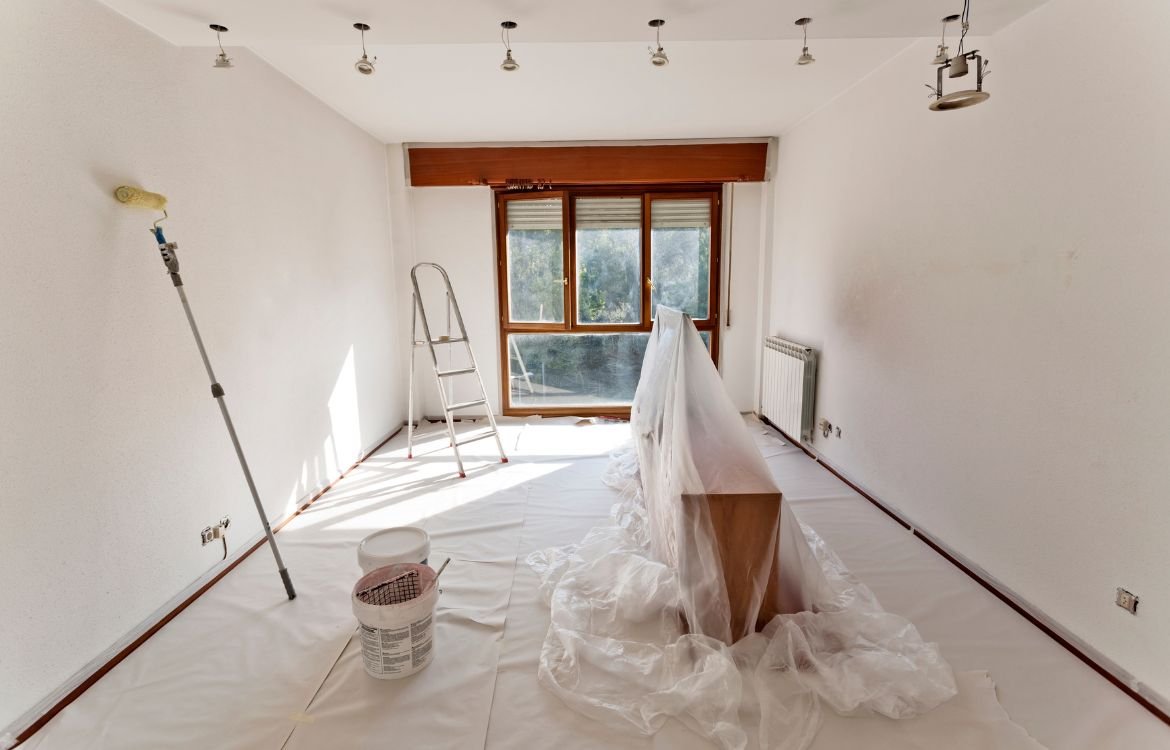
How to Prepare the Surface for Painting
To prepare the surface for painting, several key steps need to be followed:
- Assessing the Condition of Interior Surfaces before Painting: Start by thoroughly cleaning the surfaces you plan to paint. Remove any dirt, dust, grease, or grime that may hinder paint adhesion. Use mild detergent, water, and a sponge or cloth to clean the surfaces. Allow them to dry completely before proceeding.
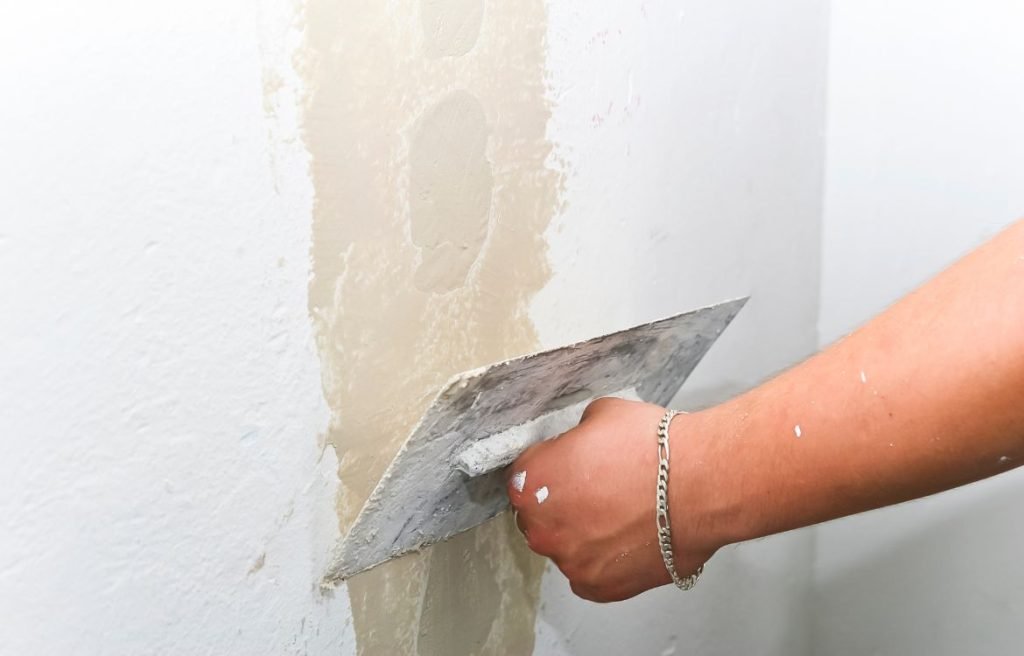
- Repairing Cracks and Holes: Inspect the surfaces for any cracks, chips, or holes. Fill them using an appropriate filler or patching compound. Smooth the surface with sandpaper after the filler has dried, ensuring a level and even finish.
- Removing Old Paint or Wallpaper: If there is existing paint or wallpaper that is peeling, flaking, or in poor condition, it is essential to remove it before painting. Use appropriate methods such as scraping, sanding, or applying a chemical paint stripper. Follow the manufacturer’s instructions and take necessary safety precautions during this process.
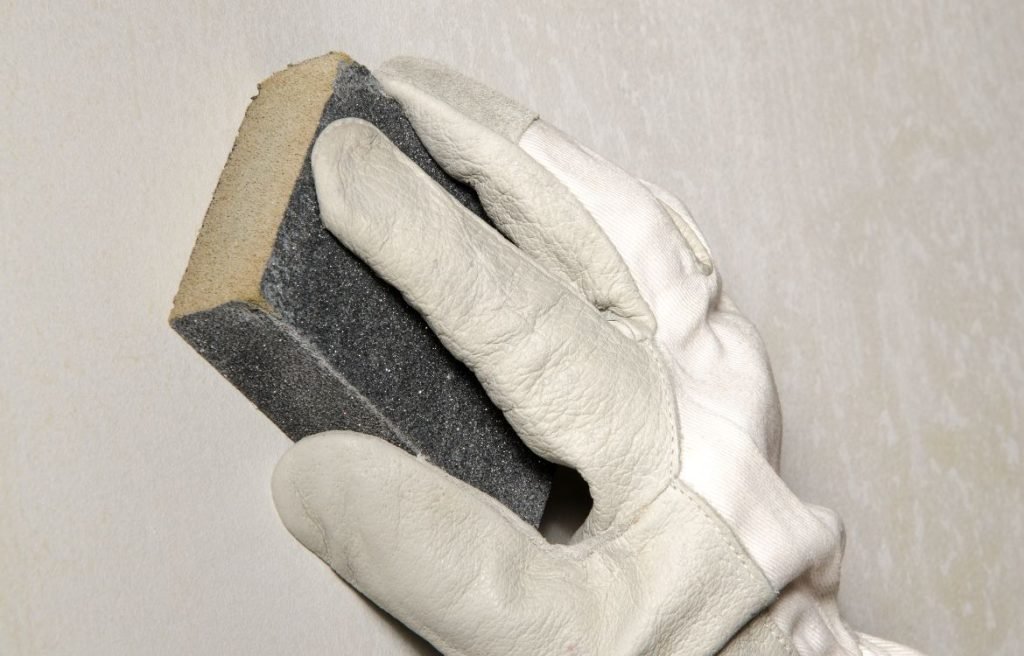
- Smoothing Rough Surfaces: Sand down any rough or uneven surfaces to create a smooth base for your paint. Use sandpaper or a sanding block to gently even out the surfaces, paying attention to areas with imperfections or high spots.
Benefits of Assessing the Surface Condition before Painting
Assessing the surface condition before painting offers numerous benefits:
- Optimal Paint Adhesion: By assessing the surface condition, you can identify potential barriers to paint adhesion, such as dirt, grime, or existing damage. Addressing these issues ensures that the paint bonds effectively to the surface, leading to better adhesion and a longer-lasting finish.
- Improved Durability: Surfaces that are properly assessed and prepared have a greater ability to withstand daily wear and tear. By addressing cracks, holes, or other imperfections, you create a more durable and resilient surface that can withstand the test of time.
- Enhanced Aesthetics: When you assess and prepare the surfaces before painting, you can achieve a smoother and more even paint application. This results in a visually appealing finish with fewer blemishes or inconsistencies.
- Cost Savings: By assessing the surface condition beforehand, you can identify and address underlying issues early on. This can prevent the need for costly repairs or premature repainting down the line, saving you both time and money.

Visual Inspection of Interior Surfaces
Visual inspection is a fundamental step in assessing the condition of interior surfaces before painting. It allows you to identify surface imperfections, potential issues, and areas that require specific attention. By conducting a thorough visual inspection, you can address these concerns and ensure that the surfaces are properly prepared for a successful paint job.
Tools for Visual Assessment
To perform an effective visual assessment, it’s helpful to have a few tools on hand:
- Flashlight: A flashlight can illuminate dimly lit areas and reveal details that may be missed with normal lighting conditions. It allows you to examine surfaces more closely, especially in corners, crevices, or areas with limited natural light.
- Magnifying Glass: A magnifying glass can be useful for inspecting small cracks, intricate details, or areas that require closer scrutiny. It helps you identify fine surface imperfections that may not be apparent to the naked eye.
- Mirror: A handheld mirror enables you to inspect hard-to-reach areas, such as behind furniture, cabinets, or fixtures. It helps you see the surfaces from different angles, ensuring a comprehensive assessment.
Assessing Surface Imperfections
During the visual inspection, pay attention to the following common surface imperfections:
- Cracks and Chips: Look for any cracks or chips in the surfaces, particularly along walls, ceilings, or corners. These can indicate structural issues or movement within the building. Note the size, location, and severity of the cracks to determine the necessary repairs.
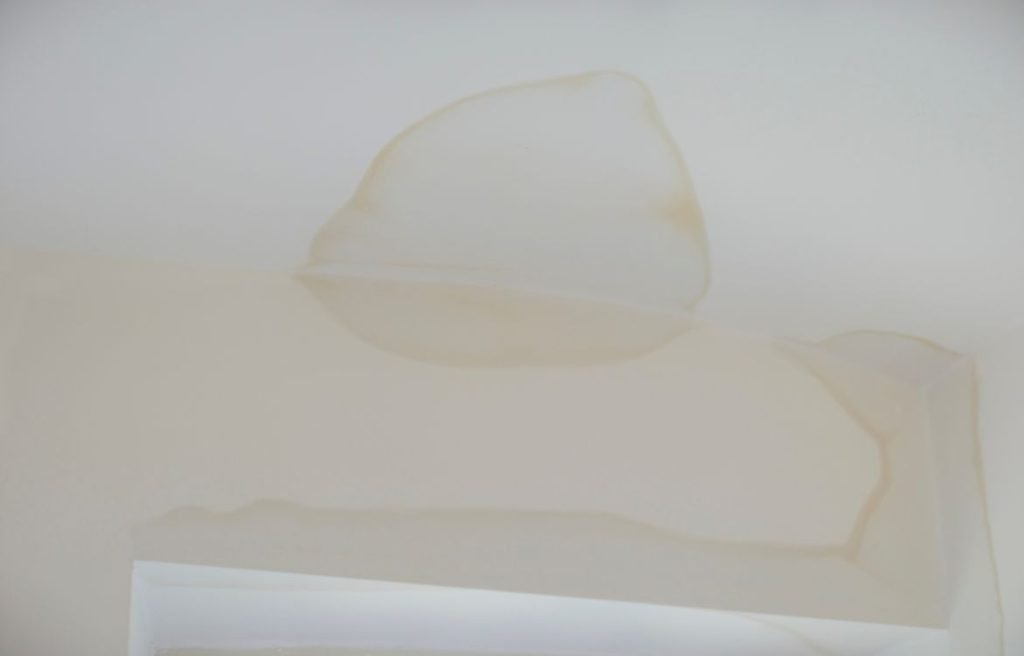
- Water Damage or Stains: Check for signs of water damage, such as discoloration, stains, or warped surfaces. Water damage can compromise the integrity of the paint and lead to further issues like mold growth or weakened surfaces. Identify the source of the water damage and address it before proceeding with painting.
- Peeling or Flaking Paint: Examine the surfaces for areas where the paint is peeling or flaking. This indicates poor adhesion and requires proper surface preparation, including removal of loose paint and application of appropriate primers or sealers.
- Nail Pops or Surface Irregularities: Look for any nail pops, surface irregularities, or uneven textures. These can create an uneven surface and affect the final paint appearance. Make note of areas that require additional sanding, filling, or smoothing to achieve a uniform surface.
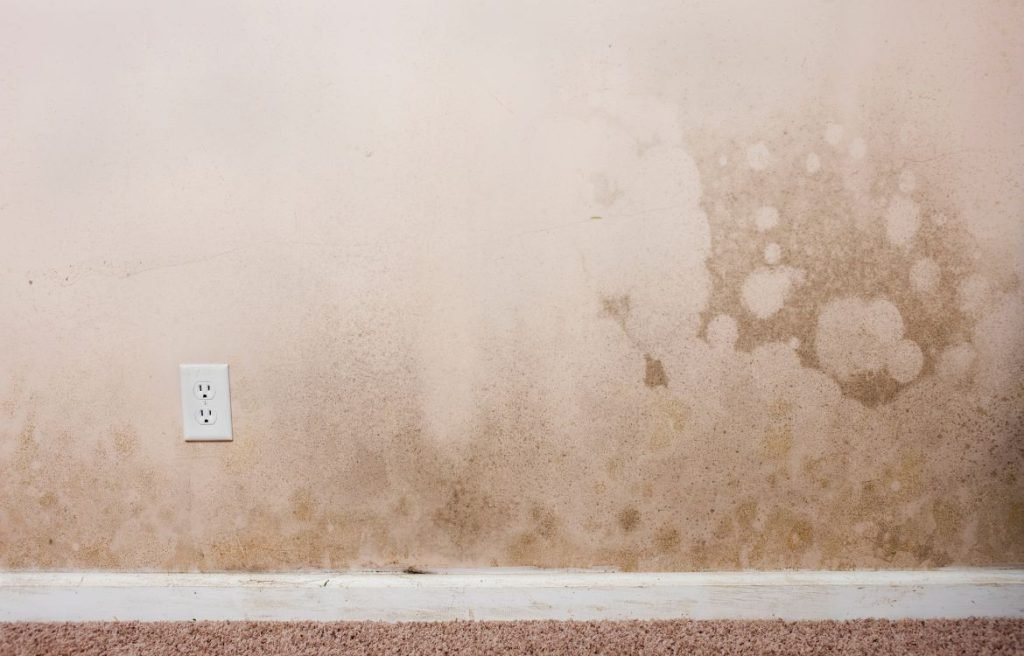
- Mold or Mildew Growth: Check for signs of mold or mildew, especially in areas with high moisture, such as bathrooms or basements. Mold or mildew growth can affect both the aesthetics and health of the indoor environment. Address any mold or mildew issues before painting to prevent further spreading.
- Discoloration or Fading: Observe any discoloration or fading of the surfaces, which may be caused by exposure to sunlight, chemicals, or aging. Discoloration can affect the paint’s color accuracy and consistency. Evaluate the extent of discoloration and consider appropriate color correction techniques.
Testing the Surface
Types of Surface Tests
To ensure a thorough assessment of the condition of interior surfaces before painting, various tests can be conducted:
- Adhesion Test: An adhesion test determines the bond strength between the existing surface and the paint. It helps identify areas where the paint may not adhere properly, leading to potential issues such as peeling or flaking.
- Moisture Test: A moisture test measures the moisture content within the surfaces. Excessive moisture can affect paint adhesion and lead to problems like paint bubbling or mold growth.
- Lead Paint Test: If your home was built before 1978, it’s essential to check for the presence of lead paint. Lead paint poses health risks, especially when disturbed during painting or renovation projects.
- pH Test: A pH test measures the acidity or alkalinity of the surface. It helps determine if any special primers or surface treatments are needed based on the pH level.
Steps for Conducting Surface Tests
- Adhesion Test Procedure:
- Select an inconspicuous area on the surface.
- Clean the selected area thoroughly to remove any dirt, grease, or loose paint.
- Score a small “X” or grid pattern on the surface using a sharp knife or blade.
- Apply a piece of adhesive tape firmly over the scored area.
- Gently peel off the tape and observe. If the tape lifts off any paint or coating, it indicates poor adhesion.
- Moisture Testing Methods:
- Use a moisture meter designed for building materials. Follow the manufacturer’s instructions to obtain accurate moisture readings from the surface.
- Alternatively, conduct a plastic sheet test by taping a plastic sheet tightly to the surface for 24 hours. Check for condensation or moisture buildup on the inside of the plastic sheet after removal.
- Lead Paint Testing Techniques:
- Use a lead paint testing kit available commercially. Follow the instructions provided with the kit to test for the presence of lead in the paint.
- Alternatively, consult a certified professional for more accurate lead paint testing using specialized equipment.
- pH Testing Process:
- Collect a small sample of the surface material.
- Use a pH testing kit or pH testing strips specifically designed for surface testing.
- Follow the instructions provided with the kit or strips to test the pH level of the sample.
- Determine if the pH level requires any additional surface treatments or specific primers based on the recommended pH range for the paint product being used.
By conducting these surface tests, you can gather valuable information about the condition of the surfaces and make informed decisions regarding necessary surface treatments, primers, or additional preparation steps.
Identifying Surface Materials
Common Interior Surface Materials
When assessing the condition of interior surfaces before painting, it’s important to identify the specific materials present. Here are some common interior surface materials you may encounter:
- Drywall: Drywall, also known as gypsum board or plasterboard, is a popular material used for interior walls and ceilings. It consists of a gypsum core sandwiched between paper facings.
- Plaster: Plaster is a traditional wall and ceiling material made from a mixture of lime, sand, and water. It provides a smooth and durable surface when properly applied.
- Wood: Wood surfaces can be found in various forms, such as paneling, trim, doors, or cabinets. Different wood species and finishes may require specific preparation techniques before painting.
- Masonry: Masonry surfaces include materials like brick, concrete, or stone. These surfaces can present unique challenges due to their porous nature and varying textures.
Assessing Specific Materials
When assessing the condition of specific surface materials, consider the following:
- Drywall Condition Evaluation:
- Check for any visible damage, such as cracks, dents, or holes in the drywall.
- Assess the overall smoothness and levelness of the surface.
- Look for signs of water damage, including stains or warping.
- Plaster Surface Inspection:
- Examine the plaster for cracks, chips, or areas of loose or crumbling plaster.
- Evaluate the surface for unevenness, bulges, or signs of previous repairs.
- Check for any water stains or discoloration that may indicate underlying issues.
- Wood Surface Assessment:
- Inspect the wood surfaces for signs of rot, decay, or insect damage.
- Look for any warping, splitting, or peeling of the wood.
- Assess the smoothness and integrity of any existing finishes or coatings.
- Masonry Surface Analysis:
- Examine the masonry surface for cracks, chips, or efflorescence (white powdery deposits).
- Assess the texture and porosity of the surface, as this will affect paint adhesion.
- Look for signs of moisture penetration or staining on the masonry.
Addressing Surface Issues
Dealing with Cracks and Holes:
When assessing the condition of interior surfaces before painting, it’s crucial to address any cracks or holes present. Here are steps to deal with these issues:
- Clean the affected area by removing any loose debris or old paint.
- Fill small cracks with a high-quality spackling compound or patching compound using a putty knife. Smooth the surface evenly and let it dry.
- For larger cracks or holes, use a joint compound or plaster to fill the gaps. Apply multiple thin layers, allowing each layer to dry before applying the next. Sand the patched area until it blends seamlessly with the surrounding surface.
Resolving Water Damage or Stains:
Water damage or stains on interior surfaces can compromise the paint’s adhesion and overall appearance. Here’s how to address them:
- Identify and fix the source of water intrusion, such as a leaky pipe or roof, before addressing the stains.
- Clean the stained area using a mild detergent or a solution of water and vinegar to remove any dirt or discoloration.
- If the stains persist, apply a stain-blocking primer to prevent them from bleeding through the new paint. Follow the manufacturer’s instructions for proper application.
Fixing Peeling or Flaking Paint:
Peeling or flaking paint is a common surface issue that requires attention. Follow these steps to address it effectively:
- Scrape off any loose or peeling paint using a putty knife or paint scraper.
- Sand the area to create a smooth surface. Use a medium-grit sandpaper, followed by a fine-grit sandpaper to achieve the desired smoothness.
- Wipe away the dust using a damp cloth or sponge.
- Apply a high-quality primer to the affected area to promote proper adhesion of the new paint.
- Once the primer is dry, proceed with painting the surface using the desired paint finish.
Repairing Nail Pops or Surface Irregularities:
Nail pops or surface irregularities can create an uneven surface that affects the paint’s appearance. Follow these steps to address these issues:
- Use a hammer and nail set to secure any protruding nails back into place.
- Fill the resulting holes with a spackling compound or patching compound.
- Smooth the surface using a putty knife and allow it to dry.
- Sand the patched area until it is level with the surrounding surface.
- Remove the dust and debris and proceed with the surface preparation for painting.
Treating Mold or Mildew Growth:
Mold or mildew growth on interior surfaces is a serious concern that needs to be addressed before painting. Here’s how to treat it effectively:
- Identify and address the source of moisture that is promoting mold or mildew growth to prevent future issues.
- Clean the affected area with a solution of water and bleach or a commercial mold and mildew cleaner. Follow the instructions provided by the manufacturer.
- Allow the surface to dry completely before applying a primer specifically formulated to resist mold and mildew growth.
- Ensure proper ventilation in the area to prevent moisture buildup.
Restoring Discoloration or Fading:
Discoloration or fading of interior surfaces can impact the overall appearance of the painted area. Follow these steps to restore the surface:
- Clean the surface using a mild detergent or a solution of water and vinegar to remove dirt or grime.
- Assess the extent of discoloration and fading. If necessary, consider applying a stain-blocking primer to prevent any discoloration from bleeding through the new paint.
- Select a high-quality paint that matches the desired color and finish, and apply it evenly to the surface using appropriate painting techniques.
Preparing the Surface for Painting
To achieve a professional and long-lasting paint finish, it is crucial to properly prepare the interior surfaces. Here are key steps to follow:
Cleaning and Degreasing the Surface:
- Remove any dust, dirt, or grime from the surface by using a soft brush or vacuum cleaner.
- Wipe the surface with a damp cloth or sponge and a mild detergent solution to remove any remaining dirt or grease.
- Rinse the surface thoroughly with clean water to remove any detergent residue.
- Allow the surface to dry completely before proceeding to the next steps.
Sanding and Smoothing Rough Areas:
- Inspect the surface for any rough or uneven areas.
- Use sandpaper or a sanding block to smooth these areas, working in the direction of the grain or using circular motions.
- Start with coarse-grit sandpaper and gradually move to finer-grit sandpaper for a smooth finish.
- Wipe away any sanding dust with a clean cloth or vacuum cleaner.
Priming the Surface:
- Apply a coat of primer to the prepared surface. Use a primer suitable for the specific surface material and the type of paint you will be applying.
- Use a brush or roller to evenly apply the primer, following the manufacturer’s instructions for drying time and coverage.
- Allow the primer to dry completely before proceeding with the next steps. This creates a smooth and uniform surface for the paint to adhere to.
Filling Cracks and Holes:
- Use a suitable filler, such as spackling compound or putty, to fill any remaining cracks or holes in the surface.
- Apply the filler using a putty knife, ensuring it is pressed firmly into the cracks or holes.
- Smooth the surface of the filler with the putty knife, removing any excess material.
- Allow the filler to dry according to the manufacturer’s instructions.
- Once dry, sand the filled areas lightly to achieve a seamless transition between the filler and the surrounding surface.
Applying Caulking or Sealant:
- Inspect the surfaces for gaps or areas that require caulking or sealant, such as around windows, trim, or baseboards.
- Select a high-quality caulking or sealant suitable for the specific application.
- Apply a thin, even bead of caulking or sealant along the gaps or joints, using a caulk gun or a putty knife.
- Smooth the caulk or sealant with a damp finger or a caulking tool to ensure a clean and professional finish.
- Allow the caulking or sealant to dry completely before proceeding with the painting process.
Properly preparing the surface ensures better paint adhesion, enhances the durability of the paint job, and results in a more professional-looking finish. In the next section, we will discuss the importance of assessing the surface texture and condition for different paint finishes and techniques.
FAQ
What is the proper surface preparation before painting?
What are the conditions for indoor painting?
What is the PDCA standard for painting?
Why is proper surface preparation so important in painting?
What are the four factors to consider when painting?
What are the 5 factors that you need to consider when doing painting jobs?
What are the 8 steps of surface preparation?
How do you prepare an interior wall for painting?
Why is it important to prep before painting?
Conclusion
Thank you for joining us on this journey to explore the essential aspects of assessing the condition of interior surfaces before painting. We hope this comprehensive guide has empowered you with the knowledge and confidence to tackle your upcoming paint project.
Remember, a thorough assessment sets the foundation for a flawless finish and ensures long-lasting results. If you have any further questions or need professional assistance, don’t hesitate to reach out to us at Horizon Painting.
We’re here to provide you with exceptional service and expertise. So, let’s bring vibrant colors and renewed beauty to your home together. Contact us today and let’s get started!