Understanding the Importance of Interior House Painting Surface Preparation
Are you looking for expert guidance on interior house painting surface preparation? You’ve come to the right place. At Horizon Painting, we understand the significance of proper surface preparation in achieving a flawless and long-lasting paint job for your home.
In this comprehensive guide, we’ll take you through the essential steps and techniques that will elevate your painting projects to new heights. From assessing the surfaces to priming and applying paint, we’ll equip you with the knowledge and insights needed to achieve professional-level results.
So, if you’re ready to unlock the secrets of interior house painting surface preparation, read on and discover the transformative power it holds for your home.
The Importance of Interior House Painting
When it comes to home improvement projects, interior house painting stands out as one of the most effective ways to transform the look and feel of your living space. Whether you’re updating the colors to match your personal style or preparing your home for sale, a fresh coat of paint can work wonders.
However, achieving professional-quality results requires more than just picking up a paintbrush and selecting your favorite colors. The key to a successful interior paint job lies in thorough surface preparation.
What is Surface Preparation?
Surface preparation refers to the process of thoroughly preparing the surfaces of walls, ceilings, and other interior areas before applying paint. It involves a series of steps aimed at ensuring a clean, smooth, and properly primed surface that allows paint to adhere effectively and achieve a professional finish.
In interior house painting, surface preparation typically includes activities such as cleaning, repairing imperfections, sanding, priming, and masking. Each of these steps plays a vital role in creating an optimal surface for paint application, enhancing the overall quality and longevity of the painted surface.
Why Should You Prepare Your Surface Before Painting
Proper surface preparation is a crucial step that should never be overlooked or rushed in interior house painting projects. Here are some key reasons why surface preparation is of utmost importance:
- Enhances Adhesion: Surface preparation ensures that the paint adheres properly to the surface, reducing the risk of peeling, cracking, or flaking over time. It creates a bond between the paint and the surface, allowing for long-lasting results.
- Smooths Imperfections: Surface preparation helps to address any imperfections on the walls, such as cracks, holes, or rough patches. By repairing and smoothing these flaws, you can achieve a flawless and visually appealing finish.
- Improves Paint Coverage: A properly prepared surface allows for better paint coverage, reducing the number of coats required and saving both time and money. It ensures that the paint spreads evenly and provides consistent color and coverage throughout the room.
- Prevents Stains and Discoloration: Surface preparation helps to prevent stains or discoloration from bleeding through the paint. By properly cleaning and priming the surface, you can create a barrier that blocks any underlying marks or stains, ensuring a clean and fresh appearance.
- Increases Durability: Well-prepared surfaces contribute to the overall durability of the painted surface. By addressing any underlying issues and providing a solid foundation, surface preparation helps the paint withstand daily wear and tear, maintaining its integrity for years to come.
Assessing the Surface
Examining the Condition of the Walls, Ceilings, and Other Surfaces
Before diving into the surface preparation process, it’s essential to thoroughly examine the condition of the walls, ceilings, and any other surfaces you plan to paint. This examination allows you to identify existing issues, assess the level of preparation required, and determine the best approach for achieving a smooth and flawless paint finish.
Take a close look at the surfaces and pay attention to the following:
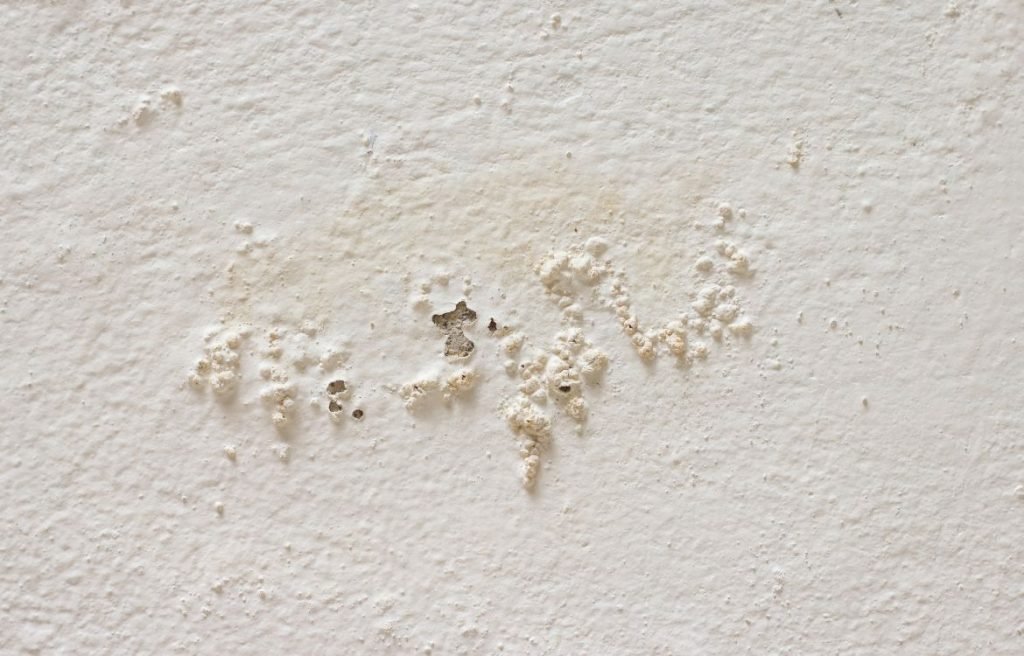
- Cracks and Holes: Look for any visible cracks, holes, or gaps in the walls or ceilings. These imperfections can negatively impact the final appearance of the paint and should be addressed before painting. If cracks or holes are present, it’s crucial to fill them using appropriate patching materials. This ensures a smooth and even surface for painting.
- Water Damage or Stains: Check for any signs of water damage, such as discoloration, peeling paint, or damp areas. It’s crucial to identify the source of the water damage and address it properly before proceeding with surface preparation. Address any underlying water damage by identifying the source of the issue and fixing it. Repair any damaged areas to prevent future problems and ensure a stable surface for paint application.
- Flaking or Peeling Paint: Examine the surfaces for areas where the existing paint is flaking or peeling. This indicates poor adhesion and requires attention to ensure proper paint adhesion in the future.
- Texture and Smoothness: Assess the texture of the surfaces. Are they smooth, rough, or uneven? Understanding the surface texture will help determine the necessary steps for achieving a desired finish. For rough or uneven surfaces, sanding may be necessary to create a smooth and uniform substrate. This step helps achieve a professional-looking finish.
- Dirty Surface: Determine if the surfaces need cleaning to remove dust, dirt, grease, or other contaminants. Clean surfaces provide a better foundation for paint adhesion.
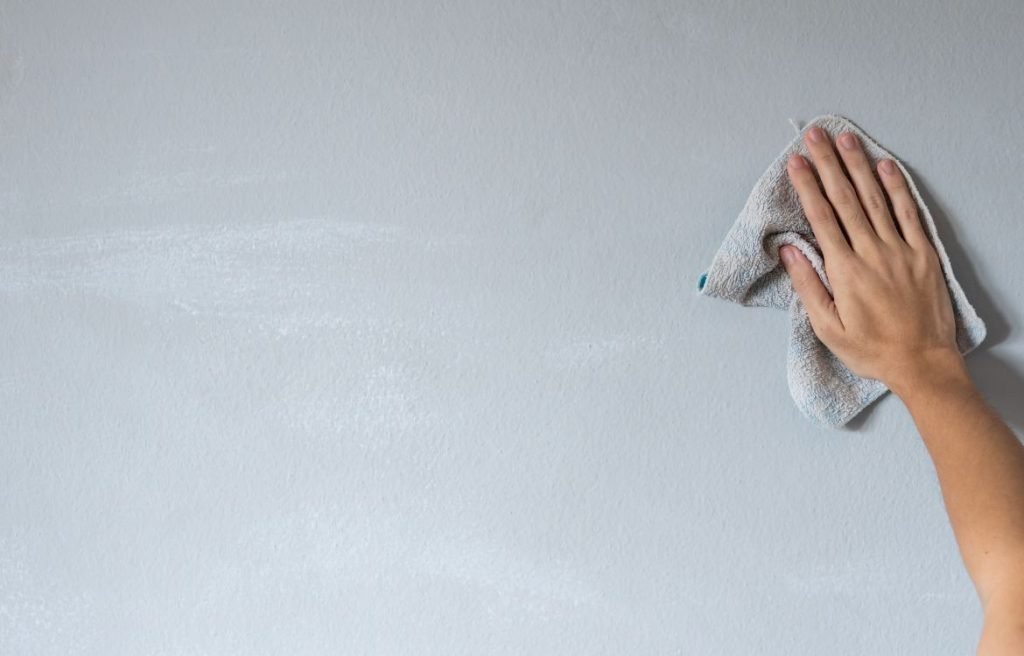
Cleaning the Surfaces
Importance of Thorough Cleaning to Remove Dust, Dirt, and Grime
Before beginning any surface preparation, it is essential to thoroughly clean the surfaces you plan to paint. Cleaning plays a vital role in ensuring proper paint adhesion and a flawless finish. Here’s why thorough cleaning is crucial:
- Dust and Dirt Removal: Over time, dust, dirt, and other airborne particles settle on surfaces, creating a thin layer that can interfere with paint adhesion. Cleaning eliminates these contaminants, providing a clean canvas for paint application.
- Enhanced Adhesion: When surfaces are free from dust, dirt, and grime, paint adheres more effectively. This improves the bond between the surface and the paint, preventing future issues such as peeling or flaking.
- Smoother Finish: Removing surface debris results in a smoother finish. It allows the paint to glide on evenly, reducing the chances of bumps or rough patches that can mar the overall appearance.
Methods for Cleaning Different Types of Surfaces
The cleaning method will vary depending on the type of surface you are working with. Here are some common surface types and the recommended cleaning methods:
- Walls and Ceilings: Begin by dry dusting the surfaces using a microfiber cloth or a soft-bristle brush. This helps remove loose dust and cobwebs. For painted surfaces, gently wipe them down using a mild detergent solution and a sponge or soft cloth. Rinse the surface with clean water to remove any residue.
- Wood Surfaces: Dust the wood surfaces using a microfiber cloth or a vacuum with a soft brush attachment. If there are stains or grime, use a wood cleaner that is appropriate for the type of wood and follow the manufacturer’s instructions. Be cautious not to oversaturate the wood, as excess moisture can cause damage.
- Metal Surfaces: Remove loose dirt and debris from metal surfaces by wiping them with a damp cloth. For tougher grime, use a mild detergent solution and a soft brush or sponge. Rinse thoroughly and dry the surface to prevent any water spots or rust formation.
- Drywall or Plaster Surfaces: Start by dry dusting the surfaces with a microfiber cloth. For stains or marks, use a mild detergent solution or a specialized drywall cleaner, applying it with a sponge or soft cloth. Avoid using excessive moisture, as it can damage the drywall or plaster.
Remember, always follow the manufacturer’s instructions for any cleaning products and perform a test on a small, inconspicuous area before applying them to the entire surface.
Repairing Imperfections
Identifying and Addressing Cracks, Holes, and Other Damages
During the surface assessment, you may have identified cracks, holes, or other damages that need to be addressed before painting. Repairing these imperfections is essential to achieve a smooth and flawless paint finish. Here’s how to identify and address common surface damages:
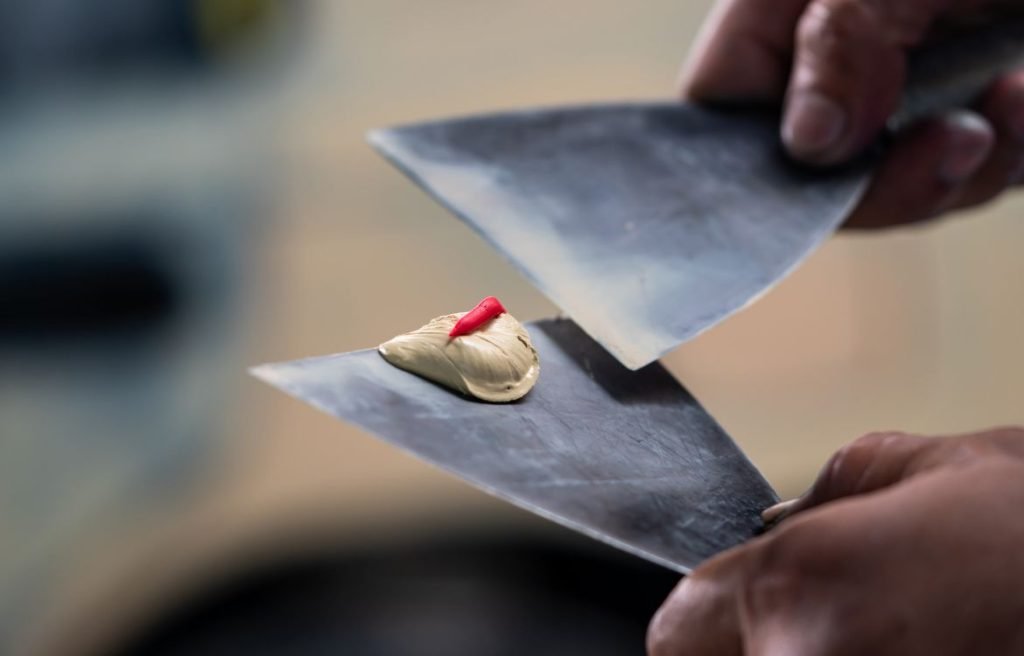
- Cracks: Cracks can occur due to settling, temperature fluctuations, or structural issues. Identify the size and nature of the cracks. Hairline cracks can often be repaired using a flexible caulk or filler, while larger cracks may require more extensive repair.
- Holes: Holes can be caused by nails, screws, or accidental damage. Assess the size and depth of the holes. Small nail holes can be easily filled with a spackling compound, while larger holes may require patching with a joint compound and appropriate patching material.
- Dents or Dings: Surface imperfections like dents or dings can be caused by furniture or other objects. Gently sand the area to smoothen the surface, and if necessary, apply a thin layer of spackling compound to fill in the depression.
Filling and Repairing Surface Imperfections with Appropriate Materials
Once you have identified the specific imperfections, it’s time to repair them using the appropriate materials. Here’s a general guideline for repairing common surface imperfections:
- Small Cracks and Holes: For hairline cracks and small nail holes, use a flexible caulk or lightweight spackling compound. Apply the caulk or spackling compound using a putty knife or a caulking gun, ensuring smooth and even coverage. Once dry, sand the repaired area lightly for a seamless finish.
- Large Cracks and Holes: For larger cracks and holes, use a joint compound along with a patching material such as drywall tape or mesh. Apply the joint compound over the damaged area, embed the patching material, and smooth it out using a putty knife. Sand the area once dry to achieve a uniform surface.
- Dents and Dings: To repair dents or dings, sand the affected area to level it with the surrounding surface. If necessary, apply a thin layer of spackling compound to fill in any remaining depressions. Once dry, sand the repaired area and ensure it blends seamlessly with the rest of the surface.
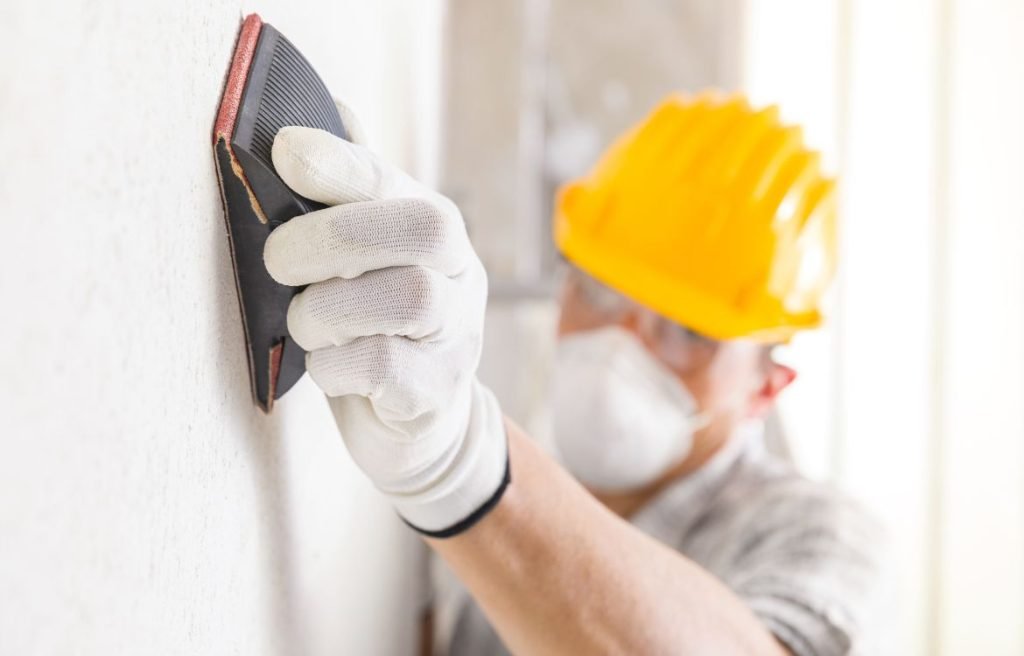
Sanding and Smoothing
Importance of Sanding for Creating a Smooth and Even Surface
Sanding is a crucial step in the surface preparation process as it helps create a smooth and even surface for painting. It involves the use of abrasive materials to remove imperfections, roughness, or uneven textures from the surface. Here’s why sanding is important:
- Surface Leveling: Sanding helps level out uneven areas, such as patched holes, joint compound, or textured surfaces. By smoothing these areas, you ensure that the paint will adhere uniformly and provide a consistent finish.
- Adhesion Enhancement: Sanding also enhances paint adhesion by creating a slightly roughened surface. This texture provides a better grip for the paint, reducing the likelihood of peeling or flaking over time.
- Paint Finish Improvement: Sanding removes any minor blemishes, bumps, or brush marks, resulting in a smoother and more professional-looking paint finish. It allows the paint to flow evenly, leading to a flawless appearance.
Techniques and Tools for Sanding Different Surfaces
The sanding technique and tools you use will depend on the type of surface you are working with. Here are some general guidelines for sanding different surfaces:
- Drywall or Plaster: Use a sanding block or sanding pole fitted with medium-grit sandpaper (around 120-150 grit) for drywall or plaster surfaces. Sand in a circular or back-and-forth motion, applying even pressure. Start with a coarser grit to remove high spots or imperfections, then switch to a finer grit for a smooth finish.
- Wood: When sanding wood surfaces, begin with a coarse-grit sandpaper (around 80-100 grit) to remove any existing finish or rough spots. Follow up with progressively finer grits (e.g., 120, 180, and 220) to achieve a smooth surface. Sand along the grain of the wood for the best results.
- Metal: For metal surfaces, use sandpaper with a grit suitable for the level of roughness or rust present. Coarse grits (around 80-120) are ideal for removing rust or paint, while finer grits (180-220) help smooth the surface. Consider using a sanding block or power sander for larger metal areas.
- Previously Painted Surfaces: If you are working on a previously painted surface, use fine-grit sandpaper (around 220) to lightly scuff the surface. This creates a better surface for paint adhesion without removing the existing paint layer entirely.
Always wear appropriate safety gear, such as a dust mask and eye protection, when sanding to prevent inhalation of dust particles. After sanding, thoroughly clean the surfaces to remove any sanding residue before proceeding with the next steps of surface preparation.
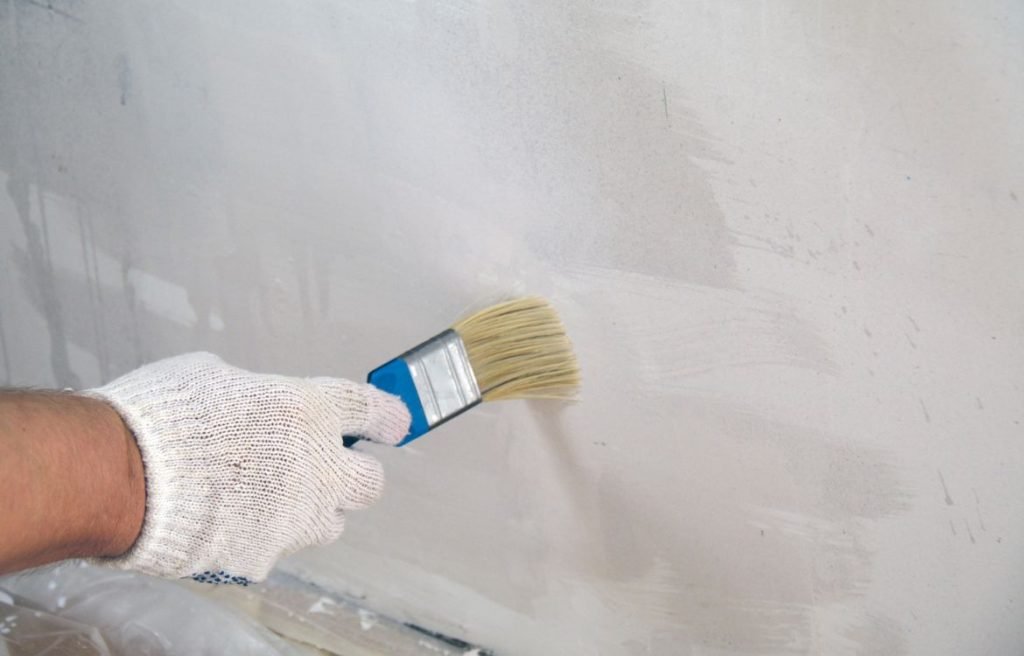
Priming the Surfaces
Priming is a crucial step in the surface preparation process before applying paint. Primers are specifically designed to create a suitable foundation for paint adhesion and provide various benefits. Here’s why priming is important:
- Improved Adhesion: Primers enhance paint adhesion by creating a bonding layer between the surface and the paint. They help the paint adhere more effectively, resulting in better durability and longevity.
- Sealing and Uniformity: Primers seal porous surfaces, such as bare wood or drywall, preventing excessive absorption of paint. This ensures that the paint spreads evenly and avoids blotchiness or uneven coloration.
- Stain Blocking: Certain primers have stain-blocking properties, preventing stains from bleeding through the paint. They are particularly useful when dealing with surfaces that have been affected by water damage, smoke, or other types of stains.
- Surface Protection: Primers can provide a protective barrier for the underlying surface, shielding it from potential damage caused by moisture, chemicals, or environmental factors. This is especially important for exterior surfaces.
Choosing the Right Primer for Different Surfaces and Conditions
Selecting the appropriate primer depends on the type of surface and the specific conditions you are working with. Here are some guidelines for choosing the right primer:
- Bare Wood: When priming bare wood, choose a wood primer specifically formulated for this purpose. These primers penetrate the wood, seal the surface, and provide a suitable base for paint adhesion.
- Drywall or Plaster: For drywall or plaster surfaces, use a drywall primer or a high-quality latex primer. These primers help seal the porous surface and promote even paint absorption, reducing the chances of a patchy or uneven finish.
- Stained or Discolored Surfaces: If you are dealing with stained or discolored surfaces, opt for a stain-blocking primer. These primers effectively block stains from bleeding through and ensure that the final paint color appears uniform and vibrant.
- Metal Surfaces: When priming metal surfaces, choose a primer specifically formulated for metal or a rust-inhibiting primer. These primers provide corrosion resistance and promote paint adhesion on metal surfaces.
- High-Moisture or Exterior Surfaces: For areas exposed to high moisture or exterior conditions, consider using a moisture-resistant or exterior primer. These primers are designed to withstand environmental elements and provide long-lasting protection.
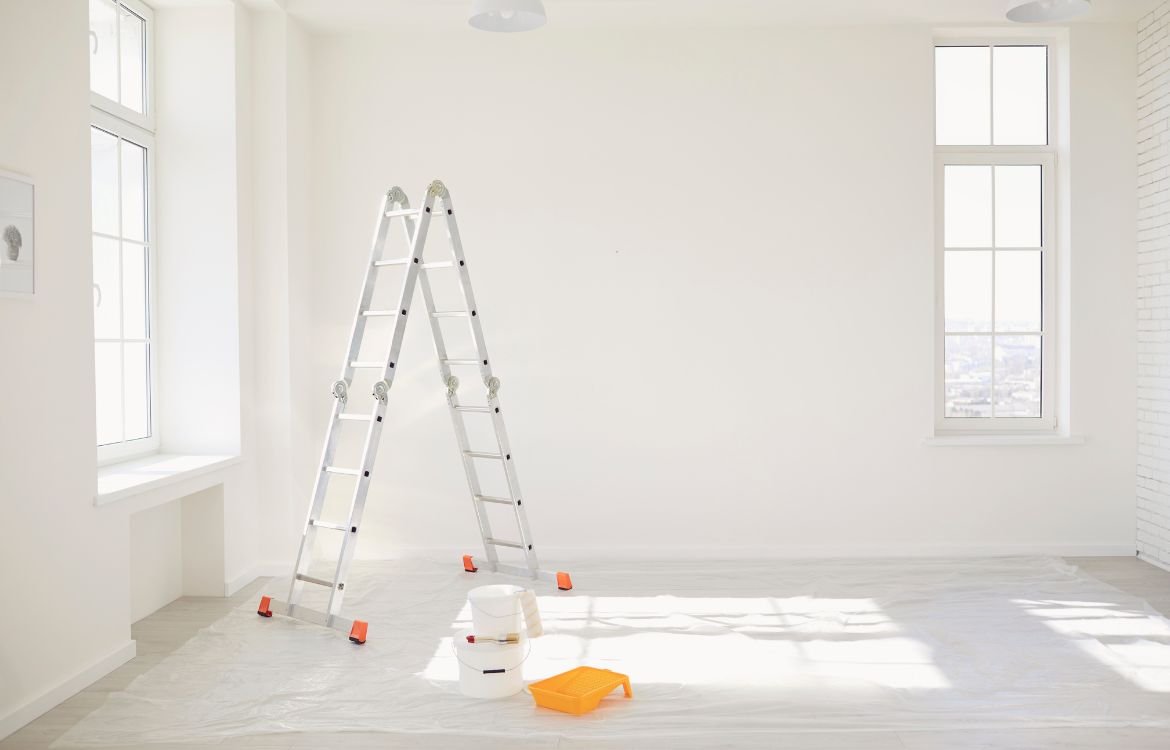
Masking and Protecting
Masking and protecting adjacent surfaces and fixtures is essential to prevent unwanted paint splatters or spills. Taking the time to properly mask and protect ensures a clean and professional paint job. Here’s why masking and protecting are important:
- Prevents Accidental Paint Splatters: Masking and protecting adjacent surfaces, such as trim, baseboards, windows, or light fixtures, prevents accidental paint splatters or drips from landing on them. This helps maintain their original appearance and avoids the need for time-consuming cleanup later.
- Saves Time on Cleanup: By investing time in proper masking and protecting upfront, you save valuable time on cleanup after painting. Removing dried paint from surfaces or fixtures can be challenging and may cause damage or require additional touch-ups.
- Provides Crisp, Clean Lines: Masking tape allows you to achieve sharp, clean lines between different paint colors or when painting adjacent walls or surfaces. This creates a professional and polished look, enhancing the overall aesthetic appeal of the painted space.
Tips and Techniques for Proper Masking and Protecting
Here are some tips and techniques to ensure proper masking and protecting during your interior house painting project:
- Use High-Quality Masking Tape: Invest in good-quality painter’s tape that is designed specifically for masking. This type of tape is easy to apply, adheres well to surfaces, and can be easily removed without leaving residue or damaging the paint.
- Clean and Dry the Surfaces: Before applying the masking tape, make sure the surfaces are clean and dry. Any dirt, dust, or moisture on the surfaces can prevent the tape from adhering properly, compromising the effectiveness of the masking.
- Apply the Masking Tape with Precision: Take your time to apply the masking tape precisely along the edges or surfaces you want to protect. Ensure that the tape is straight and firmly pressed down to create a tight seal and prevent paint from bleeding underneath.
- Cover or Remove Fixtures and Furniture: When possible, remove or cover furniture, light fixtures, switches, outlets, and other fixtures that you want to protect from paint splatters. Use plastic drop cloths or plastic sheeting to cover larger areas, securing them in place with painter’s tape.
- Lay Drop Cloths or Tarps: Lay drop cloths or canvas tarps on the floor to catch any paint drips or spills. Secure them in place with tape or weigh down the edges to prevent them from shifting during the painting process.
- Work in Sections: If you’re painting a large area, consider working in sections. Complete one section, remove the masking tape, and then move on to the next section. This helps ensure that the paint doesn’t dry on the tape, which can cause peeling or uneven edges.
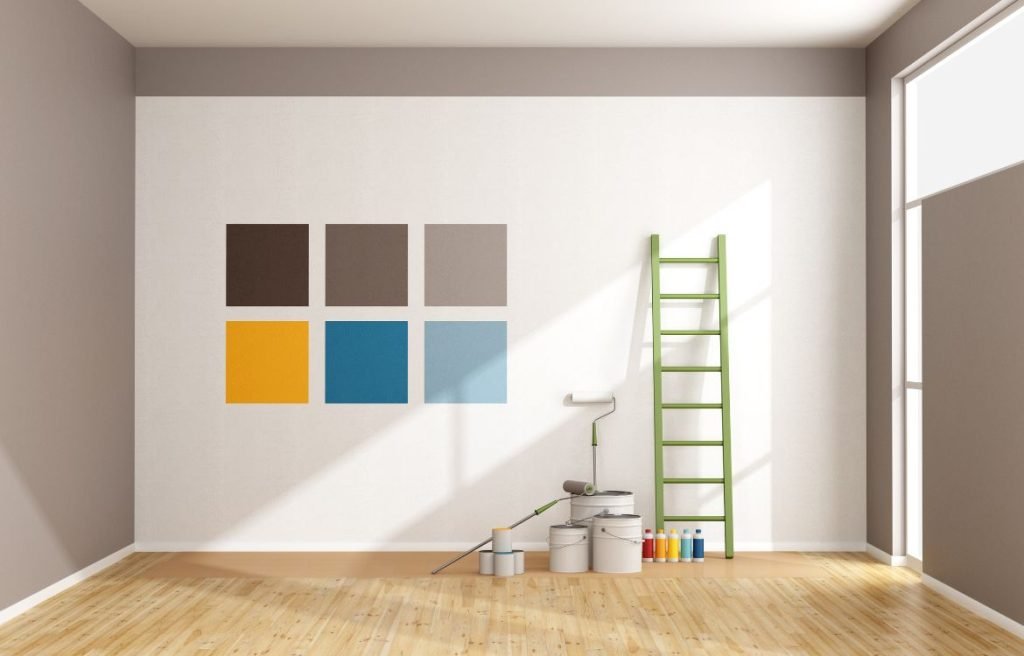
Choosing the Right Paint
Selecting the right paint for your interior surfaces is essential to achieve a desired aesthetic and long-lasting results. Consider the following factors when choosing paint:
- Surface Type: Different surfaces may require specific types of paint. For example, drywall or plaster may benefit from a primer and latex-based paint, while wood surfaces may require specialized wood paint or stain. Ensure the paint you choose is suitable for the surface you are painting.
- Durability and Usage: Consider the level of durability and the intended usage of the painted surface. High-traffic areas such as hallways or kitchens may require paint that is more resistant to wear and stains, such as semi-gloss or satin finishes. For less frequented areas like bedrooms, a flat or eggshell finish may be sufficient.
- Color and Aesthetic: Choose paint colors that align with your desired aesthetic and the overall design scheme of the room. Consider factors such as lighting, furniture, and décor to ensure the paint color complements the space. Remember that colors may appear differently under various lighting conditions.
- VOC Content: Volatile Organic Compounds (VOCs) are chemicals emitted by some paints that can have negative health effects. If you have concerns about indoor air quality or are sensitive to odors, opt for low or zero VOC paints, which are environmentally friendly and have reduced emissions.
- Paint Sheen: Paint sheen refers to the level of glossiness or shine the paint has once it dries. Different sheens offer various levels of durability, ease of cleaning, and aesthetic appeal. Common paint sheens include flat, eggshell, satin, semi-gloss, and high-gloss. Consider the practicality and desired look for the specific surfaces you are painting.
Understanding Different Paint Finishes and Their Suitability
- Flat/Matte Finish: Flat or matte paint has a non-reflective, smooth appearance. It is ideal for hiding imperfections and is commonly used on ceilings and low-traffic areas like bedrooms or living rooms. However, it is less resistant to stains and may not be as easy to clean as higher sheen finishes.
- Eggshell Finish: Eggshell paint has a subtle shine and offers more durability and washability than flat finishes. It provides a smooth and soft appearance, making it suitable for moderate-traffic areas such as dining rooms, hallways, or adult bedrooms.
- Satin Finish: Satin paint has a velvety, semi-gloss appearance. It offers good durability, scrubbability, and moisture resistance, making it suitable for high-traffic areas like kitchens, bathrooms, or children’s bedrooms. Satin finishes are easy to clean and provide a subtle shine.
- Semi-Gloss Finish: Semi-gloss paint has a noticeable shine and provides excellent durability and resistance to moisture, stains, and scrubbing. It is commonly used on trim, doors, cabinets, and high-traffic areas that require frequent cleaning.
- High-Gloss Finish: High-gloss paint has a reflective, shiny appearance. It offers the highest level of durability, stain resistance, and washability. High-gloss finishes are commonly used on doors, trim, and furniture, but are less popular for large wall surfaces due to their strong sheen.
Consider both the desired aesthetic and the practicality for the specific surfaces you are painting. Combining different finishes can create visual interest and depth within a space while ensuring the durability and functionality required for each area.
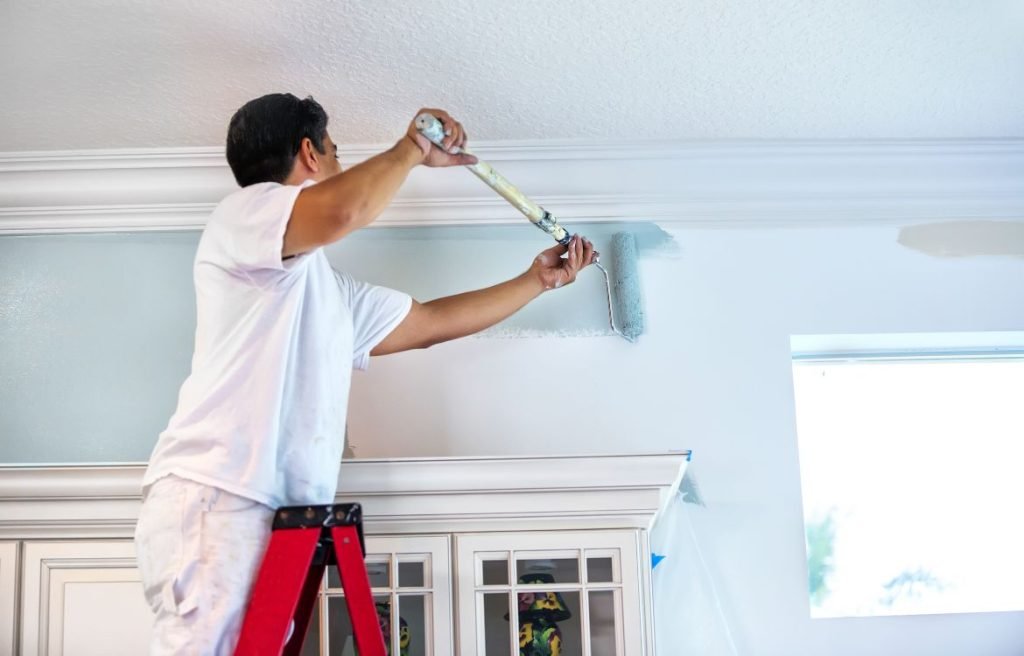
Applying the Paint
Once the surfaces are properly prepared, it’s time to apply the paint. Here are some techniques and tools to help you achieve a successful paint application:
- Brush and Roller: The most common tools for applying paint are brushes and rollers. Brushes are ideal for cutting in and painting trim, corners, and edges. Use a high-quality brush with synthetic bristles for latex paints and natural bristles for oil-based paints. Rollers are efficient for covering large areas quickly. Choose the appropriate roller nap length and type (smooth or textured) based on the surface and the type of paint being used.
- Cutting In: Before using a roller, start by cutting in the edges and corners of the walls and ceilings using a brush. This involves carefully painting a straight line where the wall meets the trim or where two different paint colors meet. Use a steady hand and take your time for clean, precise lines.
- Roller Techniques: When using a roller, start by loading it with paint using a tray. Roll off excess paint on the ridges of the tray to prevent drips. Use a “W” or “M” motion to apply the paint in a consistent and even manner. Apply light pressure to avoid creating streaks or lines. Work in small sections and maintain a wet edge to ensure seamless blending of paint.
- Paint Sprayer: For larger projects or smooth surfaces, paint sprayers can be used for a faster and more even application. When using a paint sprayer, ensure proper ventilation and cover nearby surfaces or items to protect them from overspray. Follow the manufacturer’s instructions for setup, technique, and cleanup.
- Feathering: When applying paint with a brush or roller, feather the edges to achieve a smooth and seamless finish. Feathering involves lightly blending the wet paint with the previously applied paint, smoothing out any visible brush or roller marks.
Tips for Achieving a Professional Finish
To achieve a professional finish and ensure the best results, consider the following tips:
- Proper Coverage: Apply paint with enough coverage to avoid streaks or thin areas. Follow the paint manufacturer’s guidelines for recommended coverage per coat and allow sufficient drying time between coats.
- Consistent Direction: Maintain a consistent direction when applying paint with a brush or roller. This helps create an even texture and minimizes visible brush or roller marks.
- Thin Coats: Apply multiple thin coats rather than one thick coat. This promotes better adhesion, reduces drying time, and minimizes the risk of drips or sags.
- Paint Edges Last: Paint the edges, corners, and trim first before moving on to larger surfaces. This ensures a neat and crisp finish without the risk of overlapping or smudging the edges.
- Natural Lighting: Use natural lighting or a combination of natural and artificial lighting to inspect your work during and after painting. This allows you to identify any imperfections or areas that may require touch-ups.
- Patience and Attention to Detail: Take your time and pay attention to detail throughout the painting process. Carefully inspect each section for even coverage, drips, or imperfections, and address them promptly.
Drying and Curing
Once the paint is applied, it goes through a process of drying and curing. Understanding these processes is important for achieving optimal results. Here’s an explanation of the drying and curing process:
- Drying: Drying refers to the initial stage when the solvents in the paint evaporate, allowing the paint to become touch-dry. During this phase, the paint transforms from a liquid to a solid state. The drying time depends on various factors such as humidity, temperature, ventilation, and the type of paint used. Water-based latex paints typically dry faster than oil-based paints.
- Curing: Curing is a more extended process that occurs after the paint has dried. It involves the chemical reaction of the paint molecules, leading to the formation of a hardened and durable film. Curing allows the paint to reach its full strength, adhesion, and resistance properties. While the paint may feel dry to the touch, it takes time for it to fully cure.
Allow Sufficient Time for Paint to Dry and Cure
Allowing sufficient time for paint to dry and cure is crucial for the longevity and durability of the painted surfaces. Here’s why it’s important:
- Avoiding Damage: Prematurely touching or applying pressure on paint that hasn’t fully dried can lead to smudging, smearing, or imprints. It can also cause the paint to peel or become damaged. Patience during the drying process ensures a smooth and flawless finish.
- Achieving Full Strength and Hardness: Curing allows the paint to reach its maximum hardness and strength. Rushing the curing process may result in a less durable finish that is prone to scratches, scuffs, or other forms of damage.
- Enhancing Adhesion and Resistance: The curing process is crucial for the paint to develop its optimal adhesion and resistance properties. By allowing the paint to cure fully, you ensure better adhesion to the surface, increased resistance to wear and tear, and improved resistance to moisture, stains, and cleaning agents.
- Avoiding Odor and Off-Gassing: Freshly painted surfaces may emit odors or off-gas certain chemicals during the drying and curing process. Allowing sufficient time for proper ventilation helps reduce these odors and ensures a healthier indoor environment.
To ensure proper drying and curing, follow these general guidelines:
- Follow Manufacturer’s Instructions: Refer to the paint manufacturer’s instructions for recommended drying and curing times. Different paint types and brands may have varying requirements.
- Allow Sufficient Ventilation: Provide proper ventilation during the drying and curing process to help expedite drying and reduce the accumulation of fumes. Open windows and use fans to circulate fresh air.
- Avoid Excessive Humidity or Cold Temperatures: High humidity or extremely cold temperatures can prolong the drying and curing process. Optimal drying and curing conditions usually involve moderate temperatures and humidity levels.
- Be Patient: Patience is key when it comes to allowing paint to dry and cure. It’s better to wait for the recommended time to ensure a well-cured, durable finish that will stand the test of time.
Final Touches and Cleanup
Removing Masking Materials and Cleaning Up the Work Area
As you near the completion of your interior house painting project, there are some important final touches and cleanup tasks to consider. These tasks ensure that your work area is tidy, and the painted surfaces are free from any imperfections. Here’s what you need to do:
- Remove Masking Materials: Start by carefully removing any masking materials, such as painter’s tape or plastic sheets, that were used to protect adjacent surfaces and fixtures during the painting process. Take your time to prevent any accidental damage to the freshly painted areas.
- Clean Up Paint Spills and Drips: Check the work area for any paint spills or drips that may have occurred during the painting process. Use a damp cloth or sponge to clean up any excess paint on surfaces, floors, or furniture. Promptly address any spills or drips to avoid them drying and becoming harder to remove.
- Dispose of Waste Properly: Dispose of used paint cans, brushes, rollers, and other painting materials in accordance with local regulations. Check if there are any specific disposal requirements for paint-related waste in your area. Consider recycling or donating any leftover usable paint to minimize environmental impact.
- Clean Brushes and Tools: Thoroughly clean your brushes, rollers, and other painting tools using appropriate cleaning agents recommended for the type of paint used. Follow the manufacturer’s instructions for cleaning and storing these tools to maintain their longevity and ensure they’re ready for future use.
Inspecting the Painted Surfaces for Any Touch-ups or Corrections
After the cleanup, it’s essential to inspect the painted surfaces to identify any areas that may require touch-ups or corrections. Here’s how to ensure a flawless finish:
- Adequate Lighting: Use natural or artificial lighting to inspect the painted surfaces. Different lighting conditions can reveal imperfections that may be missed under certain lighting conditions. Check the surfaces from different angles to detect any inconsistencies.
- Look for Uneven Coverage or Missed Spots: Carefully examine the walls, ceilings, and other painted surfaces for any areas with uneven coverage, missed spots, or visible brush or roller marks. Take note of these areas for touch-ups.
- Addressing Touch-ups: If you find any imperfections, prepare the necessary paint and tools to perform touch-ups. Use a small brush or roller to carefully apply paint to the affected areas, blending them with the surrounding surface. Take your time to ensure a seamless finish.
- Step Back and Assess: After completing touch-ups, step back and assess the overall appearance of the painted surfaces. Check for consistency in color, texture, and sheen. Make any additional corrections or touch-ups as needed to achieve a visually pleasing and professionally finished result.
FAQ
What is the importance of surface preparation in painting?
What is the proper surface preparation before painting?
What are the steps involved for surface preparation of paint?
What are the safety requirements relevant to preparing new surfaces for painting?
What will happen if you will not apply surface preparation before applying paint?
What is surface treatment for painting?
What is the importance of surface processing?
What is surface finish and why is it important?
Why is surface finish important?
Conclusion
We hope you found this guide on understanding the importance of interior house painting surface preparation informative and empowering. At Horizon Painting, we are dedicated to helping homeowners like you create stunning and long-lasting results in their painting projects.
Remember, proper surface preparation sets the foundation for a flawless finish and enhances the overall durability and beauty of your home’s interiors. If you’re ready to take the next step, don’t hesitate to contact us at Horizon Painting.
Our team of experienced professionals is ready to assist you in achieving the painting results you desire. Thank you for joining us on this journey, and we look forward to serving you with our expertise and commitment to excellence.