Introduction
Are you ready to transform your living spaces with a fresh coat of paint that looks like it was done by a pro? In our latest blog post, we’re about to unveil a treasure trove of expert tips and techniques that will take your interior painting to the next level. From prep work to finishing touches, we’ve got you covered. Say goodbye to uneven coats, visible brush marks, and those pesky paint drips that can ruin the look of your walls.
Don’t let your paint dry out
It is important not to let your paint dry out during an interior painting project because dried-out paint can result in uneven and streaky application. When paint dries out, it becomes thicker and can lead to visible brush or roller marks on your walls. This not only affects the aesthetics of the paint job but also makes it challenging to achieve a smooth and professional finish. Keeping your paint properly mixed and at the right consistency ensures that it flows evenly onto the surface, allowing for a more seamless and attractive result.
Use the right primer
Using the right primer is crucial in interior painting because it helps create a strong and even base for your paint. Primers not only improve paint adhesion but also block stains, provide better coverage, and enhance the durability of the paint job. Choosing the appropriate primer for the specific surface you’re painting, whether it’s drywall, wood, or a different material, ensures that your paint adheres properly and looks its best. It also helps in preventing issues like peeling, discoloration, and uneven color absorption, resulting in a longer-lasting and more professional finish.
Avoid lap marks
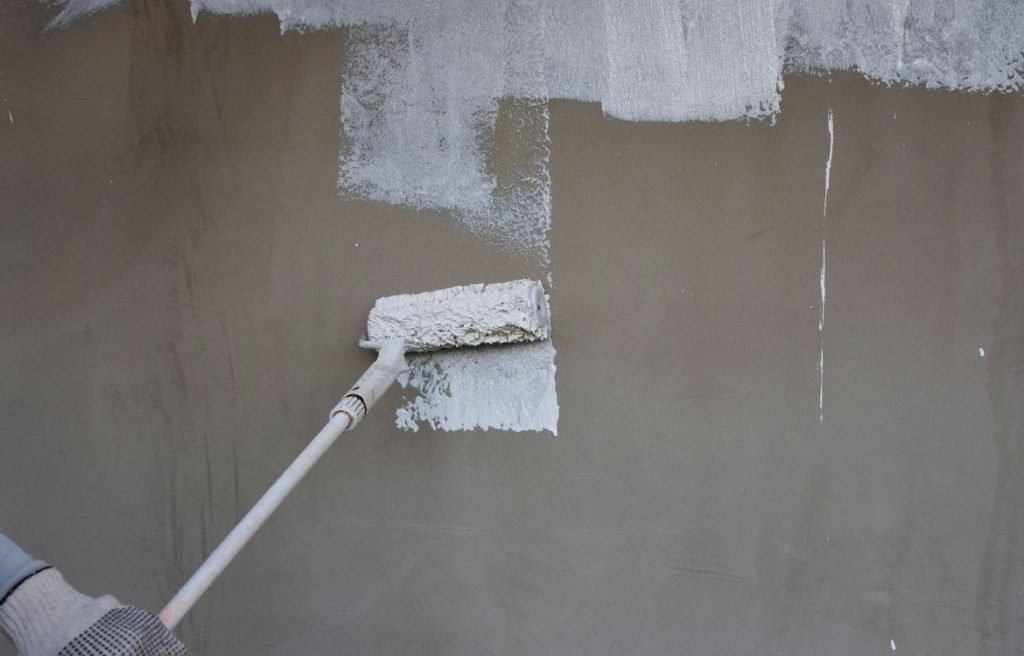
Avoiding lap marks is essential in interior painting because these visible lines or stripes can significantly detract from the overall appearance of your painted surface. Lap marks occur when wet paint overlaps with partially dried or dry paint, causing a difference in color and texture. To prevent lap marks, it’s crucial to maintain a wet edge while painting. This means working in sections and ensuring that each new stroke of paint slightly overlaps the previous one before it dries. By doing so, you’ll achieve a uniform and smooth finish without any unsightly streaks or marks, enhancing the aesthetics of your painted walls or surfaces.
Stir paint with a modified stirrer
Stirring paint with a modified stirrer is important in interior painting because it ensures that the paint is thoroughly mixed and consistent in its color and texture. When paint sits for a while, the pigments and solids can settle at the bottom of the can, leading to an uneven application if not properly mixed. Using a modified stirrer, such as a paint stir stick or an electric paint mixer, helps blend these components effectively. This ensures that you apply a uniform coat of paint, avoiding any color variations or streaks on your walls. Properly mixed paint also enhances the overall durability and longevity of the paint job, making it a crucial step in achieving a professional finish.
Add texture
Adding texture to your interior paint can be important depending on the look and feel you want to achieve. Texture can add depth and visual interest to your walls or surfaces, making them more appealing and unique. Whether you choose techniques like stippling, rag rolling, or sponge painting, adding texture can help disguise imperfections in the surface, such as small cracks or uneven spots, providing a more polished appearance. Additionally, textured paint can create a cozy and tactile ambiance in your living spaces, enhancing the overall aesthetics and character of your interior design.
Don’t wash your brushes or rollers
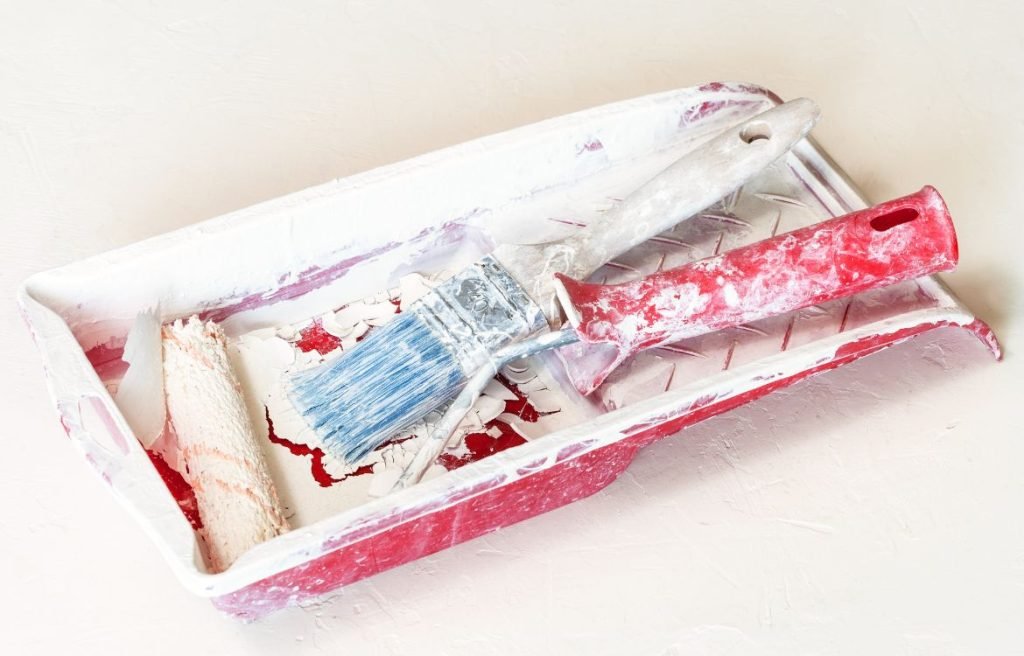
It is crucial to wash your brushes and rollers after each use in interior painting. Not washing them can lead to several problems. First, dried paint on the bristles or rollers can affect the quality of your next paint job, causing streaks, clumps, and uneven application. Second, it can be a waste of resources as you may need to replace these tools more frequently. Third, allowing paint to dry on brushes and rollers can make them stiff and less effective over time, reducing their lifespan.
Properly cleaning your brushes and rollers, on the other hand, ensures that you can reuse them for multiple projects, saving you money and reducing waste. It also maintains the quality of your painting tools, allowing for smooth and consistent paint application, which is essential for achieving a professional-looking interior paint job.
Deal with problem tape
Dealing with problem tape is essential in interior painting to ensure clean and sharp paint lines. When tape doesn’t adhere properly or leaves residue upon removal, it can lead to messy and uneven paint edges. To address this issue, it’s crucial to use high-quality painter’s tape specifically designed for interior painting. Cheaper or low-quality tapes may not stick well or may fail to prevent paint bleeding through the edges.
Additionally, you can improve tape adhesion by applying it to a clean and dry surface and pressing it down firmly to create a tight seal. If you encounter tape that doesn’t adhere well or leaves residue, carefully remove it while the paint is still wet. Use a utility knife or a painter’s tool to score along the edge of the tape before peeling it off gently at a 45-degree angle. This helps prevent tearing and ensures a clean and crisp paint line, enhancing the overall appearance of your interior paint job.
Determine paint type on existing walls
Determining the paint type on existing walls is important for various reasons. Firstly, it helps you choose the right paint for touch-ups or repainting, ensuring compatibility and a seamless finish. Secondly, knowing the existing paint type is crucial if you’re planning to change the color or sheen, as some paint types may require additional preparation or priming.
To identify the paint type on your walls, you can perform a simple test. Start by rubbing a cotton ball or a cloth soaked in rubbing alcohol on a small, inconspicuous area of the wall. If the paint comes off onto the cotton ball, it’s likely latex or water-based paint. If the paint doesn’t come off, you’re likely dealing with oil-based paint. This information will guide your paint selection and preparation process, ensuring a successful and long-lasting interior paint job.
Invest in a paint pen
Investing in a paint pen can be a valuable addition to your interior painting toolkit. Paint pens are versatile tools that allow for precise and controlled application of paint. They are particularly useful for touch-ups, small details, or correcting imperfections in your paint job.
The importance of a paint pen lies in its ability to provide a clean and seamless finish in areas that may be challenging to reach with a brush or roller. Whether you need to cover up small blemishes, create fine lines, or add intricate designs, a paint pen offers the precision required to achieve professional results. It can save you time and effort while ensuring that your interior paint job looks flawless down to the smallest details.
Use a Tack Cloth to Clean the Surface
Using a tack cloth to clean the surface before painting is a critical step in achieving a smooth and flawless interior paint job. Tack cloths are specially designed to remove dust, dirt, and debris from the surface, ensuring that your paint adheres properly and results in a clean finish.
The importance of using a tack cloth lies in its effectiveness in eliminating tiny particles that may not be visible to the naked eye but can still affect the quality of your paint job. Dust and debris on the surface can lead to rough textures and imperfections in the paint, making it essential to have a clean and smooth canvas. By using a tack cloth, you create an ideal foundation for your paint, allowing it to bond evenly and ensuring a professional-looking interior paint job that lasts.
Purchase High-Quality Roller Covers and Brushes
Investing in high-quality roller covers and brushes is paramount for a successful interior paint project. The choice of painting tools significantly impacts the final result, making it essential to use the best ones available.
The importance of using high-quality roller covers and brushes cannot be overstated. These tools determine the smoothness of your paint application, the evenness of coverage, and the overall finish. Cheap or low-quality brushes and roller covers may shed bristles, leave streaks, or absorb too much paint, leading to an uneven and unprofessional appearance.
On the other hand, high-quality brushes and roller covers are designed to hold paint effectively, release it evenly, and provide better control over the application. They result in a smoother finish with fewer visible brush or roller marks, enhancing the overall aesthetics of your interior paint job. So, investing in top-notch painting tools is a wise decision that pays off in the form of a more polished and durable paint job.
Purchase High-Quality Paint
Selecting high-quality paint is a fundamental step in achieving a successful interior paint project. The choice of paint not only affects the final color but also plays a crucial role in the durability and appearance of the finish.
The importance of using high-quality paint lies in its ability to provide better coverage, color retention, and resistance to wear and tear. High-quality paints typically contain superior pigments and binders, resulting in richer and longer-lasting colors. They also tend to have better adhesion properties, ensuring that the paint adheres well to the surface and doesn’t peel or flake over time.
Additionally, high-quality paints often have low volatile organic compounds (VOCs), making them more environmentally friendly and less likely to produce strong odors during and after painting. While premium paints may be slightly more expensive, the investment pays off in terms of a more vibrant, durable, and aesthetically pleasing interior paint job.
Test for Loose Paint With the Duct Tape Test
Conducting the duct tape test to check for loose or peeling paint is a crucial preparatory step in interior painting. This test helps identify areas where the existing paint is not properly adhered to the surface, allowing you to address these issues before applying new paint.
The importance of the duct tape test lies in its ability to reveal potential problems that can affect the quality and longevity of your paint job. Loose or peeling paint can create unsightly blemishes and cause new paint to peel or bubble if not properly addressed. By applying a piece of duct tape to various areas of the wall and then quickly pulling it off, you can determine if there are any loose paint spots. If the tape removes paint, it indicates that these areas need scraping and sanding to ensure a smooth and stable surface for your new paint to adhere to. This proactive approach helps you achieve a more professional and long-lasting interior paint finish.
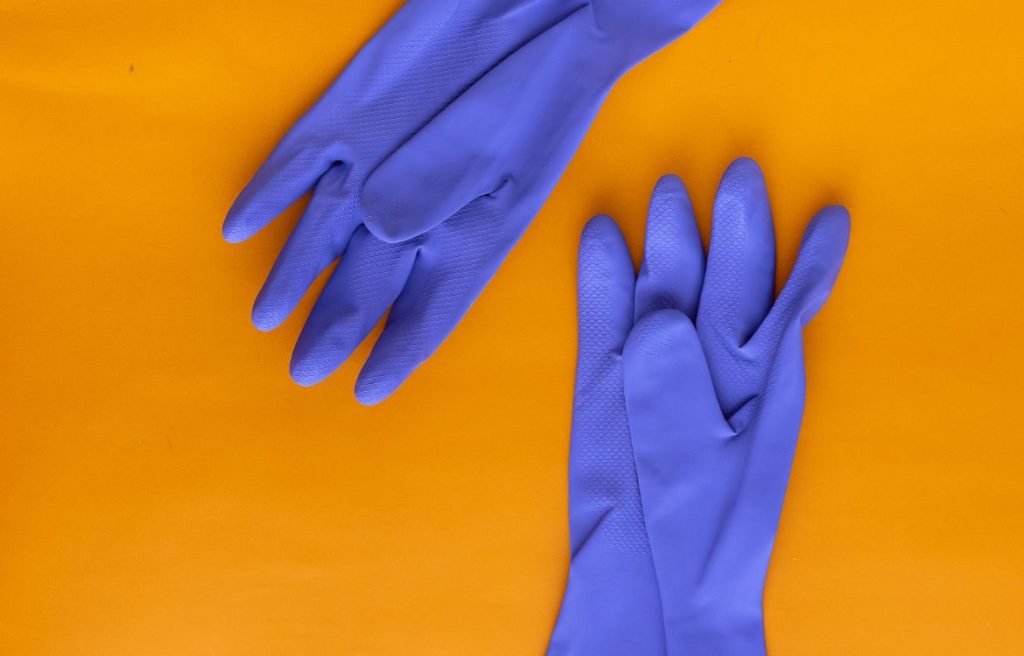
Use Latex or Nitrile Gloves
Using latex or nitrile gloves is an important safety and hygiene measure in interior painting. These gloves serve several essential purposes during the painting process.
Firstly, wearing gloves helps protect your skin from coming into contact with paint, especially if you’re using oil-based or solvent-based paints, which can be challenging to remove from the skin and may cause irritation. Latex or nitrile gloves act as a barrier, preventing paint from getting on your hands and making cleanup much easier.
Secondly, gloves help maintain a clean and professional appearance. Paint-stained hands can inadvertently transfer paint to surfaces you touch, leading to smudges and imperfections on your walls or other painted surfaces.
Lastly, gloves are crucial for your safety, as they prevent potential exposure to chemicals in paints and solvents. It’s always a good practice to prioritize safety when working with any painting materials.
Liberally Apply Low-Stick Painter’s Tape
Applying low-stick painter’s tape generously is a crucial technique in interior painting, especially when you want to create crisp, clean lines between different painted areas or protect trim, baseboards, or other surfaces from accidental paint splatters.
The importance of liberally applying low-stick painter’s tape lies in its ability to provide reliable protection and precise edges. By using enough tape and ensuring it’s firmly adhered, you minimize the risk of paint bleeding under the tape, which can result in uneven lines and require time-consuming touch-ups.
When applying low-stick painter’s tape, make sure it’s straight and aligned correctly to achieve the desired line or edge. Additionally, remove the tape carefully while the paint is still wet to prevent peeling or tearing, ensuring a sharp and professional finish to your interior paint job.
Maintain a Wet Edge
Maintaining a wet edge while painting is a critical technique in interior painting to ensure a smooth and even finish. This technique is particularly important when using paints that dry relatively quickly, such as latex paints.
The importance of maintaining a wet edge lies in preventing overlap marks, which can occur when you paint over partially dried or drying paint. Overlapping areas that have started to dry can result in visible lines or streaks, detracting from the overall appearance of your painted surface.
To avoid overlap marks, work in sections and make sure each new stroke of paint slightly overlaps the previous one while it’s still wet. This technique ensures that the paint blends seamlessly, creating a uniform and professional finish on your interior walls or surfaces.
Use Masking Film
Using masking film to cover clean areas is a valuable technique in interior painting, especially when you want to protect specific surfaces or areas from paint splatters or overspray. Masking film provides a secure and precise way to shield clean or finished surfaces, such as windows, countertops, or fixtures.
The importance of using masking film lies in its ability to provide complete coverage and protection while allowing for easy removal after painting. Unlike some other masking methods, masking film adheres tightly and uniformly, ensuring that no paint can seep through and affect the clean areas beneath. This technique helps maintain a neat and professional look in your interior paint project while saving you the time and effort of cleaning up after accidental spills or splatters.
Wrap the Brush or Roller
Wrapping the brush or roller in plastic wrap or aluminum foil is a handy technique to avoid cleaning them between coats or during short breaks in your interior painting project.
The importance of wrapping brushes or rollers lies in its convenience and efficiency. It allows you to temporarily store your painting tools without the need for thorough cleaning, which can be time-consuming, especially if you plan to use the same color or finish for the next coat. By tightly wrapping the brush or roller, you prevent the paint from drying out, keeping them in a workable condition for your next painting session. This method not only saves time but also reduces paint wastage and ensures that your tools remain ready for use without the hassle of repeated cleaning.
Roll the Full Height of the Wall
Rolling the full height of the wall while maintaining a wet edge is a key technique in interior painting to achieve a seamless and professional finish, especially when using a roller for larger surfaces.
The importance of rolling the full height of the wall and maintaining a wet edge lies in preventing lap marks. Lap marks can occur when you stop and start painting in the middle of the wall, resulting in overlapping areas that dry at different rates and leave visible lines or streaks. By rolling from the top of the wall to the bottom in a continuous motion and ensuring each new pass of the roller slightly overlaps the previous one while it’s still wet, you create a consistent and uniform paint finish. This technique is essential for achieving a polished and even appearance on your interior walls, free from unsightly lap marks.
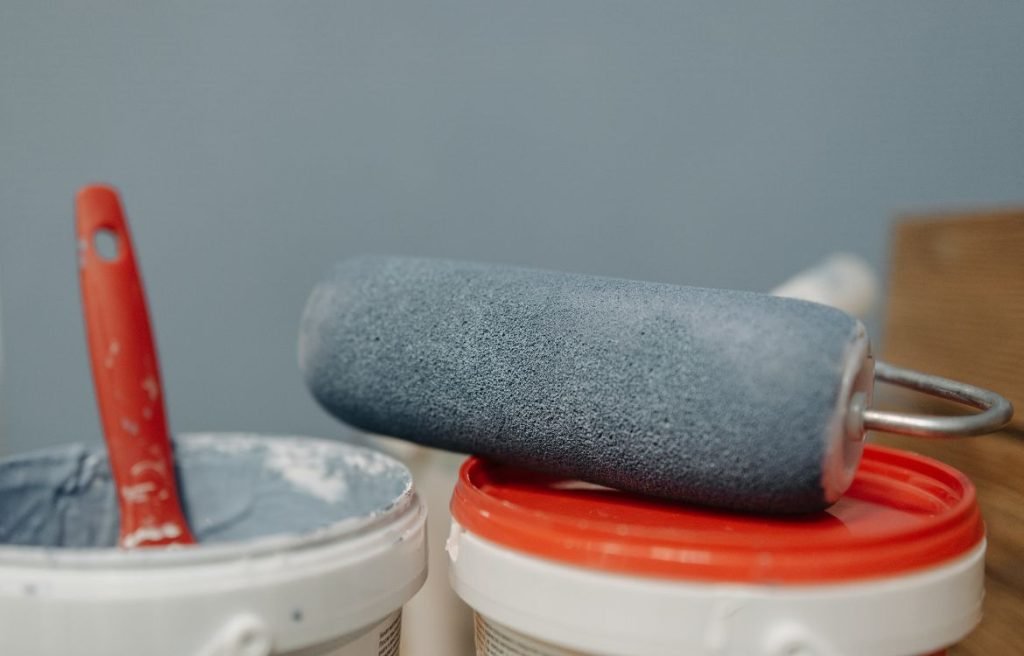
Mix Several Cans of Paint
Mixing several cans of paint in a large bucket is a crucial step in interior painting, especially when you’re dealing with multiple paint cans of the same color. This technique ensures that the paint color remains consistent throughout the room, avoiding any noticeable variations in shade.
The importance of mixing paint in this way lies in achieving a uniform color tone on your walls or surfaces. Even paints from the same brand and color code can have slight variations, so combining them into a single container helps eliminate these differences. It also ensures that the pigment and sheen are evenly distributed, providing a seamless and professional finish in your interior paint project. This practice is particularly important for larger rooms or projects where color consistency is a top priority.

Cut the Tape After the Paint Dries
Cutting the tape after the paint has dried is a final step in achieving clean and sharp lines in your interior painting project. This technique is important for ensuring that you have well-defined edges and a polished finish.
The importance of cutting the tape after the paint has dried lies in preventing any potential damage or smudging that can occur if you remove the tape while the paint is still wet. Waiting for the paint to dry before carefully cutting along the edge of the tape ensures that you have a crisp and precise line. It also reduces the risk of accidentally pulling off dried paint or creating jagged edges. This attention to detail is key to achieving a professional and aesthetically pleasing interior paint job.
Paint the Trim First, Then the Ceiling and Walls
Painting the trim first, followed by the ceiling and walls, is a recommended sequence for interior painting. This approach is important for several reasons:
Clean Lines: Starting with the trim allows you to create clean and precise edges along the baseboards, door frames, and windows. This ensures that the trim is neatly painted without overlapping onto the walls or ceiling.
Ease of Cleanup: If any paint from the trim ends up on the walls or ceiling, it can be easily covered when you paint these larger surfaces afterward. This simplifies the cleanup process and reduces the need for meticulous taping and masking.
Efficiency: Painting the trim before the larger surfaces allows you to work more efficiently. You can use smaller brushes or rollers for the trim, which are better suited for detailed work. Once the trim is complete, you can switch to larger tools for the walls and ceiling.
Color Consistency: Painting the trim first establishes a consistent color foundation, making it easier to blend the wall and ceiling colors seamlessly up to the trim. This ensures a cohesive and professional appearance.
Prime and Texture Wall Patches
Priming and texturing wall patches are essential steps in interior painting, particularly when you’re dealing with repaired or patched areas. These steps are crucial for ensuring a uniform and seamless finish without blotches or uneven spots.
The importance of priming and texturing wall patches lies in their ability to prepare the repaired areas to accept paint in the same way as the surrounding wall surface. Without proper priming, the patched areas may absorb paint differently, leading to blotchy or discolored spots. Texture matching is equally important to ensure that the patched areas blend seamlessly with the rest of the wall.
By applying primer to the patched areas before painting and replicating the wall’s texture, you create a consistent surface for paint application. This technique results in a professional and uniform finish, effectively concealing the repairs and achieving a cohesive look throughout the room.
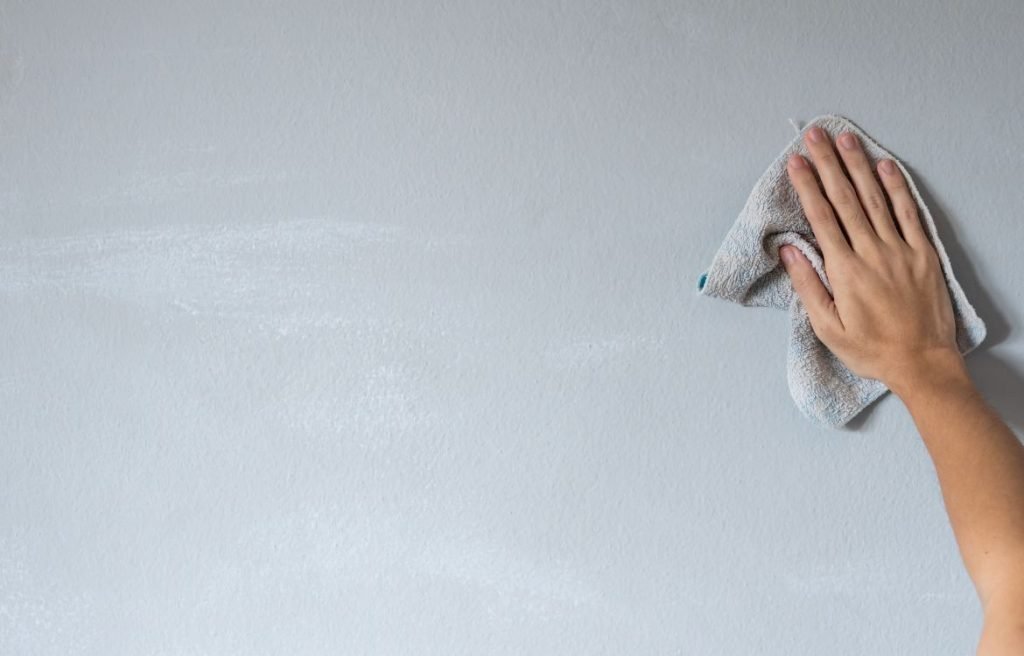
Clean Dirty Surfaces
Cleaning dirty surfaces is a critical preparatory step in interior painting. This process is essential because it ensures that the paint adheres properly to the surface, forming a strong and durable bond.
The importance of cleaning dirty surfaces lies in removing dust, dirt, grease, and any other contaminants that can hinder paint adhesion. When you paint over a dirty or greasy surface, the paint may not stick well, leading to issues like peeling, cracking, or poor coverage. Cleaning the surface thoroughly ensures that the paint can bond securely, resulting in a longer-lasting and more attractive finish.
Before painting, it’s recommended to wash the surface with soap and water, rinse it thoroughly, and allow it to dry completely. This practice creates an ideal canvas for your interior paint job, allowing the paint to adhere evenly and form a strong bond, ensuring the longevity and quality of your project.
Roll Paint Along the Edges
Rolling paint along the edges is a valuable technique in interior painting to achieve consistent texture and ensure a professional finish, especially when painting larger surfaces like walls.
The importance of rolling paint along the edges lies in maintaining a uniform appearance throughout the room. When you only use a brush to cut in along edges and corners, there can be a noticeable difference in texture between the brushed areas and the roller-applied sections. By gently rolling the paint along the edges after cutting in, you create a seamless transition and texture match between the two methods of application.
This technique is particularly effective in preventing lap marks, visible lines, or texture variations, resulting in a more cohesive and aesthetically pleasing interior paint job. It’s a valuable practice to ensure that your entire room looks consistently finished and professional.
Use Cotton Drop Cloths Rather Than Plastic
Opting for cotton drop cloths instead of plastic is a wise choice in interior painting, as it offers several advantages for protecting your floors and furniture.
The importance of using cotton drop cloths lies in their ability to provide better protection while being more versatile and environmentally friendly. Cotton drop cloths are more absorbent than plastic, which means they can catch and contain paint spills and drips effectively, preventing them from spreading across your floors. This can save you from potential damage and extensive cleanup efforts.
Furthermore, cotton drop cloths are reusable and more durable than disposable plastic sheets. They can withstand heavy foot traffic and can be easily washed and reused for future painting projects, reducing waste and saving you money in the long run. Overall, using cotton drop cloths contributes to a cleaner and more sustainable approach to interior painting.

Feather Out Paint Where You Can’t Keep a Wet Edge
Feathering out paint is an important technique in interior painting, especially when it’s challenging to maintain a wet edge, such as in corners, tight spaces, or when dealing with drying conditions.
The importance of feathering out paint in these situations lies in achieving a smooth transition between the wet and dry areas of paint. When you can’t keep a wet edge, abrupt stops and starts in your brush or roller strokes can result in visible lines or texture differences. Feathering involves gently blending the wet paint with the dried or drying edges, creating a gradual and seamless transition.
Sand Trim Between Coats for an Ultra-Smooth Finish
Sanding trim between coats is a crucial step in achieving an ultra-smooth and flawless finish in interior painting, especially when working with wood or other materials that require a high level of refinement.
The importance of sanding trim between coats lies in its ability to remove imperfections, such as brush marks, drips, or uneven surfaces, and create a polished and professional look. Sanding helps smooth out the previous coat of paint, providing a clean and receptive surface for the next coat to adhere to. It also helps blend any overlapping areas or seams between coats, ensuring a seamless and cohesive appearance.
To achieve an ultra-smooth finish, use fine-grit sandpaper and sand the trim gently but thoroughly. Be sure to clean away any dust before applying the next coat of paint. This practice enhances the overall quality and aesthetics of your interior paint job, resulting in trim that looks smooth, even, and impeccably finished.
Sand Away Flaws
Sanding away flaws is a critical step in interior painting to ensure a smooth and flawless surface before applying paint. This practice is essential for achieving a professional and polished finish.
The importance of sanding away flaws lies in its ability to correct imperfections such as bumps, rough spots, or previous paint drips. Sanding smooths out these flaws, creating a clean and even canvas for your paint application. It also helps paint adhere better to the surface, ensuring better coverage and a more durable finish.
When sanding, use the appropriate grit of sandpaper for the type of flaw you’re addressing, and work carefully to avoid creating new imperfections. After sanding, be sure to clean the surface to remove any dust or debris before proceeding with painting. Sanding away flaws is a fundamental technique that significantly improves the overall quality and aesthetics of your interior paint job.
Press Tape With a Putty Knife
Pressing tape with a putty knife is a useful technique in interior painting for achieving a secure and clean seal along the edges of the tape. This step is particularly important when you want to create crisp lines and prevent paint from bleeding under the tape.
The importance of pressing tape with a putty knife lies in ensuring that the tape adheres firmly to the surface, creating a tight seal. By using a putty knife to press down the edges of the tape, you minimize the risk of paint seeping underneath, which can result in uneven lines and the need for touch-ups. This technique helps you achieve precise and professional results, especially when you’re working on detailed or intricate painting projects.
Cover Furniture
Covering furniture is a crucial step in interior painting to protect your valuable furnishings and belongings from paint splatters and spills. This practice helps prevent damage and makes the cleanup process much more manageable.
The importance of covering furniture lies in its ability to safeguard your items from accidental paint contact. Even with careful painting, there’s always a risk of paint splattering or drips that can quickly ruin upholstery, wood, or other surfaces. By using drop cloths or plastic covers to shield your furniture, you can paint with confidence, knowing that your belongings are safe from potential harm.
Additionally, covering furniture simplifies the post-painting cleanup process. You can simply remove the covers or cloths, ensuring that your furniture remains in excellent condition while achieving a well-protected and pristine interior paint job.

Use Tinted Primer
Using tinted primer is a valuable technique in interior painting to enhance the overall paint job’s quality and appearance. This step is particularly important when you’re transitioning from a dark or heavily stained surface to a lighter paint color.
The importance of using tinted primer lies in its ability to provide a uniform and consistent base for your paint. Tinted primer is formulated with a color that is close to your chosen paint color, which helps with coverage and achieving the desired final color. Without tinted primer, it can take multiple coats of paint to cover a dark or stained surface completely.
Tinted primer also helps with color accuracy, as it ensures that the final paint color matches what you see on the paint swatch or sample. This technique saves you time, effort, and paint costs while ensuring a more professional and even finish in your interior paint project.
Scrape a Ridge in Textured Ceilings
Scraping a ridge in textured ceilings is an important step in interior painting, especially when dealing with textured surfaces like popcorn or stipple ceilings. This technique is crucial for achieving a smooth and even paint application.
The importance of scraping a ridge in textured ceilings lies in removing any buildup or protrusions that can affect the paint finish. Over time, dust, dirt, or previous paint layers can accumulate in the textured surface, creating uneven areas or ridges. When you paint over these ridges without smoothing them out, the paint can pool or settle unevenly, resulting in an unattractive and inconsistent appearance.
Finish One Wall Before Starting Another
Finishing one wall before starting another is a fundamental principle in interior painting, promoting a systematic and organized approach that leads to a cleaner and more professional paint job.
The importance of finishing one wall before moving on to the next lies in several factors:
Consistency: By completing one wall at a time, you maintain a consistent application technique and ensure that the paint dries evenly. This reduces the risk of visible differences in texture or color between walls.
Control: Focusing on one wall allows you to maintain better control over the paint application, ensuring that it’s applied uniformly and without mistakes. It also helps you manage paint drying times and blending at corners and edges.
Efficiency: Working on one wall at a time minimizes the chances of paint drying too quickly or becoming tacky, making it easier to achieve a smooth and consistent finish.
Less Interruption: It’s easier to manage interruptions or breaks when you’re working on a single wall. This can lead to a more efficient and less stressful painting process.

Buy an Extra Bucket or Two
Purchasing extra buckets is a practical and wise decision in interior painting, as it offers several advantages during the painting process:
Convenience: Having extra buckets allows you to prepare multiple paint batches or mix different colors without needing to clean and reuse the same bucket repeatedly. This saves time and effort during the project.
Organization: You can use additional buckets to organize your painting tools and supplies, keeping them easily accessible and reducing clutter in your work area.
Paint Mixing: When you need to mix paints or additives, having extra buckets makes it convenient to do so without interrupting your painting progress.
Cleanup: Extra buckets can be handy for tasks like cleaning brushes or rollers. You can use one bucket for rinsing and another for clean water, making the cleanup process more efficient.
Emergency Needs: In case of spills or unexpected mishaps, having spare buckets on hand can be invaluable for containing and managing paint spills or cleanup emergencies.
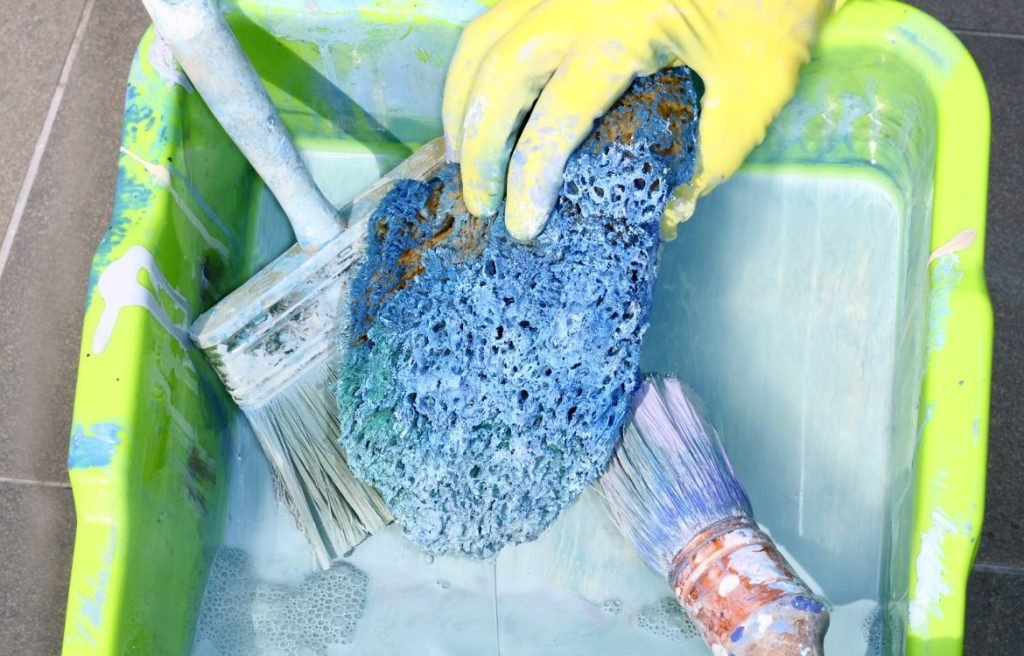
Wash Roller Covers
Washing roller covers is a critical step in interior painting, as it helps maintain the quality of your painting tools and ensures a clean and efficient paint application process.
The importance of washing roller covers lies in several factors:
Reuse: Cleaning and washing roller covers allow you to reuse them for multiple paint coats or different projects, saving you money and reducing waste.
Consistency: Clean roller covers ensure consistent paint application, preventing any residual paint from affecting the texture or finish of your new paint coats.
Efficiency: A clean roller cover absorbs and distributes paint more effectively, resulting in a smoother and more even paint application. This can help you achieve a professional finish.
Professionalism: Using clean roller covers demonstrates attention to detail and professionalism in your interior painting work.
When washing roller covers, be sure to use the appropriate cleaning solution for the type of paint you’ve been using. Thoroughly rinse and dry the roller covers before storing them for future use. Proper maintenance of your painting tools, including roller covers, contributes to the overall success of your interior painting projects.
Proper Lightning
Ensuring proper lighting in your work area is essential for a successful interior painting project. Good lighting offers several advantages:
Accuracy: Adequate lighting helps you see and identify imperfections, flaws, and areas that require touch-ups more easily. This results in a more precise and professional paint job.
Color Accuracy: Proper lighting allows you to assess paint colors accurately, ensuring that they match your expectations and the overall design scheme.
Safety: Well-lit workspaces reduce the risk of accidents and mishaps, making it easier to navigate the room, avoid tripping hazards, and work safely.
Efficiency: Good lighting enhances your efficiency by minimizing the time spent inspecting, correcting, and touching up areas. It also reduces the likelihood of missing spots.
Clean Dirty Walls With Degreaser
Cleaning dirty walls with a degreaser is a crucial preparatory step in interior painting, especially in areas like kitchens where walls may have accumulated grease, oil, or other contaminants.
The importance of cleaning walls with a degreaser lies in its ability to effectively remove stubborn dirt and grime that regular cleaning solutions may not address. Grease and oils can create a barrier that prevents paint from adhering properly, leading to paint peeling or uneven coverage.
When using a degreaser, follow the manufacturer’s instructions, apply it to the dirty areas, and scrub gently to remove the grease or other residues. Afterward, rinse the walls thoroughly and allow them to dry completely before painting. This practice ensures that your paint adheres properly, resulting in a durable and professional-looking interior paint job.
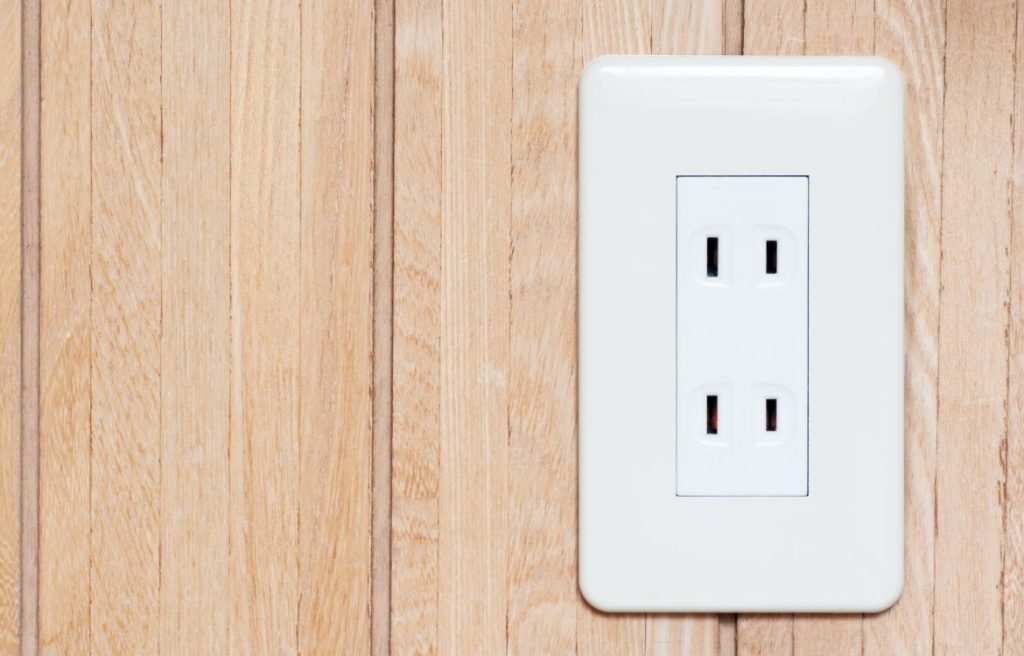
Take Off Electrical Plates
Removing electrical plates, such as outlet covers and switch plates, is a recommended step in interior painting, particularly when you’re painting walls. This practice offers several advantages:
Clean Edges: Removing electrical plates allows you to paint right up to the edges of outlets and switches, creating a cleaner and more polished look without paint seeping onto the plates.
Even Coverage: When you paint around electrical plates, it can be challenging to achieve even coverage, leading to visible paint lines or irregularities. Removing the plates ensures consistent paint application.
Time-Saving: While it may seem like an extra step, taking off electrical plates actually saves time in the long run. It reduces the need for meticulous taping and touch-ups around the plates.
Safety: Working around electrical plates can be tricky, and accidentally getting paint on them can create electrical hazards. Removing the plates ensures a safer painting process.
When removing electrical plates, remember to turn off the power to the outlets or switches for added safety. Label each plate to make reinstallation easier, and store the screws in a safe place. This practice contributes to a more professional and efficient interior paint job.
Start With a Loaded Brush
Starting with a loaded brush is a valuable technique in interior painting to ensure consistent and efficient paint application. This approach is particularly important when you begin painting a new section or wall.
The importance of starting with a loaded brush lies in several factors:
Even Coverage: A loaded brush ensures that you begin painting with sufficient paint on the surface, promoting even coverage and minimizing the need for additional strokes.
Time-Saving: Starting with a loaded brush reduces the need to dip it into the paint tray frequently, saving you time and allowing you to maintain a smooth and continuous painting rhythm.
Consistency: Using a loaded brush from the beginning helps maintain a consistent paint thickness, preventing uneven spots or streaks that can occur when paint is applied inconsistently.
Professional Finish: This technique results in a more professional and polished paint job, as it reduces the likelihood of visible brush marks or variations in texture.
When starting a new section, dip the brush into the paint, then tap it gently on the inside of the paint container or tray to remove excess paint. This ensures that the brush is loaded with the right amount of paint for a smooth and controlled application.
Push Paint to Avoid Runs
Pushing the paint, rather than overloading the brush or roller, is a valuable technique in interior painting to prevent runs and achieve a smooth finish. This practice is particularly important when working on vertical surfaces such as walls.
Control: Pushing the paint allows for better control over the amount of paint applied to the surface, reducing the risk of excess paint running down the wall.
Even Coverage: Pushing the paint evenly distributes it across the surface, resulting in a consistent and uniform coat.
Reduced Drips: By avoiding excess paint, you minimize the chance of paint drips, which can mar the finish and require additional touch-ups.
Efficiency: This technique helps you work more efficiently, as you won’t need to continually clean up drips or excess paint.
Bag Rollers and Brushes
Bagging rollers and brushes is a useful practice in interior painting, particularly when you need to take short breaks or pause your painting project for an extended period.
The importance of bagging rollers and brushes lies in several benefits:
Preservation: Bagging your paint tools helps prevent them from drying out when you need to take breaks between coats or overnight. It preserves the wet paint on the brushes and rollers, making them ready for use when you resume painting.
Reduced Cleanup: Bagging eliminates the need to clean your brushes and rollers thoroughly between coats or when taking breaks. This not only saves time but also reduces paint waste and cleanup efforts.
Efficiency: Bagging allows you to continue painting without interruption, ensuring a more efficient painting process. You can focus on your work rather than preparing and cleaning tools repeatedly.
When bagging rollers and brushes, use plastic bags or plastic wrap to seal them tightly, ensuring that no air can get in. This practice helps maintain the paint’s consistency and keeps your tools in good condition, contributing to a smoother and more convenient interior paint job.
Conclusion
We hope you’ve found our interior painting tips and tricks as enlightening and inspiring as we intended. Armed with these expert insights, you’re now equipped to tackle your next painting project with confidence and achieve a professional finish.
At Horizon Painting, we’re passionate about helping homeowners like you transform their living spaces into works of art. If you’re ever in need of expert guidance, top-quality paints, or professional painting services, don’t hesitate to reach out to us.